December 27, 2006

Chocolate Chip Muffins Gluten-Free

My kids are very considerate. They always offer me tastes of their gluten bakery items, even if they know I will need to turn them down. Unfortunately, most pastry shops don't service gluten-free customers.

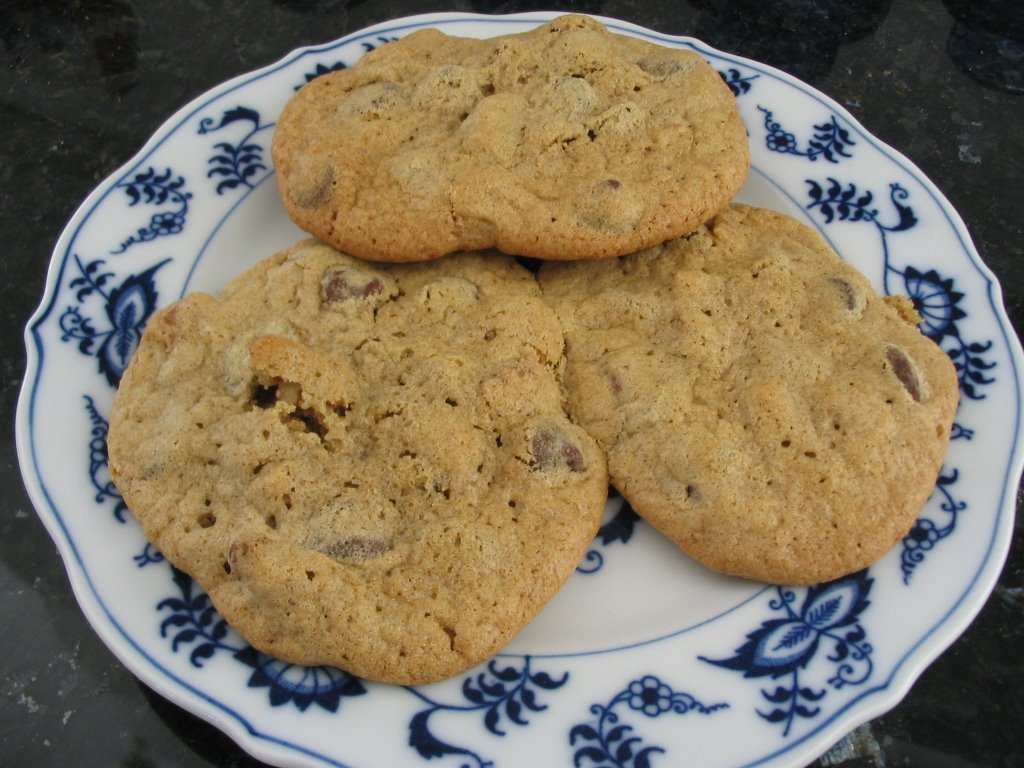
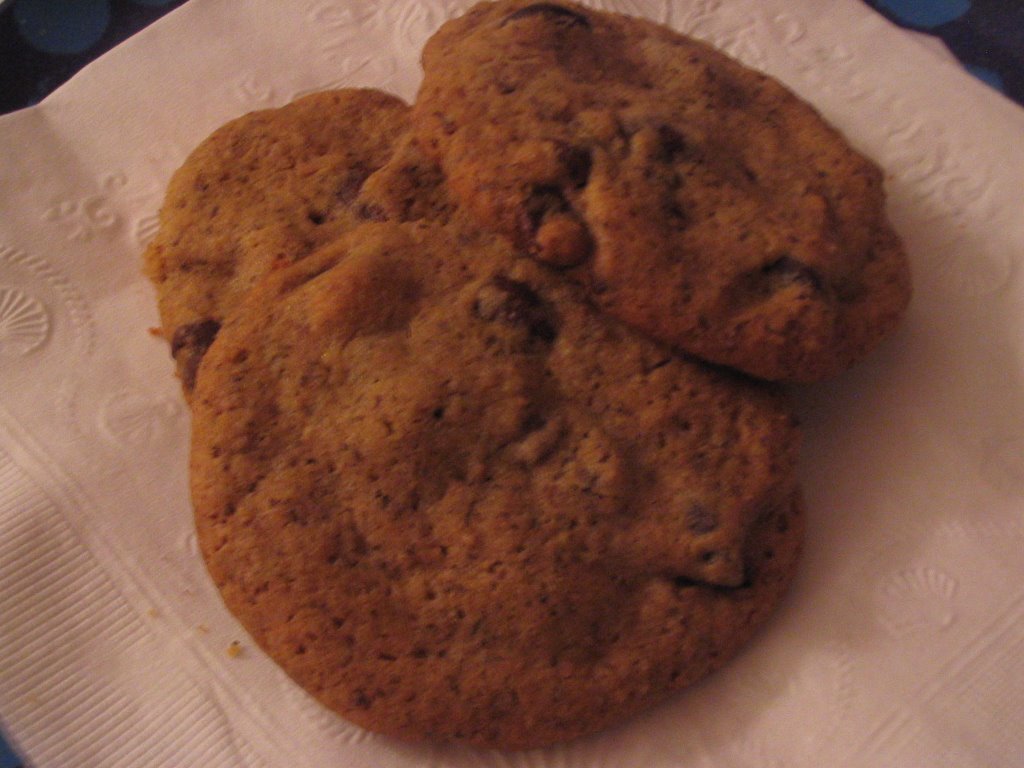
The last time we were at a local pastry shop, my children wanted to try some of their chocolate chip muffins. My daughter was worried that I wasn't going to get anything, but this particular pastry shop is a veritable bonanza of wheat - it's even in their meringues. So she made me promise her that I would make chocolate chip muffins that I could eat too.

On our previous visit to this pastry shop, I asked the clerk if they had anything that did not have wheat in it. She said, "No." They had meringues in the case, so I asked her if the meringues were wheat free. She said, "Yes." Hmmmm..... So, I bought one just to check it out. The clerk was right the first time. They put wheat in their meringues. Ignoring gluten and focusing on taste alone, a meringue cookie with wheat and nuts and then sprinkled with wheat (no, it wasn't powdered sugar) is pretty disgusting. It makes you want to act like your kids and wipe your tongue with a napkin. Yuck.

So, on to tastier things. After looking through my cook books, I selected the Fanny Farmer Cookbook as my source of inspiration. Their basic muffin recipe is an excellent base that allows the extra ingredients to shine. Hoping that this same quality could be transfered to my gluten free version, I set to work. This is what I did:

Recipe

2/3 cup brown rice flour
2/3 cup oat flour
1/3 cup sweet rice flour
1/3 cup almond meal
3 Tb arrowroot flour (You can use almond meal instead)
1 Tb baking powder
1/2 tsp salt
1 egg, beaten
1 cup milk
1/4 cup melted butter
1 1/2 tsp kudzu powder, dissolved in the milk
1/2 cup sugar
1/2 cup chocolate chips, regular sized
(Optional: 1/2 cup mini chocolate chips, add to dry ingredients before adding liquids)

Preheat oven to 350 degrees. Line the insides of a cup cake pan with paper liners. In a sauce pan, melt the butter. Remove it from the heat and add in the milk, beaten egg and kudzu powder. Make sure to blend the kudzu powder. In another bowl, mix all the dry ingredients together. Pour the liquid mix into the dry ingredients and blend. Do not over mix. Keep it a bit lumpy. Resist the urge to blend well.

Fill the cup cake papers 2/3 full. Sprinkle chocolate chips over the tops of the muffin batter. Press lightly to make sure the chips stay attached to the muffin tops. Bake for 25 minutes or until golden brown. Makes 1 dozen muffins.

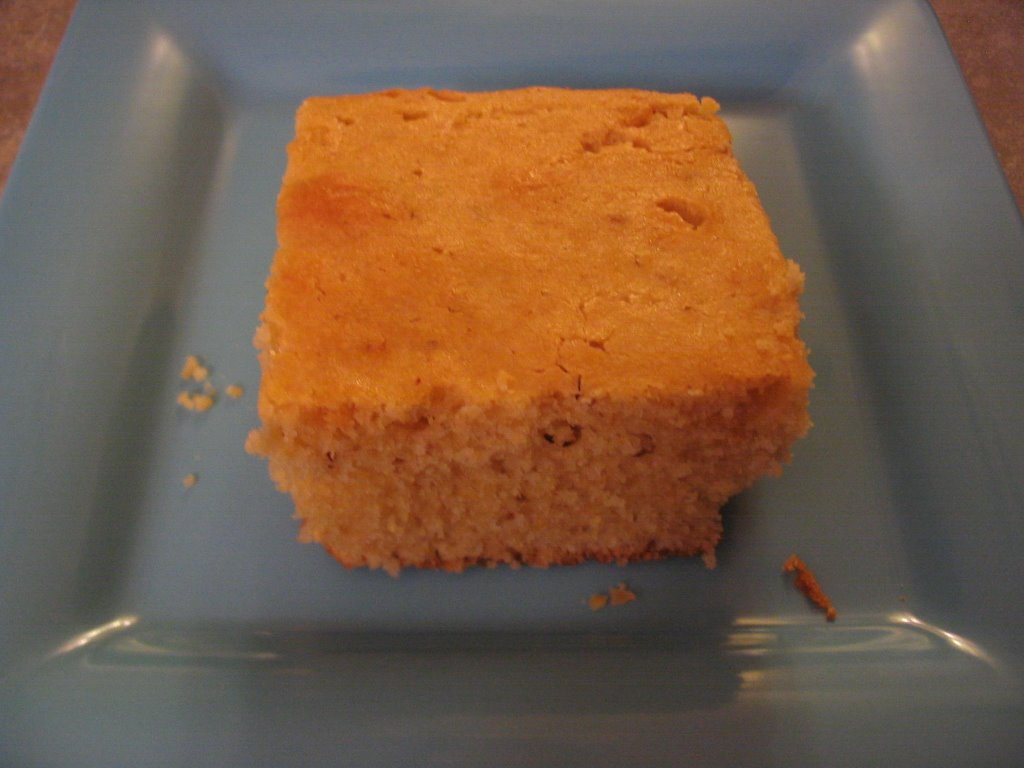
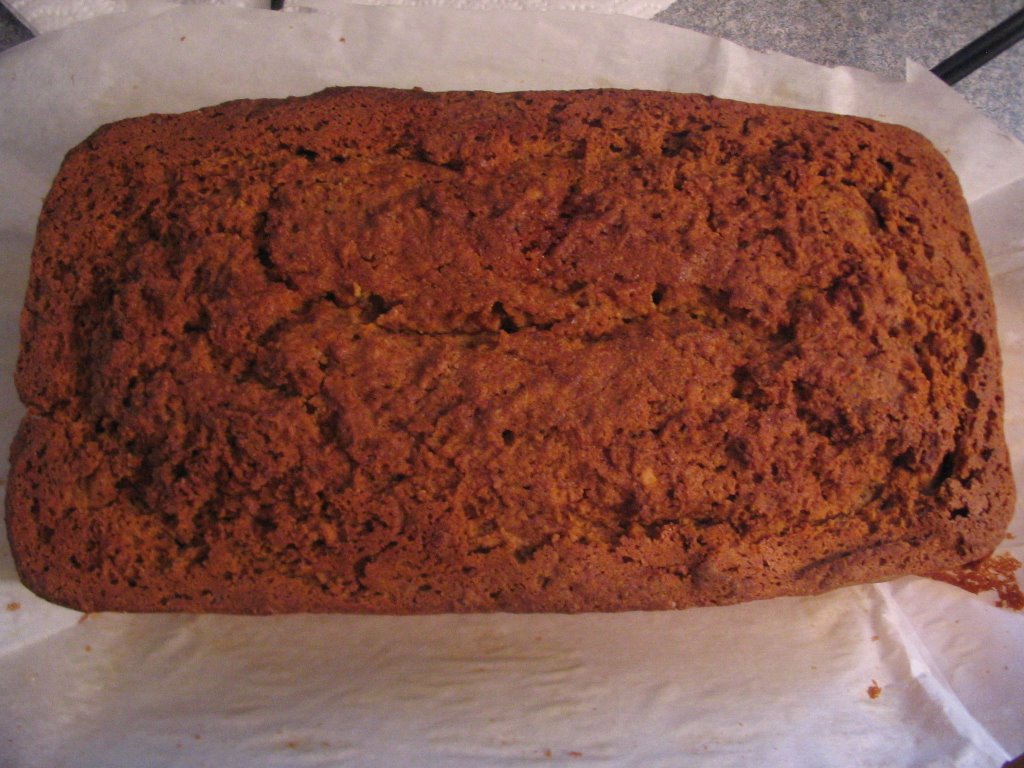
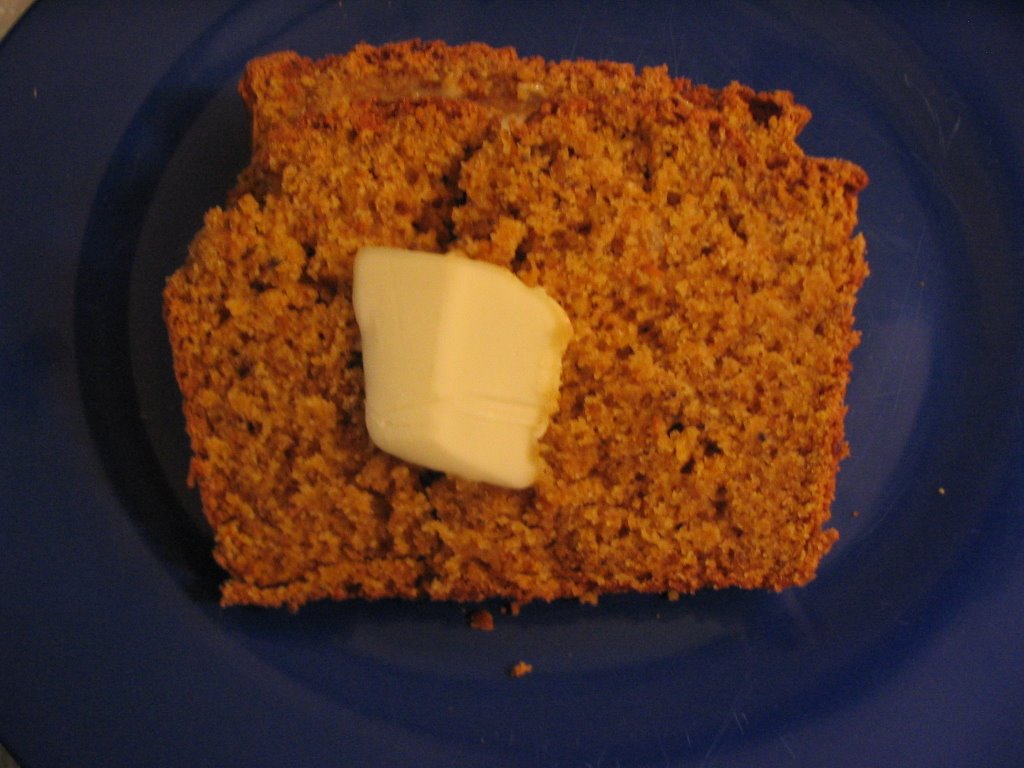
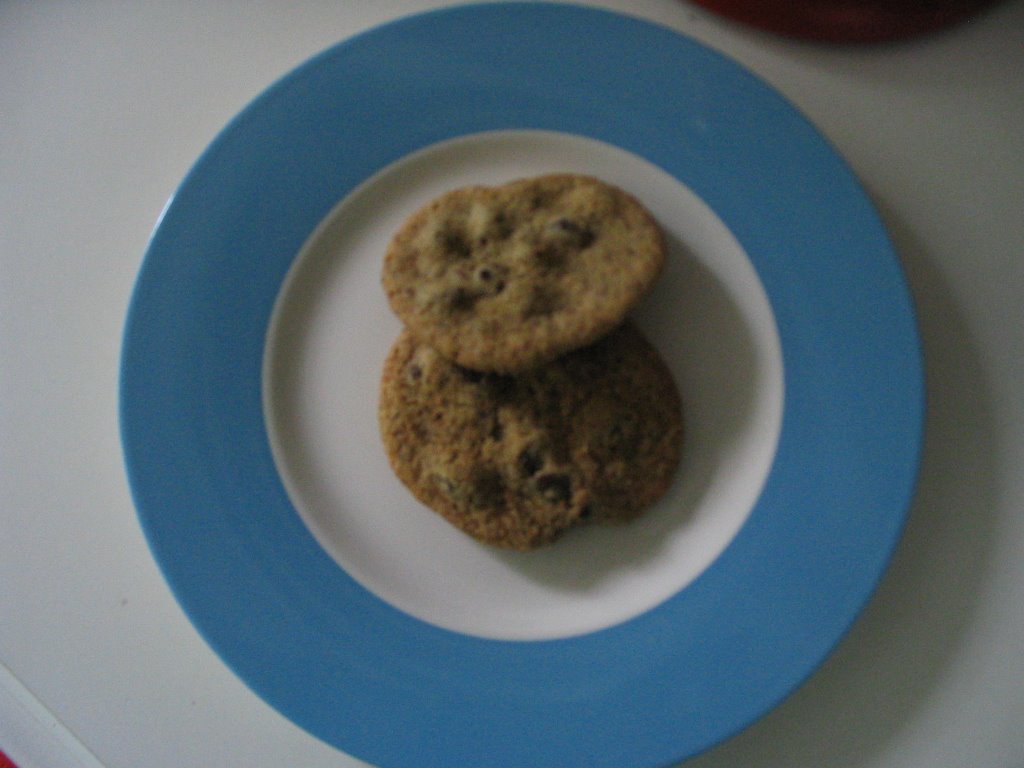
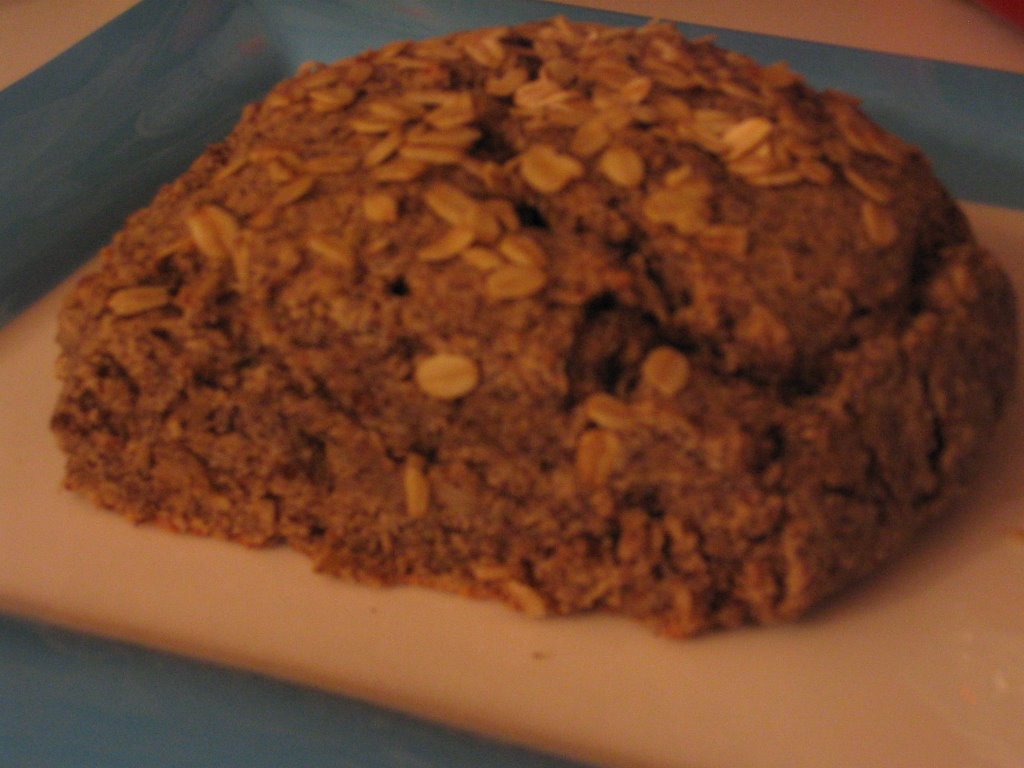
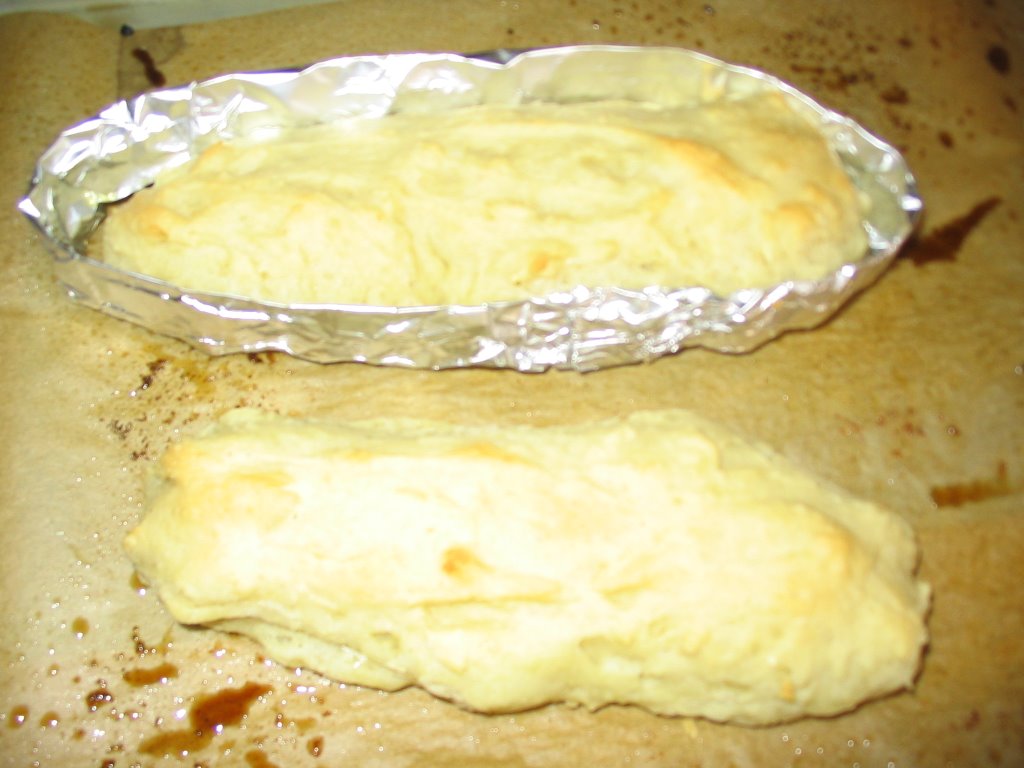
How did they turn out? Beautifully. They are a lovely golden brown with just a slightly sweet taste, which allows the topping (chocolate chips or crumb) or filling (such as nuts or fruit) to shine. My daughter didn't really care for the muffins. She wanted them to be sweeter and have chocolate chips inside the muffin, not just on top. My husband and son thought just the opposite. They liked the chips on top and weren't too sweet. I agree with them. They are delicious...just like a muffin is supposed to be.

December 21, 2006

Mesquite Pumpkin Bread - Gluten Free

With Christmas only a few days away, I wanted to have some nice gluten-free sweet batter breads around the house for breakfast. Pumpkin Bread is a family favorite and I had a can of organic pumpkin, so the decision was made. Next step was trying to figure out which flours to use in the recipe. While I was contemplating what flours I had in the pantry, I remembered my bag of mesquite flour and realized that the light caramel-like of mesquite would go beautifully with pumpkin.

The basic wheat version of this recipe for Mesquite Pumpkin Bread comes from a church cook book that belonged to my mother. Her dear friend shared this recipe with their church community and now I'll share it with you.

Mesquite Pumpkin Bread

1/3 cup vegetable shortening
1 1/3 cup sugar
2 eggs
1 cup pumpkin (fresh or canned)
2/3 cup brown rice flour
1/3 cup mesquite flour
1/3 cup oat flour
1/3 cup sweet rice flour
1/4 tsp baking powder
1 tsp baking soda
1/4 tsp ground cloves
1/2 tsp cinnamon
1/2 tsp salt
1/3 cup water with 1 1/2 tsp kuzu powder dissolved in it
Optional: 1/2 cup nuts

Preheat the oven to 325 degrees. Line a bread pan with parchment paper. Cream the shortening with the sugar. Then add the eggs and pumpkin. Slowly add the dry ingredients. Bake for 1 hour. Remove and cover with aluminum foil. Return to the oven and bake until a stick comes out clean. Approximately 90 to 120 minutes total baking time for one loaf. Allow to cool before cutting.

Alternative: Divide dough into two parchment paper lined bread pans. Bake at 325 degrees until a test stick or toothpick comes out clean. Approximately 1 hour. (Note: I would make this recipe as two loaves rather than one. It takes a long time for the one loaf version to bake all the way through.)

The bread turned out a warm shade of dark caramel and smelled divine. Just the aroma brought back so many memories of pumpkin pie and holidays. I had just set the bread to cool on the counter, when in comes my son looking for snackage. "Ohhhhhhh," he says when he spies the bread, "I want that for my snack." Out comes the bread knife (actually a cake fork might work better) and away I went fixing up servings for my salivating critics.

The family critics voted this recipe as yummy, to be repeated, and there won't be enough to have for Christmas morning. Not to worry, I told my daughter I'll make some more. By the way, mesquite flour and pumpkin are very good together. Now, where's the cream cheese.....

Black Bean Soup - Gluten Free & Vegetarian

I've been looking for some nice hearty gluten-free soup recipes for the winter. Soups that can slowly cook in the crock pot, while we're out building things in the snow or going to activities. My kids will eat a wider variety of vegetables in soup, so I was thinking this would be a great place to start. Plus, I've wanted to find tasty vegetarian or low meat soup options.

I've found a couple of soup recipes that are pretty good, but for some reason they haven been what we wanted to add our to family cookbook. Either my family hasn't enjoyed some of them or some recipes are too high on the Glycemic Index and need to be modified before I cook them again.

One of my crock pot soup successes was a gluten free Black Bean Soup, although this version does have green salsa, a nightshade plant, in it. It's very easy and makes enough for left overs.

Black Bean Soup Recipe

2 cans Black Beans
1 1/2 boxes of Vegetable Broth
1 chopped onion
2 cloves minced garlic
2 Tb grapeseed or olive oil
1 can diced tomatoes
1/2 cup green salsa
1/2 tsp black pepper
salt to taste
Optional: sour cream as a garnish

I put all the ingredients in the crock pot and set it to 250 degrees. At this temperature, you can start it to cook in the morning and serve in the evening.

So as to my goal with broadening my children's vegetable horizon...didn't happen. They said it had too many onions. (Insert - parental sigh) My husband and I thought it tasted great. We added blue corn tortilla chips and Monterey Jack cheese and it tasted wonderful. I had some Gouda cheese that we tried on our left overs and that was a nice option too.

December 19, 2006

Why Am I Sheltie Girl?

The day I started my blog, our four year old blue merle shetland sheepdog was hard at work protecting us from the dreaded Storage Stealer's (see story below). I was laughing with my husband about how our sheltie treats us as though we are a flock of sheep to be protected from wolves. We agreed, it is the nature of the sheltie...constant vigilance.

Take a moment and step into our lives in the Land of Sheltie:

I live in the land of Sheltie. It's a wonderful land...full of trees, squirrels, rabbits and the occasional skunk. Our population is small and consists of two older sheep, two lambs and a sheltie.

Life in Sheltie is never dull, whether it's running off with the lambs kick ball, chasing squirrels who snitch our nut crop or warding off an attempted invasion by the evil giant brown. At the center of our country, we have a cozy capitol building that is full of soft beds and yummy food. Life is good in Sheltie. So good, that we are in peril from numerous outside forces.

Our sheltie is the lone member of the Department of Homeland Security. The threats are real and they are stalking our country daily. Our small country has woodland on three sides and the Sea of Road on the other. Our main attacks come via the sea route, which requires constant vigilance.

Our main threats come from the forces of the evil Giant Brown, the Grass Grazers and the Storage Stealer's. Almost daily, we are stalked by the evil Brown's minions. They are a fearless bunch that sweep the coast in large clanking ships. If our country is the target of their attack, they will dock at our port, swarm from the deck and leave bombs at the entrance to our capitol building. Then just as quickly, they will rush back to their ship and wait for the bomb to explode as they sail away.

The Storage Stealer's are bold force that sneaks in to our country every few days. They prefer to attack when the sun is barely faint rays on the horizon. Sneaking up to our outdoor storage silos, they will grab some of our uneaten food stores and hurry off to their mini-ship. Then hugging the coast, they will travel to other countries to steal their stores rather than grow their own food.

The Grass Grazers never attack our country, however they constantly prowl our borders. They look for a way to enter and swarm across our grazing lands. They look to steal grass and nut crops from us, but have been thwarted by the vigilance of our Department of Homeland Security (DHS).

The greatest challenge of the DHS is predicting the arrival of the Leaf horde. Loud and fierce, these fiends hug the coast of the Sea of Road sucking up every country's leaf crop. To date, they have proven to be an unstoppable force and we lose our leaf crop every year.

Even with all these outside threats, the Land of Sheltie is a good place to live. The sheep are well cared for and the sheltie is sweet, loving and brave.

December 14, 2006

Rolled & Cut-Out Sugar Cookies - Gluten-Free

One of my biggest challenges in cooking gluten free was making sugar cookies. Many recipes were too bland for my taste or the dough ran during baking and the shapes wouldn't hold. A tasty gluten-free sugar cookie recipe was becoming very important at our house as Christmas was drawing nearer. Many little batches of gluten-free sugar cookies were made, testing the various classic ways of making sugar cookies. This recipe is the winner of our little bake-off.

Traditionally at our house, Santa is left a plate of Christmas sugar cookies and a mug of hot chocolate. My kids really get into the spirit of Christmas. Not wanting the reindeer to feel left out, they require that a reindeer cookie is left for Santa's team. They very thoughtfully rearrange the living room so that Santa's snack is left on a small table by the tree. This arrangement is the best way for Santa, because he can snack while he puts out presents. Creative aren't they...

I've been stalling on making this batch of cut-out sugar cookies, as I wanted to go slowly so I could document and make pictures along the way. I've tried other methods to shorten the process, but without the same level of success. Although it takes a while, this method makes the best cut out cookie.

To begin, I got myself into a comfy cooking mood and set up some mental entertainment. My family joined me and we watched Redwall - Season 1, while we cut-out and baked cookies.

Gluten Free Sugar Cookie Recipe

1/2 lb butter
1 1/2 cups cane sugar
2 eggs
1 tsp vanilla
2 Tb cream with a rounded 1 tsp kuzu powder dissolved in it
2/3 cup brown rice flour + 2 Tb
2/3 cup oat flour + 2 Tb
2/3 cup sweet rice flour + 2 Tb
1/2 cup almond meal + 2 Tb
1/4 tsp sea salt
1/2 tsp baking powder

Note: Freezing or chilling the rolled dough packets comes before baking. Wait to preheat the oven until you are cutting out the cookies and placing them onto the cookie sheets.

Cream the butter, and then gradually adding the sugar. Add the egg, vanilla and cream with kuzu powder in it. Beat thoroughly. In another bowl, mix the all the dry ingredients together. Add this slowly to the butter mixture and blend well. If your dough is too soft add a little extra oat flour to stiffen the dough.

Divide into larger balls that you place in between two sheets of parchment paper. Roll the balls until the dough is between 1/8" and 1/4" thick. Then freeze the sheets making sure that they are lying flat in your freezer.

When the dough is firm remove from the freezer (one pack at a time) and peel the top layer of parchment paper off the dough. Put the top layer of parchment paper on your work surface and flip over the dough onto it. Then peel off the bottom layer. Proceed to cut out cookies. Work quickly before the dough thaws. The dough will probably stick inside the cutters. Use your fingers to ease the cookie shape out of the cutter. (Note: detailed cookie cutters may not work as the dough is still soft and may stick in the corners.)

Once you have cut out the cookies and placed them on the parchment paper lined cookie pan, roll the left over dough into a ball and place it between the previously used layers of parchment paper. Roll to a uniform thickness and then freeze again.

Make sure that the cut out cookies that are on the cookie sheet are still chilled and the dough isn't warm. When the warm cookie dough is baked it spreads more during baking than will the frozen dough and you will lose the cut out shape.

Bake at 325 degrees for 12 - 14 minutes or until golden brown.

The cookies are now ready for frosting and decorating.

As soon as the first batch of cookies cooled, my family swarmed the stove and at least left the parchment paper uneaten. I kept baking and here are some for you to see.

How did they taste? Great! The four family voters all thought the same thing. Our sheltie girl didn't get to vote except on the dough, which she thought was quite tasty. She kept hitting my leg with her head to remind me that she was patiently waiting for more.

Anyway, the cookies turned out with a nice crisp texture and the edges were just slightly blurred. I had trouble with the more detailed cookie cutters (i.e. snowflake, reindeer, angel), but the less detailed ones (i.e. gingerbread man, star, candy cane) worked just fine.

Hmmm...I'll have to work on getting the reindeer cookie for Santa.

December 13, 2006

Time For Gluten-Free Holiday Cookies

I've been looking for some gluten-free sprinkles so I can start my marathon baking of cut out sugar cookies. I just wanted to say...I've been successful! The sprinkles are called "lets go...Sprinkelz". They come in two types that I've found so far. The pastel Sprinkelz are called Carnival and the chocolate Sprinkelz are called Chocolatey.

I purchased my boxes at Whole Foods, but Gluten Free Pantry sells them as well. You can find them under the baking supplies at the Gluten Free Pantry's website.

More Gluten Free Oats

Another location that you can purchase gluten-free oats is the Gluten Free Pantry. You can find them under the Cereals section of their website. They sell rolled oats in two sizes from Cream Hill Estates. Or you can buy their oat flour which is located under the baking supplies. You can find the Gluten Free Pantry at: www.glutenfreepantry.com.

You can also order direct from Cream Hill Estates. Their website is: www.creamhillestates.com.

December 5, 2006

Corn Bread Stuffing - Gluten-Free

After making gluten-free corn bread (see previous post), I began preparing to make my stuffing for Thanksgiving. This recipe is from my Mother, but I've modified the spices which makes for a zipped up version.

First I took 2/3 of the pan of corn bread and crumbled it up onto a cookie sheet with sides. I did grease the pan so that the corn bread wouldn't stick. I toasted it in the oven for about 20 minutes on 325 degrees. Make sure to keep an eye on it so that it doesn't brown too much or burn.

In a large bowl I combined:

corn bread, crumbled and toasted
5 stalks of celery, chopped
3 hard boiled eggs, chopped
3 shallots, chopped (or 1 small onion)
1/2 cup chopped pecans
1 tsp ground sage, or to taste
1/2 tsp ground thyme, or to taste
1/2 cup chopped fresh parsley
1/2 tsp sea salt, or to taste
1/2 tsp ground black pepper, or to taste
1 stick of butter, melted
2 cups chicken or vegetable broth

In a sauce pan melt the butter in the 2 cups of broth. Pour over the stuffing mixture and blend together. Then pour it into a 6 x 10 greased pan. Cover and bake for 45 minutes at 350 degrees. Then uncover to allow to brown for 10 to 15 minutes.

Stuffing is one of my family's favorite holiday food items and always gets rave reviews. My kids love this recipe. It's savory yet mild enough for most kid's.

December 1, 2006

Corn Bread Gluten-Free


For my family, Thanksgiving feasting isn't the same if there isn't cornbread stuffing on the table. So I pull out my old Quaker Oats Corn Bread recipe and started modifying it to be gluten free.
My first gluten free attempt at baking was corn bread. It was so dense and heavy, it could have been used as an anchor. Given that it was somewhat tasty, my family encouraged me to go ahead and make it into stuffing rather than make it a donation to the local dump.
This is a double recipe made for a 9 x 12 pan. That way we could have enough for munching and stuffing. So, this is what I did:


Gluten Free Corn Bread

2 cups Corn Meal
2/3 cup + 4 Tb Brown Rice Flour
(4 Tbs added because mix didn't seem thick enough)
1/4 cup Arrowroot Flour
1/3 cup Oat Flour
1/3 cup Sweet Rice Flour
1/3 cup Almond Meal
4 tsp Baking Powder
1 tsp Salt
2 cups Milk
1/2 cup Vegetable Shortening
2 eggs
1 tsp Kudzu Powder dissolved in 1 Tb Water
2/3 cup Sugar
Preheat oven to 350 degrees and line a 9 x 12 baking pan with parchment paper. Mix ingredients together. Bake for approximately 40 minutes.
My family said that this was the best version of corn bread that I have made yet. The kids were thumbs up and said make it this way again. My husband and I enjoyed it, but were slightly more critical. As Southerners we both prefer a corn bread that is slightly sweet, so my recipe has more sugar. However, we both agreed that it had a bit too much sugar, so I cut back on the sugar in the recipe above. The almond meal and sweet rice flour add their own natural sweetness to the mix and the recipe didn't need as much sugar as it did in the original wheat recipe. This is a nice corn bread recipe.
The Arrowroot Flour in the recipe came from Bob's Red Mill. (www.bobsredmill.com)

November 20, 2006

Mesquite Chocolate Chip Cookies - Gluten Free

One of our native flours is Mesquite, which has the added benefit of being gluten-free. I have been reading various articles and recipes about Mesquite flour and wanted to give it a try. After looking at the various companies that carried the flour, I decided to give order mine from Native Seeds out of Tucson, Arizona.

According to Native Seeds, the flour is a good source of calcium, manganese, potassium, iron and zinc. Additionally, it has the ability to stabilize blood sugar. It's taste is fruity or a caramel-like flavor. I found the flour to have a very pleasant taste which is mild. My kids liked it too.

I took my basic Chocolate Chip Recipe and modified it so that the flavors blended with the Mesquite flour.

Gluten-Free Mesquite Chocolate Chip Cookies

3/4 cup Brown Rice Flour

3/4 cup Oat Flour

1/2 cup Sweet Rice Flour

1/4 cup Mesquite Flour

1 tsp Baking Soda

1 tsp Sea Salt

1 cup Organic Butter

3/4 cup Organic Cane Sugar

3/4 cup packed Organic Brown Sugar

1 tsp Vanilla Flavoring

2 large Organic Eggs

2 cups Chocolate Chips

Optional: 1 cup chopped Pecans

Preheat the oven to 350 degrees. Line a cookie sheet with parchment paper. Then combine the flours, baking soda and salt into a small bowl. In a mixing bowl, cream the butter. Then add the sugars and vanilla flavoring. Add the eggs, beating well after each one. Slowly add in flour mixture. Stir in the chocolate chips and nuts. Drop by rounded teaspoons onto the parchment paper. Bake for approximately 12 minutes or until golden brown. Cool before removing from the parchment paper. (Check the consistency of your batter once you've add all the flours. I added an additional 2 - 3 Tbs of sweet rice flour to make the batter firmer.)

The cookies turned out beautifully. The kids liked them and thought they were a great addition to our range of chocolate chip cookies. I agreed with them. My husband, who hadn't eaten anything gluten-free for awhile, thought that the cookie texture was a bit grainy. I agreed, however, the texture wasn't bothersome like it can be with other flour mixtures. We all agreed - these are worth making again.

Where I bought my mesquite flour:

Native Seeds/SEARCH

526 N. 4th Ave

Tucson, AZ 85705

1 lb Mesquite Flour @ $13.00

www.nativeseeds.org

October 7, 2006

Pamela's Gluten Free Pancake Mix - Revisited


I've wanted to try using Pamela's Gluten-Free Pancake Mix again to see if I could make another good batch of pancakes. The previous batch was pretty nasty.

The pancake batter turned out too gooey and stuck to the skillet horribly. I wondered what could have gone wrong, since the previous batch has been so good. It could have been a couple of things, there could have been product settling in the bag or during the packaging process the ingredients are added to the bag in layers and not as a blend.

Just in case either of my ideas was the source of my pancake problem, I emptied out the bag of mix into another container and mixed well. Then I made the basic pancake mix and did a taste test. Yep, pretty typical gluten-free flavor...bland. I have to mess with food that tastes this dull...I can't help it. So, I went to town making banana nut pancakes. Here's what I did:

Gluten Free Banana Nut Pancakes

1 cup Pamela's Pancake Mix
1 large egg
3/4 cup + 2 Tb of water
1 Tb Grapeseed Oil
1/4 cup almond meal
2 small bananas, mashed
1/4 cup chopped pecans

Mix the ingredients together. Mix shouldn't be too thick or too thin. Heat skillet with some grapeseed oil on medium low heat. Pour 1/4 cup batter or smaller amount into pan and cook until golden brown and flipped once.

This time they turned out beautifully. My small array of food critics loved them...even the guy who doesn't like syrup or butter on his pancakes. They were very tasty. The mix didn't stick to the pan and cooked up just like they were supposed to...YEAH!

October 2, 2006

Peanut Butter Sauce Pan Cookies - Gluten Free

One of my family's favorite recipes is gluten-free, Peanut Butter Sauce Pan Cookies. My baking record is three batches in a row of these cookies when we've had family over.

I've done a little tweaking to the recipe which my mother received from her friend Deannie about 45 years ago, so the flavor is a richer chocolate rather than like cocoa.

Recipe

1 stick butter
2 cups cane sugar
1 1/2 squares semi-sweet chocolate
1/2 cup milk or half 'n half
2 tsp vanilla
1/2 cup + 2 Tb crunchy peanut butter
3 1/2 cups quick rolled oats

Get all of your ingredients together and measured out before starting. Once the chocolate mixture is boiled it will set up before you have time to measure everything out.

Place butter, sugar, chocolate and milk in a large sauce pan. Stirring constantly, bring to a boil. Boil for 1 minute. Remove from heat and add in vanilla, peanut butter and oats. Blend well. Drop by spoonfuls onto parchment paper. Allow 15 minutes for cookies to harden enough to eat.

All of my family loves these cookies. They are a family favorite that disappear quickly.

Source for Gluten Free Oats

The latest Living Without Magazine mentioned a Montana based company called Gifts of Nature which is now carrying certified gluten free oats. They also carry Montina flour and lima bean flour. You can find out more from their website, http://www.giftsofnature.net

September 30, 2006

Banana Bread Gluten-Free

Cooler fall weather seems to create cravings for warm quick breads like pumpkin, sweet potato and banana. I had five pretty ripe bananas, so it seemed my kitchen mission was clear. It would be gluten-free banana bread.

I selected my family's favorite wheat based banana bread recipe, which is from a church we belonged to in the early 1960's, as the to modify to be gluten free.


Recipe

1 stick of salted butter
1 cup sugar
1 egg
3 mashed ripe bananas
1 cup brown rice flour
3/4 cup oat flour
1/4 cup + 1 Tb sweet rice flour
1 1/2 tsp kuzu starch
1 Tb water
1 tsp baking soda
1/2 sea salt

Dissolve the kuzu starch in the water. Cream butter and sugar then add the egg. Alternately add flour mixture and mashed bananas and kuzu liquid. Bake in a parchment paper lined loaf pan for approximately 1 hr 15 minutes at 350 degrees. Note: I covered the bread at 50 minutes so it wouldn't get too brown on the top.

How did this recipe go over with my tough food critics? My husband and the kids loved it and liked that the half slice held up in their hands. They said I could make this recipe again. I liked the way this bread turned out. It's moist and has an excellent banana flavor.

September 22, 2006

Millet Pizza - Gluten Free

I found a gluten-free pizza crust recipe at Epicurious.com. It had been published in the November 2005 edition of Gourmet magazine. I hadn't made a gluten free pizza in a while, so I decided to give this recipe a try.

I made a slight adjustment to the brown rice flour mix in the recipe and removed the potato flour, since my daughter has a slight reaction to nightshade plants, so I used millet flour instead. This is what I did:

Pizza Crust

1 tsp olive oil and more for brushing
1 Tb cornmeal
1 cup brown rice flour mix
1/2 cup millet flour
1 Tb agar dissolved in the water
1/2 tsp salt
2 tsp sugar
1 package yeast
1/2 to 3/4 cup of warm water plus 1 Tb

Brown Rice Flour Mix

1 2/3 cup brown rice flour
1 cup oat flour
1/3 cup cornstarch

I used my pizza stone as my pan and didn't preheat the stone. Preheat oven to 425 degrees.

Mix the dough together and allow to stand 40 minutes to rise. Then transfer the batter onto the pizza stone that has been covered in cornmeal. Press out the dough into a pizza shape sprinkling cornmeal as you need to keep the dough from sticking to your hands.

Then cover with your choice of pizza toppings and bake for 15 minutes or until nicely browned.

So what did it taste like? A bit like a whole wheat pizza. I had doubled the crust recipe and the crusts on my pizzas were thicker. The crust came out nice and crispy on the bottom so that the slice would hold up for you to eat with your hands.

My kids said the crust turned out too thick and that the crust tasted sort of okay. But they really didn't care for it too much. My husband really liked the taste of the crust, but wanted it to be thinner too. I thought the pizza needed to be thinner, but it did taste good. It was best warm right out of the oven, rather than cold.

We all liked the crispy crust on this pizza since I had cooked it on the stone rather than a pan. The stone worked very well even though it wasn't warmed in the oven.

September 20, 2006

Beer Batter Bread Gluten-Free

I had been reading Farmgirl's post on Beer Bread and was fondly remembering eating a yeast version of Beer Bread in years past. Since I had an unopened bottle of Ramapo Valley Gluten-Free Passover Beer in the fridge, I decided to modify Farmgirl's quick version of Beer Bread a try.

The recipe that Farmgirl uses is based on the Beer Bread recipe found at Epicurious.com. I modified her whole wheat version of the bread to make it gluten free. This is what I did:

Recipe

1 cup oat flour
1 cup millet flour
1 cup sorgham flour
1 Tb granulated sugar
1 tsp salt
1 Tb baking powder
14 ounces GF beer or 12 oz beer & 2 oz water
1 1/4 kuzu powder dissolved in the 2 oz of water
Optional Egg Glaze: 1 beaten egg & 2 tsp water

Preheat oven to 350 degrees. Line a 4 x 8 loaf pan with parchment paper. Combine all dry ingredients in a mixing bowl. Add the dissolved kuzu and water to the beer. Then pour both liquids into the dry ingredients. Stir only enough to blend and lumps are okay. The batter will be thick. Pour into parchment lined pan and bake for approximately 1 hour or until a toothpick inserted into the center comes out clean. Remove from oven and allow to cool. Serve warm or at room temperature.

The bread turned out beautifully, although it had too strong of a taste for my kids. They didn't care for it even with butter. The texture was beautiful although slightly crumbly when cut. It still held together enough to take bites out of the slice I covered with cheese. The bread tasted the best with savory companions, such as Emmenthaler cheese or pepperoni. However, it was quite tasty with just butter too.

This bread is better to eat within the first couple of days. After the third day the after taste becomes stronger until it is almost as strong as the aged Emmenthaler cheese.

September 17, 2006

Chocolate Chip Cookies Gluten Free - Version #3

The gluten-free chocolate chip cookie is a required staple at our house. I've made this recipe more than any other. Since it is one of my children's favorite cookies, it does require continuous baking trials to tweak the recipe to get a finer taste.

I think this version will become the staple at out house. They were perfect. Beautiful on the baking sheet and scrumptious to eat.

Here's what I did:

Recipe - Version #3

2 sticks organic butter
3/4 cup packed brown sugar
3/4 cup granulated cane sugar
1 tsp vanilla extract
2 eggs
1 tsp baking soda
1 tsp salt
1 1/4 tsp kuzu powder dissolved in 1 Tb water
1/3 cup Montina flour
1/2 + 1 Tb sweet rice flour
1 cup oat flour
1/2 cup brown rice flour
2 cups chocolate morsels
Optional: 1 cup chopped nuts

Beat the butter until creamy, then add the brown and granulated sugar. Add vanilla flavoring. Add one beaten egg at a time. Add the dissolved kuzu. Slowly add flours, soda and salt. Once blended add chocolate morsels. Place cookie dough into the refrigerator to chill down.

Preheat oven to 350 degrees. Place spoonfuls of chilled cookie dough on a parchment paper lined baking sheet and bake for approximately 12 minutes or golden brown. Allow to cool before removing the cookies from the baking sheet.

This variation was an instant hit. I made them on Wednesday and by Friday they were gone. This version got four yes votes. I think given the speed that the cookies disappeared...it's a keeper.

What makes this the best version yet? This version lacks xanthan gum. The kuzu powder adds just that bit of cohesion and improved texture that the cookies needed. Using more oat flour than brown rice flour helped to keep the cookie texture smoother and less grainy. Plus, the cookies didn't have the lingering after taste of rice flour. The taste isn't that bothersome unlike the xanthan gum. However I've been trying to achieve that pure rich lingering taste that you got when you had a wheat chocolate chip cookie....rich and chocolatey. I think this version comes the closest so far.

September 16, 2006

Nutrition Labels on Food Packages

I came across an interesting food nutritional label while we were on vacation. While I was looking at the nutrition labels on boxes of cereals, I found one cereal that appeared to have no wheat in it, although it contained corn flakes. They didn't mention the ingredients in the corn flakes, but most corn flakes contain wheat. Then I noticed at the very bottom of the box a statement that said, "Contains no added wheat." Which means the cereal did contain wheat...I was right to be concerned about the corn flakes.

With the information in the nutrition boxes changing due to the new allergy information requirements, be sure to check out the whole box not just the ingredient list.
Sweet Potato Bread - Gluten-Free

Fall is almost upon us. I'm finding I have a need for a gluten-free pumpkin bread. These cool mornings have been making me crave a slice of a warm batter bread and a hot cup of hot coffee.

I haven't tried making pumpkin or sweet potato bread since I had a major gluten free baking disaster last year. I was trying to explore beyond the gluten free recipes I'd tried when I first went gluten free and it was a well...a disaster. I tried making gluten free pumpkin bread in my bread maker. Lessons learned from that experiment were that the bread maker cooks too hot, the middle of the batter bread will never cook and the burning food smell will take a week to get out of your house. So, cook batter breads the traditional way...in the oven.

I had a monster of a baked sweet potato sitting in the fridge that looked like it had more than enough flesh to make a loaf of bread. Next, I was off to work on a recipe. Here's how it turned out:

Sweet Potato Bread

6 Tb of melted butter
1 tsp kuzu powder
1 cup of sugar
2 beaten eggs
1 cup cooked and mashed sweet potato or yams
1/4 tsp cloves
1/4 tsp cinnamon
1/2 tsp nutmeg
1/2 tsp salt
1/2 tsp baking soda
1 1/2 tsp baking powder
1 cup millet flour
1/2 cup oat flour
1/2 cup brown rice flour
4 tsp flax meal
1/3 cup milk
Optional: 1/2 cup ground nuts

Preheat oven to 350 degrees. Line a 4 x 8 loaf pan with parchment paper.

Dissolve the kuzu powder in the melted butter. Add the sugar and blend. Then add the beaten eggs and the mashed sweet potato. In another bowl sift together the cloves, salt soda, nutmeg, flours, meal, baking powder and cinnamon. Then slowly add it to the sweet potato mixture. Next slowly add the milk to the mixture.

Pour batter into the loaf pan and bake for 1 hour. Cover and bake until a tooth pick comes out clean. (My bread took 1 hour and 30 minutes to cook all the way through.)

All four of us voted this one a keeper. Unfortunately, there isn't much left to have for breakfast.

August 29, 2006

Mixed Berry Fruit Pops - Gluten Free

In the warmer months of the year my family enjoys relaxing and cooling down with homemade fruit pops. I wanted to try substituting agave syrup for cane sugar in my gluten free fruit pops. So, I worked up a variation with agave syrup and bag of organic frozen mixed berries. They were delicious.

Recipe:

1 bag Cascade Organic frozen mixed berries
1/3 cup agave syrup
2/3 cup water

Mix in a food processor until smooth. Then pour mixture through a sieve to remove the seeds. Then pour the mixture into your Popsicle molds. Freeze for at least 4 hours before serving.

August 16, 2006

Chocolate Chip Cookies Gluten-Free - Version #2

I was beseeched by my kids to make cookies today. They needed to be gluten-free Chocolate Chip Cookies, like the ones I had made before that were so good. Oh, that made my heart swell...my children were requesting gluten-free cookie rather than the spelt version.

I had made a spelt version of these cookies using brown rice flour, Montina flour and spelt for my family . Since they were low gluten and not gluten-free, I didn't get to try them. This combination of flours got high ratings from my family for taste. Since then, I have been trying to recreate the richness these cookies had using only gluten free flours. I've come close, but haven't quite hit it yet. Try, try, again....

This version looked good on the cookie sheet as they came out of the oven. They held their edges and retained a little loft. This recipe is based on the traditional Toll House Cookie recipe. The main modifications are made in the use of the various flours and adding a binding agent.


Recipe - Version #2

1/4 cup Montina flour
1/2 cup Almond Meal
1 cup Brown Rice flour
1/2 cup Sweet Rice flour
1/2 cup Oat flour
1 tsp baking soda
1 tsp salt
1 cup (2 sticks) butter, softened
1/3 cup brown sugar
1 1/4 cup granulated sugar
1 tsp vanilla extract
1 tsp kuzu (kudzu) powder, softened in 1 tsp water
1/4 tsp xanthan gum
2 large eggs
2 cups chocolate chips
1 cup chopped nuts, optional

Preheat oven to 350 degrees. Cream the butter. Add the sugars and vanilla flavoring and cream again. Add the eggs and blend well after each one is added. Add the rest of the ingredients gradually as you blend. Add chocolate chips and nuts.

Bake on a parchment paper covered cookie sheet for 11 to 13 minutes. Remove from the oven and allow to cool before removing them from the cookie sheet.

Makes about 4 dozen cookies.

Both of my kids said that these were the best yet of all the chocolate chip cookie versions I've made. My husband and I think they're great too.

August 15, 2006

Antibodies

My doctor reviewed my blood work and said, "You've got antibodies." I smartly responded with, "Well, of course I've got antibodies." She laughed and said, "Yeah, but these are attacking you." She got my attention with that statement. She continued, "You have tested positive for gluten sensitivity. You will need to remove wheat from your diet...." Hmmmmmm........

I went to one of our larger natural & organic food markets. It seemed so vast. I'd never noticed gluten free foods in there on previous trips. How was I supposed to find them? I sought help from Customer Service. The young lady behind the counter handed me a map and said the gluten free foods are marked in each aisle. "Markings? What markings?" I ask. "The ones on each package," she tells me. "So, I need to look at all the food packages?" She smiled and said, "Yes." "Don't you have a food list?" I ask. "No," she smiled. Not a stellar moment for customer service...

The pain of that visit...it took so long. I was sick of grocery stores by the time I had read my way down 3 aisles. When I found the gluten free cookies, I was thrilled. I was really looking forward to savoring one on the ride home. When I bit into the first one I just about choked...these were disgusting...bland, crumbly and a funky after taste. There has to be something better than this....sure there is....I know there is...I'll keep looking.

Why am I writing this down for all to read? I was frustrated with my search for tasty baked goods. I had made more yuck and chucks than I cared to think about. Plus I was thoroughly disgusted by the amount of money I'd spent on gluten free foods that seemed to taste like paper. Where were the reviews of gluten free foods...or of gluten free recipes... Didn't anybody get creative or try some of the really interesting flours? If they did, what was the verdict? I wanted to know...maybe someone else did too.

I decided to document my journey after experiencing some spectacular failures and some wonderful successes. Some of my failures included the discovery that you shouldn't cook gluten free pumpkin bread in the bread maker. The smell of burning pumpkin bread will take 3 days to get out of your house. Or yellow pea flour really isn't all that mellow (it was described as a mellow tasting flour in a well known gluten free cook book) ...well okay so it is before it's cooked, but after it's cooked your bread will be overcome by the taste of peas. Maybe I can even save some folks a little money so they won't have to throw this stuff out in the trash. And by the way, don't bother leaving the pea bread out for the birds...they won't eat it.

August 13, 2006

Fruit Pastries Gluten-Free

My children dearly love Pop Tarts. I think they have too many additives that their growing bodies don't need. Replacing Pop Tarts with a nutritious fruit pastry recipe is becoming quite important at my house. So, I tried my hand at making mini gluten-free fruit pastries.

First, I selected which fillings my children would like the most...strawberry and mixed berry jams. Then I needed to select a crust recipe. My inspiration for the crust of the fruit pastry came from the Almond Pastry recipe at the Paleo List.

Oats & Almond Pastry Crust

2/3 + 1/4 cup ground oats
1/3 almond meal
2/3 cup shortening
1 tsp Montina Flour, rounded
1 tsp ground Flax Seed, rounded
Pinch salt
just less than 1/4 cup water
2 tsp sugar

Use only as much water as will make a crumbly dough. Roll out between two sheets of parchment paper. Peel off one side and use biscuit cutter to cut out Pop Tart pieces.

Place on a parchment paper lined pan. Put a small scoop of jam in the center of one side of the dough. Place the other half on top and press sides to keep jam from oozing out.

Bake at 350 degrees for 10 to 12 minutes.

The mini Pop Tarts came out beautifully. The kids and I really liked them, but my husband felt that they were tasty yet crumbly. The crumbly aspect of gluten free baking really bugs him.

August 10, 2006

Vanilla Ice Cream - Gluten Free

I have fond memories of eating home made ice cream in the summer. A gluten-free and organic version of vanilla ice cream has been on my wish list.

When I was a kid, my parents would invite a number of friends over for a summer barbecue and the dessert would be brownies and ice cream. However, in order to have ice cream you had to help crank the churn. All the kids would line up to take a turn working the crank. Sometimes two of us at a time would try to put that handle around. After a few minutes, one of the dad's would come over and say, "If we want ice cream tonight guys, I need to put some spins on that handle!"

These were always great parties. When the ice cream was finally declared ready and was served, the silence was amazing. Everyone sat and savored their cool and delicious ice cream. We had our reward and it was fabulous.

At our house, I like to make up the ice cream early on Saturday morning and put it in the freezer to chill down. Then we go out to do the yard work or clean up the cars. By the time we've finished taking care of the lawn, everyone is ready for a rest and we start up the barbecue grill. After dinner, we have brownies and ice cream. Our sweet reward for a day of working in the sun.

I have wanted an ice cream churn for a while and my family remembered my interest in making ice cream. For Mother's Day, they gave me an ice cream bowl attachment for my Kitchen Aid stand mixer. This baby rocks...in 20 minutes it has a nice soft serve which is ready to eat. If you prefer it harder...put the ice cream in another container and let it freeze for about 4 hours... or less if you don't have the patience to wait that long.

My Mom's recipe for Vanilla Ice Cream was made for a 5 to 6 Qt. traditional or electric ice cream churn. I have modified her recipe in size and by using half & half plus whipping cream.

Mom's Vanilla Ice Cream Recipe

6 pasteurized eggs, whole
2 cups white sugar
1 can condensed milk
1 can PET cream by Carnation
1 Tb Vanilla
Add milk until you get to the fill point on the cannister.

Note: This ice cream recipe is not cooked prior to churning.


No Cook Vanilla Ice Cream Recipe (makes 1 Qt)

3 pasteurized eggs, whole
1 cup white sugar
1 1/2 cup half and half
1 cup heavy whipping cream
1 Tb vanilla (mine is homemade)

Place in an already blending Kitchen Aid ice cream attachment. Allow to mix for 20 minutes. Transfer to a freezable container for storage and serving.

This is a quick and delicious ice cream and a family favorite. It gets 5 yes votes at our house, because our dog loves ice cream too.

August 8, 2006

"Lessons From A Green Kitchen" by Michael Pollan

I purchased the August 2006 edition of Food & Wine magazine primarily for the article called "Lessons from a Green Kitchen." I hoped to learn more about making my kitchen more green. I learned a little bit more than I thought I would from food detective Michael Pollan. I should forewarn you that this subject is best contemplated when you are feeling stout of heart and stomach. So, if you aren't ready for this type of information...save it for another day.

I knew the food industry has some horrible methods of treating animals in their daily conditions, but I didn't realize exactly what they were now feeding our beef and chickens. The idea that they would feed herbivores manure, desiccated members of their own kind and blood was shocking. Was this really true? After Googling the phrase, "feeding cows chicken manure," I was shocked to discover this is true. This isn't right. You can't turn herbivores into carnivores and cannibals without there being biological consequences. Thoughts of "Jurassic Park" and the chaos theory come to mind.

Additionally, feeding cows the manure from chickens raises other heath concerns. There are poultry producers who feed their chickens arsenic to help them bulk up faster. Just follow the food chain to see the additional concern. Not only are we getting arsenic from the chickens we eat, but the cows are getting arsenic from the chicken excrement which then comes back to us when we eat the cows. So everybody in this circle is now poisoned with arsenic and the resulting health issues that come from this particular poison. For more read this article at Wikipedia, http://en.wikipedia.org/wiki/Arsenic_poisoning#Symptoms.

The cows are not alone in their mistreatment by the food industry. They also extend their unique methods to chickens and pigs. After being crammed in small cages unable to satisfy their basic biological needs to forage and wander the pigs and chickens have developed unique anti-species behaviors. So the food industry strikes back with detailing pigs so they can't bite off another pig's tail and debeaking chickens so they can't cannibalize each other.

Finally, since roosters don't produce enough meat to make it financially worth while to raise them, they are disposed of in a horrific way after hatching and sexing. For more about the egg hatchery read this article from Farm Sanctuary, http://www.farmsanctuary.org/newsletter/behind_the_scenes.htm.

For more on cows, start with the Organic Consumers Association article on "Grass Fed Beef" at http://www.organicconsumers.org/madcow/grassfed111505.cfm.

I agree with Michael Pollan, you can choose what to do 3 times a day. Join us in choosing to vote with your fork for as many meals as you can.

August 7, 2006

Chocolate Chip Cookies & Montina Bread - All Gluten Free

For our planned weekend of yard work, I made up several gluten-free recipes ahead of time - chocolate chip cookies and Montina rolls.

We spent the weekend working in the yard trying to tame the overgrowth from all the rain we had in July. We were victorious! The jungle has been tamed! At our house, yard work requires constant infusions of ice tea and fruit pops so we can survive the summer heat. Another yard working necessity is grilling while we work...the aromas of cooking hot dogs and buffalo burgers will keep your mind thoroughly occupied on something other than how your body is reacting to the heat.

To reward us for all our hard work, I made a variety of things this weekend to go with our organic Applegate hot dogs and buffalo burgers. I tried an alternate version of my Montina rolls, made chocolate chip cookies and vanilla ice cream.

I took the traditional Toll House Chocolate Chip Cookie recipe and then played with the "flour category" by try a different combination of flours and meals. The recipe calls for 2 1/4 cups of wheat flour which I substituted with 1 cup of brown rice flour, 1/2 cup almond meal, 1/2 cup tapioca flour and 1/4 Montina flour. I didn't use any xanthan gum in the recipe. After mixing up the cookie dough, I put it in the refrigerator to cool over night. The next day, I placed small spoonfuls on parchment paper to cook in a 350 degree oven. Instead of the usual 8 to 9 minutes per batch, this flour combination took 10 to 11 minutes to brown. Needless to say, this combination got four happy votes.

Next came the Montina rolls, I played so much with this recipe that I felt more like a mad scientist than the family cook. I started with the basic Montina Rolls recipe in the Montinia Recipe Booklet by Montana State University at Bozeman by Betty Drummond. After playing with it several times, I've remade these rolls a variety of different ways, one version I've posted earlier. What follows is my attempt at making a rich tasty roll that doesn't have lingering tastes of a bland starch (tapioca or potato) or of xanthum gum (which doesn't agree with me in larger amounts). The resulting roll wasn't large (I hoped they would rise a bit more...but considering the flour combination it is a dense rich bread).

Montina Rolls

1/4 cup coconut oil
1/2 cup half and half
1/2 cup heavy whipping cream
1/4 sugar
1/4 tsp salt
1 package Rize Yeast (an organic yeast by Rapunzel)
1 egg, beaten
1 cup ground oats (ground in my coffee grinder)
1/3 cup almond meal
1/3 cup Montina flour
1/3 cup ground white grits (ground in my coffee grinder)
1/4 cup ground flax seeds (ground in my coffee grinder)
1/3 cup or less whole oats (enough to make the dough firm enough to make into rolls)
2 Tb agar agar
1/2 tsp kuzu powder (kudzu)
2 tsp baking powder

Place into a sauce pan the coconut oil, milk, sugar, agar agar, kuzu, and salt. Heat to a low rolling boil for about 3 minutes. This allows the agar agar to begin gelling. Remove from heat and allow to cool for about 15 to 20 minutes. Then add the dry yeast and stir. Give the yeast time to begin to work. Add to the bowl with your flour combination the beaten egg and then the liquid mixture. Add as much of the whole oats until you get a manageable dough. Form into rolls and place on a parchment paper lined baking sheet. Allow to rise in a warm place until the dough leaves a dent. Bake at 350 degrees for 20 minutes.

Notes: I used agar agar because of it's jelling properties and I want to see if I can substitute it in some recipes for xanthan gum. Yes, you can use agar agar instead of xanthan gum. Agar agar does have nutritional properties (contains iodine) unlike xanthan gum which doesn't have any. I added the kuzu root to see if the bread would hold together better with two jelling agents rather than one. It did do this nicely, however I could have used more kuzu powder and achieved the same results.

What did my poor guinea pig family think about my edible science experiment? I got 3 thumbs up. What did I think? It was a bit more work to put things together, but the result was a rich tasting roll. It was very satisfying with it's slightly sweet and rich undertones without any funky after taste that you get from xanthan gum.

August 6, 2006

Wasabe Slaw - Gluten Free

Being gluten-free changes how you regard food and how other people prepare recipes, which makes you wonder about recipes and the ingredients they contain. Once you have to go gluten-free you research every ingredient that you put into recipes of your own and what you buy at restaurants.

On one of my exploratory visits to Whole Foods, I was inspired to buy a lovely green cabbage, but once I got it home I was uninspired to do something with it. It's been mocking me, laughing at me from it's resting place in the refrigerator. I didn't want to add it to my compost pile unused. So, today I decided to do something slightly different with it. My green slaw is a combination of what things I had around the kitchen and my mood for something spicy.

Recipe

1/2 Head of Cabbage
1 cup baby spinach leaves, chopped
1/2 cup raisins
1/2 tsp. celery seed
1/4 cup chopped almonds
1/4 cup wasabe mayonnaise or to taste
1/2 tsp. cracked black pepper or to taste
1/4 tsp sea salt or to taste

Blend and serve.

The family voting? My husband and I really liked it, but my kids won't even attempt to try wasabe again. Too spicy.

Pamela's Gluten Free Pancake Mix - A Misadventure

My adventures in using Pamela's Pancake Mix have been interesting to say the least. I used it to make chocolate chip cookies and one batch of pancakes that turned out quite well. The third time, I wanted to use up my bag of mix to make another batch of pancakes. Third time was not a charm....

Here is my picture of the lovely batch of pancakes that I made using Pamela's Pancake Mix.

The last batch of pancakes that I made kept sticking to the pan. I even threw out the first batch and made a second one, but it did the same thing. See how lumpy and destroyed they looked? These pancakes even tasted slightly different.

What went wrong? I'm not sure, but I've got a couple of ideas. First the mix could have been getting older. Second, the mix wasn't totally mixed. Depending on assembly line processes, the various ingredients could simply have been put inside the bag one at a time rather than mixed before bagging. Third, the various ingredients could have settled down and weren't mixed anymore after sitting on a shelf for who knows how long.

I have bought another bag of Pamela's Pancake Mix to try again. This time I'll mix the ingredients in the bag before trying to make something with it. More to come on this one.

July 8, 2006

Thai Coconut Ice Cream - Gluten Free

For the Fourth of July , I try a Thai Coconut Milk Ice Cream for holiday menu. This recipe doesn't have any dairy products, so it has a milder flavor. In texture it's like a sorbet rather than an ice cream. This recipe is also gluten-free.

Recipe

2 cups coconut milk or coconut cream (a richer alternative)
1 cup water
4 eggs
1 teaspoon of vanilla
pinch of salt
Optional ingredients: cooked corn or toasted coconut

Heat the coconut milk and water over medium heat, stirring continuously. Do not allow it to boil.
In a bowl beat four eggs, then add the other ingredients. Whisk gently. Transfer the mixture to a double boiler over gently boiling water, and slowly blend in the hot coconut milk. Sir the mixture until it thickens. It is ready when there is a sticky coat left of the back of the spoon when it is lifted from the mixture. Allow it to cool. Then put it into your ice cream freezer and process for 15 minutes. Put the ice cream into a storage container and chill for an hour. Serve with maple syrup.

This recipe was well received, except by my son. He couldn't get past the idea that I had put corn into one of his ice cream scoops. My daughter liked the version with maple syrup the best. My husband and I like the maple syrup version best too, but the corn was a unique alternative too.

June 13, 2006

Montina Almond Bread - Gluten Free

I returned to working on my flour combination for my tastier gluten-free bread. This is a variant on my previous post on Montina rolls, but much better. Even my kids said it had lots of potential - fancy that!!

This variation is not only gluten-free, but dairy-free too. We have a number of food related issues at our house: lactose & soy intolerant, gluten-free and now an allergy to the nightshade vegetables. Some days it feels like I'm learning to cook all over again.

I used homemade almond milk (1 cup Almonds, 2 cups Water, 1 Tb Agave Syrup) in this recipe. Plus I wanted to try using Agar Agar as the binder rather than xanthan gum. Agar Agar contains iodine and has nutritional value unlike xanthan gum. I used Agave Syrup to keep the glycemic index of the bread down and coconut oil for its contribution of medium chain fatty acids.

Here is the variation on the recipe:

1/4 cup Coconut Oil
1 cup Almond Milk
Not quite 1/4 cup Agave Syrup
1 Egg, beaten
1 cup Oat Flour
1/2 cup Montina Flour
1/2 cup Almond Meal
1/4 cup Tapioca Flour
3 Tb Coconut Meal
2 Tb Agar Agar
2 tsp Baking Powder
1/4 tsp Salt
1 package Dry Yeast

Heat the milk, coconut oil and agar agar until boiling. Cook for three minutes stirring constantly. Then turn down the heat. Add the agave syrup and salt. Stir until dissolved. Turn off the heat and add the yeast. Stir and then allow time for the yeast to begin working. Add the beaten egg and mix together. Then add each of the flours and baking powder and beat until combined. Knead in the bowl for about 3 minutes. Place the batter (it should not be runny) into a parchment lined baking dish. Shape into a loaf and sprinkle the top with whole oats. Place in a warm location to allow it to rise for 1 hour. Bake at 350 degrees for approximately 20 to 30 minutes.

What did we think? Everybody said it was a nice bread, but still a little bland. They want me to try again and beef up the flavor. I agreed with them. How did the agar agar work? It did pretty good. It worked better when the bread wasn't toasted. When toasted the bread was more fragile and broke apart easily.

You can find agar agar in the Asian food section of your grocery store. The brand I purchased by made by Eden Foods.

June 3, 2006

Gluten Free Flour Combinations - Back to Testing

I've been working to create a decent gluten-free flour combination that tasted like a rich whole wheat (or what I remember to be a rich whole wheat) taste. I've been searching for the last 8 months to find a blend that all of us would like and wouldn't be another contribution to the ranks of yuck & chuck.

I started with Montina flour. I like the taste of Montina...it has a naturally sweet yet robust taste. To keep it mild enough that the kids will eat it meant that it had to contribute 1/4 to 1/2 cup of the total flour used. It's good to remember that Montina is high is fiber and some folks are sensitive to lots of fiber. (note: Montina is really good in chocolate chip cookies). In this recipe I used 1/2 cup of Montina.

The next addition was a mild flour that everyone enjoys -- I chose oats. I took my bag of rolled oats and ground them up in my little coffee grinder (I do have one just devoted to coffee beans.). Oats have a natural sweetness and blended nicely with the Montina. I used oats at 1 1/2 cups.

Now I needed that third starch and choose tapioca. I thought it would blend and mellow the other flours. I used 1/2 cup in the recipe.

The recipe noted that this should be a knead able dough...mine wasn't. So I worked in some cornstarch to keep the dough from being so sticky. It looked good and I moved on and finished the rolls. They looked lovely when they came out of the oven.

But how did they taste? Actually, not bad. This flour blend has potential....although it still needs some adjustments. The family vote was 4 in favor of keeping this blend as a basic, but it was a little bland. They wanted a richer taste. So back to the kitchen...

May 23, 2006

Amaranth Pie Crust - Gluten Free

I have wanted to try making homemade gluten-free fruit pastries like Pop Tarts for a long time. The real thing has too many ingredients that I prefer my children not eat. Plus, my son loves Pop Tarts, so I need to come up with a healthy alternative.

I chose as my basic crust recipe the gluten free Amaranth Pie Crust Dough at Bob's Red Mill, which I altered slightly. This is what I did:

Recipe

3/4 cup Amaranth Flour
1/2 cup Tapioca
1/4 cup Almond Meal
1/4 tsp Celtic Sea Salt
1/2 tsp Cinnamon
3 Tb Coconut Oil
3 - 4 Tb Water (I ended up needing 6 Tb)
2 tsp Agave Syrup

I mixed it up with my Kitchen Aid Stand Mixer. Then rolled the dough out between two sheets of parchment paper. I used my biscuit cutter to make the shapes. Since they were small, I used the following items as fillings: mixed berry jam, strawberry jam, pumpkin butter, lemon curd, orange marmalade and apple sauce.

My Mom always used make little cookies out of the left over pie crust. She'd place them on a cookie sheet and sprinkle sugar and cinnamon on them. They were always my favorite part of any pie baking. So I did the same with the Amaranth Pie Crust. They turned out great. There weren't any left for taste testing though.....the cook turned into a little piggy.

The final fruit pastry turned out beautifully. Now, to try them on the kids.... My son said, "Ick, ick and double ick." My daughter thought the ones filled with the mixed berry jam were the best and orange marmalade was totally disgusting. I thought the ones with pumpkin butter and lemon curd stood up best to the taste of the dough.

The amaranth flour had a raw grassy smell in the package and tasted if possible even grassier in the uncooked dough. The cooked version was milder, but still might have too strong a taste for some. The cinnamon and sugar pie crust cookies were the best tasting of all.

Papaya Salsa - Gluten & Nightshade Free

Since the discovery of my daughter's challenges with plants from the nightshade family, she has really moaned the loss of salsa. She loved to snack on salsa and corn chips. Yeah! A new culinary challenge for me - fruit salsas. I've never tried making them, but I'm sure it will be a tasty adventure. The added benefit is that they are gluten-free, too.

I started out with a can of organic papayas that I got at Trader Joe's. I diced them and added two small yellow onions, 5 cloves of garlic, 1/8 cup of cilantro, salt and black pepper. I served it with organic yellow corn chips.

The taste test verdict? My son wouldn't even consent to try it. My daughter thought there was too much green stuff. She wanted me to try again, but use very little green stuff (cilantro) as she didn't really like the taste of it. My husband and I gave it a thumbs up. A simple and tasty salsa that was sharp yet sweet. Better yet it didn't have any offending members of the nightshade family in it.

So what is the nightshade family? It is the botanical family of a variety of plants such as: potatoes (white, blue, yellow, etc.), tomatoes, peppers (bell peppers, cayenne, jalapeno, banana, etc.), eggplant, tobacco, ground cherry or tomatillo. All in all there are about 1700 species in the nightshade family and some are poisonous. Some we know and love are ornamentals like the petunia. The Forest Preserve District of Cook County in Illinois Bulletin on the nightshade family is a good primer: http://www.newton.dep.anl.gov/natbltn/400-499/nb460.htm

May 22, 2006

Dowd & Roger's Chocolate Chestnut Cake Mix - Gluten Free

I really needed a successful gluten free baking experience! At my kids insistence, I reached for the Dowd & Rogers chocolate cake mix. Made with rice flour, chestnut flour and tapioca flour, this mix is one even those who have an allergy to nightshade plants can handle. My daughter has an evolving/developing allergy problem with the nightshade plant family. Yep, there goes the potato flour.... The "evil shadow vegetables," as my daughter calls them, will no longer have a place in our evolving gluten-free cooking.

I found my Dowd & Rogers cake mix at our local Whole Foods market in the baking section. It comes in chocolate, dark vanilla and lemon. We have tried the chocolate and dark vanilla cake mixes -- both are delicious. If you can't find it at your local market, Dowd & Rogers does sell mixes over their website.

The box holds enough cake mix for a single layer cake. I bake mine in a 6 inch springform pan which yields a nice double layer height cake. I have sliced the cake in the middle to add frosting, but most often just frost the outside. I line the springform pan with parchment paper (sides & bottom) to make sure the cake comes out of the pan.

Our cake baked up beautifully and didn't make it to the frosting stage before the kids were asking to have some. The Dowd & Rogers cake mix is always moist and chocolately. It doesn't leave a grainy texture in your mouth when you eat it. I used butter cream frosting to top it off. Now I'm thinking that I should have decorated it like Pac-Man.....

The verdict on the taste test? Four thumbs up from the family. This is a keeper.

May 21, 2006

Montina Bread Gluten Free - Try, Try Again

It was time renew my search for a gluten free bread that didn't make me want to chuck it in the garbage. At our house these experiments are called, 'yuck & chuck.' I chose for my bread baking challenge my bag of Montina flour (a gluten free Indian rice grass). A rich grainy flour that has a lot of nutritional value when compared to the traditional rice, tapioca & potato mixture -- not to mention fiber. When I ordered my Montina flour and I also picked up a copy of their recipe book. The book has quite a few gluten free and gluten containing recipes for the adventurous spirit.

I chose as my candidate the Montina Yeast Bread recipe, which won 2nd prize in the Montina Flour competition. I have made this recipe before and it turned out nicely -- so I decided to try substituting brown rice and millet flour for the white rice & tapioca combination. The batter was supposed to get sticky, but never made it. It stayed very liquid -- so I added about another 1/3 cup of millet flour. It didn't help, but I was hesitant to add too much more.

How did it taste? Rather like pumpernickel bread -- dark and intensely flavored. It tasted better with jam and butter rather than just the butter. What did the kids think? After a tiny nibble they put it down and said, 'ick.'

Back to the planning stages and this bread can head out to the compost pile.

Ramapo Valley Brewery - A Gluten-Free Passover Beer

While shopping at Whole Foods, I came across a Gluten-free beer from Ramapo Valley Brewery. It was their Passover Honey Beer which is gluten-free and kosher. Made of water, molasses, hops, honey and Passover yeast it truly is gluten-free. So off to the taste testing!

It foamed nicely and had a good aroma. The taste was initially light and crisp, but it left an intensely sweet taste in your mouth. Ditto, said my husband. This one is too sweet for us.

If you like the lighter sweeter beers, then this one is a winner. It won a blue ribbon at the first ever gluten free beer festival this year in the UK.

May 15, 2006

Arrowhead Mills Gluten-Free Yellow Cake Mix

I wanted a cake for Mother's Day, one with a soft rich cocoa frosting. I chose for my candidate the Gluten Free Vanilla Cake Mix from Arrowhead Mills. It is a white rice flour cake mix amd had the added benefit of being organic.

I wanted a sheet cake, so I used my 9 x 13 baking pan which was one of the recommended options on the Arrowhead Mills package. Since the instructions on the box didn't say otherwise and feeling pretty daring, I only used a vegetable spray to coat the pan.

Like some gluten free batters it was very runny. The batter only filled the 9 x 13 pan about 1/2 inch up the side. It was looking a bit shallow for a cake mix in this size of pan, but I thought it just might rise a bit during baking. So, I went ahead and baked it for the lowest recommended time of 25 minutes.

When I checked the cake, it had already pulled away from the sides of the pan and had a caramalized coating on the top of the cake. I tried the toothpick test on the center and it came out clean. After cooling for about 30 minutes, I removed the cake from the pan onto a cookie sheet. The cake was still about 1/2 inch high and was a little over done at the recommended cooking time. But since hope springs eternal, I went ahead and moved on to the frosting stage.

I used the frosting recipe on the Arrowhead Mills package which was a cocoa butter frosting. Following the package directions, the recipe yielded a clumpy frosting without enough butter or cream to bind in the rest of the powdered sugar. I added more cream to the mix and then more cream and more cream..... By the time I was done, I had probably used double the amount of milk or cream recommended for this recipe. I probably should have used another stick of butter. The frosting was a bit firm, so I went ahead and put it on the still slightly warm cake to help soften it.

The final result looked beautiful, but how did it taste? In come my family critics with forks ready to dive into all that lovely swirling cocoa frosting. The cake has a lovely color. The texture of the cake is grainy and firm. This mix uses the traditional gluten free flour combination. First up was my husband, who said the only reason to eat this cake was for the frosting. Next, my son didn't like that the bottom of the cake got slimy as it sat on his plate. My daughter was a little slower producing her verdict since she was totally chocolated out after licking the frosting bowl, but said the cake part was icky.

The search goes on....

May 4, 2006

Chocolate Chip Cookies With Pamela's Gluten Free Pancake Mix

Since we were trying out Chocolate Chip Cookies mixes, I picked up a bag of Pamela's Gluten-Free Baking & Pancake mix on my last trip to Whole Foods. The Pamela's mix can make a variety of things, such as chocolate chip cookies, muffins, cake, and pancakes. You only need to add different ingredients in order to make the item you choose.

I decided to try out the Chocolate Chip Cookie recipe on the bag. The recipe on the makes about 1 1/2 dozen to 2 dozen cookies. After adding the extra ingredients, the cookie batter had a nice soft yet firm texture and had a good taste in dough form. I dropped the batter on a parchment lined cookie sheet and baked at 350 degrees for 14 minutes as recommended on the package. The cookies turned out beautifully and had a nice flavor. They were crisp at 14 minutes of baking time, but softer and chewier at 13 minutes in the oven.

These cookies were well received by most of my family, except for my son who thought they had a gingerbread type flavor and didn't care for them. The cookie mix is a good one since it lacks the bland rice white, tapioca, potato flour taste of many gluten-free baking goods. The day after baking the cookies are softer, but had a blander flavor. Not the basic bland white rice taste, but more like I made cookies using pancake mix. These cookies are best when fresh from the oven.

May 2, 2006

Gluten Free Pantry's Chocolate Chip Cookie Mix

With our dinner on Saturday, I tried out The Gluten Free Pantry's Chocolate Chip Cookie mix. The mix makes around 2 dozen small cookies. I dropped the cookie dough by spoonfuls on cookie sheets that I had lined with parchment paper. They held their shape during baking and had nice clean edges. This recipe has the dough cooking at a lower temperature (325 deg.) for 12 to 14 minutes rather than 8 to 9 minutes (like the traditional Toll House recipe).

The cookies were well received by my family taste testers. The most critical (the kids) of the group, thought they were great! Nice crisp cookies and tasty semi sweet morsels that weren't bitter. My husband enjoyed them too, but he prefers the softer chewy richness of the traditional Toll House recipe.

Overall, this is a great cookie mix to have around when you just need to make some chocolate chip cookies. But as my family's resident baker, I've been asked to play more with my alternative flours and try to come with with a chewy rich cookie. What sweet diversions......

May 1, 2006

Hamburger & Hot Dog Gluten Free Bun Recipe from Bob's Red Mill

After a Saturday full of yard work, I planned on grilling hot dogs and making chocolate chip cookies for dessert. I needed a gluten-free recipe for the hot dog buns and chose the hamburger/hot dog bun recipe from Bob's Red Mill. Due to time considerations, I chose to try one of the Gluten Free Pantry mixes for the chocolate chip cookies.

The hot dog bun recipe has a few additives that I don't use anymore in my gluten free baking, i.e. apple cider vinegar or gelatin. However, thoughts of a crumbly hot dog bun made me pause and think. What if I chose to add was 1/2 tsp. of kuzu powder dissolved in 1/4 cup of the water needed for this recipe? Kuzu or kudzu root is generally used as a thickener in oriental cooking or for desserts, but I thought it might be a good addition to the bun recipe.

The bread dough is primarily brown rice flour, tapioca flour and potato starch. The dough is actually more like a batter which is ooey gooey and very sticky. You will need to make shapes for your buns out of aluminum foil and spray them well with vegetable spray as well as your pan or parchment paper. After they had a chance to rise, I baked them in a 400 degree oven for 15 minutes.

The flavor of the buns was simple and okay with all the condiments added to the hot dog. As a stand alone bread recipe, it was too bland for my family. We have been eating whole grain or sprouted grain breads before discovering that I have a gluten sensitivity. We all wanted our bread to have a fuller whole wheat type of flavor. We all gave this recipe a thumbs down due to its bland flavor.

April 25, 2006

The Perfect Gluten Free Brownie: A Bake-Off

A Bake-Off Between the Gluten Free Goddess, Gluten-Free Pantry & Pamela's

I've been searching for a classic brownie recipe (gluten-free) that had a rich chocolate taste. The right recipe whose aroma makes everyone migrate towards the kitchen to ask "Are they done yet?" My contestants in our taste test were a Pamela Brownie Mix, a Brownie Mix from The Gluten-Free Pantry and a recipe from The Gluten-Free Goddess' food blog.

I started with the mix by Pamela's. It had a nice texture that wasn't too grainy as they used a nice variety of flours. It had nice sized chocolate chunks that had a nice smooth dark chocolate flavor. The mix made an 8 x 8 pan. The taste test for these went over quite well. Although my daughter still liked the taste of the uncooked batter rather than the finished brownie. She said it tasted more like the one's we used to eat that had wheat. Plus my son wanted brownies without chunks in them, so my search went on.

Next we tried The Gluten-free Pantry's brownie mix. It made up into a nice 13 x9 inch pan. They recommended lining the pan with foil and coating with vegetable spray before putting the batter in the pan. After they cooled, I put them in the freezer for around an hour to make it easier to remove them from the pan. I still needed to flip the brownies out onto a cutting board upside down to peel the foil off the brownies. As far as the taste tests went the brownies had a medium to light chocolate taste and the chocolate morsels were bitter. They lacked that warm rich moistness that make you want to have just one more. My son (a very tough food critic) said that he really didn't care for them.

The brownie recipe from the Gluten-free Goddess is wonderful. I have now made both the original version by Clare and the Gluten-free Goddess' jazzed up version of this recipe. Made from almond meal, rice flour, dark chocolate bars or cocoa powder this recipe is a winner. The recipe makes a 8 x 8 pan. Also, line the pan with foil to make them easier to remove. The brownie rated tops in our taste tests. It had all the hallmarks of a good brownie -- aroma, moistness, intense chocolate flavor and the desire to have just one more.

Update: I have substituted millet flour for the rice flour. The brownies had a nice flavor, but were difficult to eat by hand since they fell apart. Another time I substituted 1/2 cup Turbinado sugar and 1/2 cup cane sugar instead of 1 cup of brown sugar. The brownies turned out to have a lovely chewy texture. They tasted wonderful.

April 23, 2006

My Start & Inspiration for Blogging Gluten-Free

I am gluten-free - not by choice, but by necessity as I have those little antibodies that don't like gluten. I don't have enough antibodies to be considered a celiac, but enough to be gluten sensitive.

My diagnosis for gluten sensitivity came after I had just had surgery for early stage breast cancer. I went to see an integrative physician in order to get my body healthy after surgery and radiation therapy. Her first step after taking my medical history and looking at all my test results was to send me off to the lab for more blood work. Those additional blood tests discovered my gluten sensitivity and new hypothyroid condition.

Taking up the gluten free challenge, I tackled my first big holiday and made a gluten free meal that was delightful for my entire family. It was auspicious that my first big gluten free event was a success, because I've had many a recipe fail since then. So, I have endeavored to approach the world of gluten-free food and cooking with gusto and an explorer's heart.

After searching the internet and checking out gluten free cook books from our local library, I began my quest for decent tasting food. It has been delightful and challenging, but I will post the best of my experiments and lightly gloss over some of my baking failures. I'm learning how to cook gluten free and it's a grand adventure. My family isn't gluten sensitive, however they are joining me in my quest for better gluten free food. They celebrate with me on my successes and they help me compost my failures.

I have purchased a wide variety of gluten free foods and have been so disappointed in the flavors of these items. Many of the gluten free cook books that I checked out from our library didn't provide me with the food flavors that I longed to eat. In frustration, I decided to turn to my favorite recipes and adapt them into something that was delicious and healthier to eat.

As time has gone on other food allergies have made their way into our lives. My daughter and I are now allergic to tomatoes and peppers. We tend to avoid all the nightshades (tomatoes, peppers, potatoes and eggplant) since potatoes and eggplant can sometimes bother us too. My daughter is allergic to barley and I'm allergic to wheat. Our children have developed an intolerance to gluten, dairy and soy. Over time, I have also developed an intolerance to foods that contain xanthan gum, so all of my recipes use other foods that can act as binders.

I am very thankful for the other gluten free bloggers who were already on the internet. Many of them offered new recipes to try and add some to my list of family favorites. I decided to join the gluten free blogging community and share the results of my gluten free experiments.