Showing posts with label bread. Show all posts

March 7, 2010

Ciabatta (B&P41)


Like many people who love to cook, I've got a thing for cookbooks, especially old ones. I go through old bookstores, thrift shops and even the collections of my family and friends looking for old treasures.

A while back I checked out the cookery section at Project Gutenberg, but didn't find anything all that interesting. Time makes all the difference in the world, especially when transferring old books into a digital format. Yesterday, I was back at Project "G" oogling their selection and they do have some nice ones available in the cookery section of the bookshelf.  They have a variety of ways to download the books and some versions even have the images as well. I tested the Adobe EPUB and the Read Online formats and both worked very well.

There are some old gems in this collection like The Women's Institute of Cookery (vols. I - V), The White House Cookbook and The Cook's Decameron: A Study In Taste, Containing Over Two Hundred Recipes For Italian Dishes. There are quite a few interesting recipes to be found in this collection, especially one for Starvation Soup.  It's found in The Belgian Cookbook (1915), a  book of recipes provided by Belgian refugees of World War I.

With many old cookbooks, you will have to guess at the quantities required for a recipe. They might tell you to use an equal amount of almonds and sugar or use phrases like "...reckon the quantities as follows." These types of recipes give you the chance to really get a feel for the look, texture and taste of a baked good. Although, it can be frustrating sometimes when you have to try and figure out equal weights of eggs, butter, flour and sugar.

If you're looking for something really yummy to go with this very good loaf of ciabatta, check out a recipe for Roman Sauce from The Cook's Decameron. It calls for nutmeg, raisins, lemon, herbs, pine nuts or almonds, burnt sugar in an espagnole or brown sauce. For our dinner, I ended up choosing the classic tomato sauce with basil and garlic served it over brown rice pasta and meatballs. To finish it off, I served Chocolate and Drambuie Tiramisu, the latest Daring Baker Challenge recipe, along with a cup of organic Espresso. Delicious.

Enjoy!


Recipe

Protein Content
Original: 29.12 g
Gluten Free: 28.63 g

Biga

20 g brown rice flour (1.8 g)
15 g sweet rice flour (0.09 g)
15 g arrowroot starch (0.045 g)
20 g almond meal (4 g)
22 g white bean flour (4.73 g)
1 g instant dry yeast
50 ml water (120 - 130 degrees F/48 - 54 degrees C)

10 ml agave syrup

Final Dough

25 g brown rice flour (2.25 g)
22 g sweet rice flour (1.32 g)
20 g arrowroot starch (0.06 g)
30 g almond meal (6 g)
35 g white bean flour (7.525 g)
12 g instant dry yeast
6 g chia seed meal
4 g agar agar powder
7 g sea salt
126 g biga (from above)
130 ml water (120 - 130 degrees F/48 - 54 degrees C)
15 ml agave syrup

Biga Directions

In a medium sized bowl, combine the flours, water, agave syrup and yeast. Mix together, making sure the mixture is smooth. Cover the mixture or transfer to a container and allow to ferment at 75 degrees F/24 degrees C for 18 to 24 hours. When the biga is ready to use, it will have risen and receded, yet also look bubbly.


Final Dough Directions

1. In a large bowl, combine all the dry ingredients with the exception of the salt and yeast. Hold the salt out, so it can be added later in the mixing. Place the yeast into a small container, add the water and a little bit of the agave syrup. Stir to ensure the water mixes through the yeast. Allow the yeast to proof for 2 to 3 minutes.

2. Add the yeast mixture, biga, the rest of the agave syrup and blend together. Just before the dough comes together, sprinkle in the salt and then continue blending until a soft ball forms. Note: This dough should be a little wetter or looser than other types of doughs.

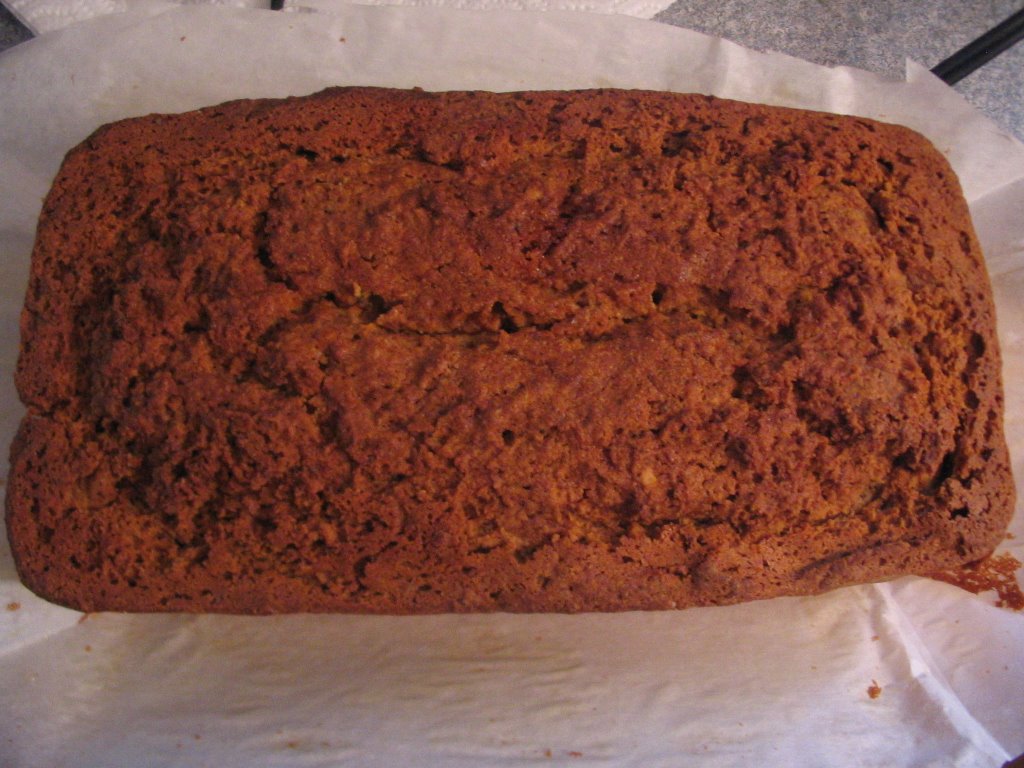
3. Since this dough is looser, I made a foil frame so the bread would turn out the right shape. Take a long strip of aluminum foil and fold it lengthwise until it is 2 inches/5 cm wide. Fold up 1/2 inch/1.3cm from one long edge, but don't make a hard crease in the foil. Ease the foil around until the ends over lap and can rest one inside the other. Work the corners until the fold lays flat and you have a rounded edge rectangle. Let the sides ease out rather than be straight up and down. (See the picture above.) Gently line this frame with parchment paper, so you can reuse the frame for the ciabatta (the next B&P recipe).

4. Place the dough in the center of a sheet of parchment paper that has been sprinkled with arrowroot starch. Gently pat the dough out into the frame, but don't press it into the sides or corners. The loaf should still have rounded sides. Slide the frame onto a parchment paper covered cookie sheet and place in a warm location to rise for 2 hours.

5. Place an oven proof bowl filled with water on the bottom shelf of the oven. Then place a baking stone on the top shelf. Preheat the oven to 460 degrees F/238 degrees C. Place the loaf in the oven and spray water over the oven box and the top of the loaf. Bake the loaf for 25 minutes. Prop the oven door open and continue to cook the bread for another 10 minutes. Remove the loaf and allow it to cool before serving.

 
What's Going On?

I was a very lucky woman and received a copy of the Culinary Institute of America's Baking & Pastry book along with their DVD's from my family for my birthday. After watching all the DVDs, I decided to work my way through the CIA's Baking and Pastry book - of course making it gluten free. There were so many skills that I wanted to develop and work on. I hope you will be interested in sharing my journey with me.


Want more?

You can follow me on Twitter and on Flickr.


Other Baking & Pastry Project Posts

Baking & Pastry #40 - Rosemary Bread (Biga)
Baking & Pastry Week 20 - More Bigas
Baking & Pastry #39 - Cracked Rice & Potato Bread (Biga)
Baking & Pastry #38 - Almond & White Bean Batard (Biga)
Baking & Pastry Week 19 - Bigas

February 25, 2010

Exploring More Bigas - Baking & Pastry Week 20


The Penance Post or How to iPod Your Mom In Six Easy Steps

I got caught out the other day and found guilty of not just tuning out my Mom, but iPoding her. I razz my kids all the time about zoning out with their iPods. Honestly, I'm not offended, because if I wasn't driving the car or navigating us through another activity (i.e. grocery shopping), I'd be listening to my iPod too.

This past Christmas, we were home visiting with my family. I was busy in the kitchen, doing the white work icing on my gingerbread house. Happily zoning out listening to a book I downloaded from our library. Everyone else in the house was off doing their own thing or watching a movie in the family room. Turns out my Mom (i.e. the kid's grandmother) was telling everyone in the family room some important stuff about the next big family get together. I was off in book and icing land and didn't hear a word of it.

Last week, the kid's asked me if I had told Mimi (i.e. their grandmother) if we were going to be attending the big Spring family get together. I (of course) was puzzled by their question..."What big get together?"  Informative pair that they are, they started to let me know all about the party. Once again, I'm trying to figure out how they got to be in the know, as I'm so totally clueless about this event.

"Oh, Mimi told us about it," they replied. "When was that?" I ask. "Oh, that night around Christmas when everyone was over watching that movie we rented," they said. "Well, what was I doing, 'cause I don't remember this," I reply. They said, "You were decorating the gingerbread house, Mom." "Well, that explains it," I reply. "How so?" asks my son. "I was listening to a book while I iced the gingerbread," I said. "Oooooohhhhhh, you iPoded Mimi!" they popped out in unison. "You're in trouble now! We're telling Dad!" 

Our kid's have gotten a lot of mileage out of this transgression on my part...their Mom was caught iPoding her Mom. Priceless dirt as far as my kid's are concerned. They've told all their cousins, their friends and maybe even their grandfather. I've had emails from all my nephews and nieces asking the same question, "Is it true that you iPoded Mimi?" "Yep!" I emailed back.  "Wow! I don't suppose you lost the use of your iPod?" my 16 year old nephew asked. "I just lost my iPod Touch for two weeks, because I didn't turn in some of my homework assignments." "Well," I said, "Not turning in your homework, is kinda different than iPoding Mimi." "Yeah, I know...," he mumbled.

So this post is my penance for iPoding my Mom. My family decided I should have to confess.

If you're wondering how you too can iPod someone, here are six easy steps to getting it done:

1. Remove the volume control on your iPod.

2. Buy better ear buds.  Look at the Creative line for some nice ones.

3. Find a task to do with your hands while you listen.

4. Listen to something that will engross you, i.e. favorite music or book.

5. Make sure that the person you are iPoding is saying or doing something worth iPoding them over.

6. Be willing to pay the price for iPoding.

Now that I've confessed, I'm off to bake some more in solace. I'm remaking the first loaf of ciabatta I made. It ended up turning out into something looking more like focaccia rather than ciabatta. It tasted great, but I wanted a rounded loaf not a flat one, so back to the kitchen I go.


What Am I Baking?

Rosemary Bread made with a biga (egg free & dairy free option)

Ciabatta made with a biga (egg free & dairy free)


Shopping List

Brown Rice Flour (Fine or Superfine Grind)
Sweet Rice Flour (also called glutinous rice flour)
Arrowroot Starch
Almond Meal
High Protein Flours, such as: Soybean, White Bean, Black Bean
Whole Grain Flour, such as: Buckwheat, Millet, Sorghum, Quinoa, Teff
Instant Dry Yeast
Binding Agents, such as: Xanthan or Guar Gum, Chia Seed Meal, Agar Agar Powder
Olive Oil
Rosemary
Milk or Alternative Milk

Resources

Flours & Binding Agents: Authentic Foods, Barry Farm, Bob's Red Mill
Instant Dry Yeast: Barry Farm
Agave Syrup: Wild Organics, Native Seeds


Equipment

Cookie Sheet
Parchment Paper
Baking Stone


What's Going On?

I was a very lucky woman and received a copy of the Culinary Institute of America's Baking & Pastry book along with their culinary dvd's from my family for my birthday and our anniversary. After watching all the DVDs, I decided to work my way through the CIA's Baking and Pastry book - of course making it gluten free. There were so many skills that I wanted to develop and work on. I hope you will be interested in sharing my journey with me.


Want more?

You can follow me on Twitter and on Flickr.


Other Baking & Pastry Project Posts

Index of the Baking & Pastry Project

Baking & Pastry Project #34 - Almond Buckwheat Batard with Poolish
Baking & Pastry Project #33 - Stollen
Baking & Pastry Project Week 17 - Sponge & A Poolish
Baking & Pastry Project #32 - Gugelhopf Crown
Baking & Pastry Project #31 - Panettone
Baking & Pastry Project Week 16 - Holiday Breads

August 13, 2009

Braided Challah (B&P17)


Baking & Pastry Project #17 - Three Strand Braided Challah

It has been a busy summer. We headed to Florida, so I could help my Dad out with my Mom. She had a stroke in October and some of her abilities are still in recovery mode. The doctor believes that she will eventually make a full recovery, but it has been a long road for her.

She wants to return to doing all the things she used to do, like cooking a meal or driving the car. However, the doctor won't allow her to do these things yet. To help out her gross motor skills and balance, my dad bought her a beautiful blue Schwinn Meridian tricycle. (I love this bike!) After my husband put it together for her, we took her outside for her first ride.

Then we all had to take a turn riding her tricycle. It's very easy to ride and steer. It has a great collapsible basket on the back for carrying your shopping. It made me wish our neighborhood was bicycle friendly. I'm a visitor over at Cycle Chic from Copenhagen. How I wish we had bicycle lanes and I could somewhat safely ride to get groceries. Where we live, I'd like to have a Jersey barrier between me and a car or truck before I'd even think about riding a bicycle on the road.

This loaf I set up to rise while my husband was putting the bicycle together. After I baked it and it was cooling, my husband, brother and I took our turn riding the bicycles. We headed out around the neighborhood taking turns riding the tricycle. Afterwards we headed back for a tall glass of iced tea and a warm slice of challah.

This was a wonderful loaf of bread. It sliced up neat and clean, which was great for making sandwiches. The loaf didn't last past breakfast the next day as it was a big hit with everyone.

Recipe

Yield: 1 loaf

Protein Content:
Original Recipe: 38.74 g
Gluten Free Recipe: 38.45 g

Bread

40 g brown rice flour (3.6 g)
40 g sweet rice flour (2.4 g)
40 g arrowroot starch (0.12 g)
60 g almond meal (12 g)
50 g millet flour (5.75 g)
8 g chia seed meal (1.68 g)
60 g white bean flour (12.9 g)
3 g agar agar powder
22 g instant dry yeast
30 g sugar
5 g sea salt
165 ml water
66 g egg yolks (approx. 4 yolks)
28 g vegetable oil

Egg Wash

57 g egg
60 ml milk
smidgeon sea salt


Dough

Combine the flours, sugar, salt and yeast in a large bowl. In another bowl, mix the water, egg yolks and oil together. Slowly add the liquid ingredients to the dry ingredients. The dough should be slightly firm, smooth and slightly sticky.


Shaping

1. Lay out a sheet of parchment paper and sprinkle with sweet rice flour. Divide the dough into 3 equal pieces. Roll the dough into oblong pieces about 12 inches/30 cm long. Make sure each piece is the same length and the center of each should be thicker than the ends.

2. Dust each length of dough and the parchment paper with sweet rice flour. Lay the strands of dough parallel to each other lengthwise on one side of the parchment paper. Begin braiding the challah from the center. When you reach the end pinch the tips together. Taking the edges of the parchment paper in your hands, ease the braid over until the top is now the bottom. Begin braining from the center again and when you reach the end pinch the tips together. Tuck both ends of the braid under the loaf. Sprinkle the parchment paper with sweet rice flour and gently ease the braid into the center of the paper. Slip the parchment paper on a cookie sheet and place in a warm location to rise for 1 1/2 to 2 hours.

3. Preheat a convection oven to 350 degrees Fahrenheit/177 degrees Celsius. Make the egg wash and brush over the wash over the braid. Place the braid into the oven and cook for 20 to 25 minutes until a dark golden brown and shiny. Cool on a rack before serving.

Notes:

1. White Bean Flour – You can purchase white bean flour from Barry Farm or you can grind your own using a coffee grinder. Make sure to sift your bean flour before using to make sure any bits that weren’t ground are removed.

2. Chia Seed Meal – You can purchase chia seeds from Barry Farm and use a coffee grinder to turn them into meal.


Other Baking & Pastry Project Posts

Baking & Pastry Project #17 - Braided Challah
Baking & Pastry Project Week 9 - Twisted & Braided
Baking & Pastry Project #16 - Raisin Cinnamon Swirl Bread
Baking & Pastry Project #15 - Rustic Raisin Bread
Baking & Pastry Project Week 8 - Raisins & More Raisins
Baking & Pastry Project #14 - Cheddar & Onion Mock Rye Batard
Baking & Pastry Project #13 - Prosciutto & Provolone Bread
Baking & Pastry Project Week 7 - Ham & Cheese


Want More?

You can find me on Twitter at glutenagogo.

April 20, 2009

Baking & Pastry Project Week 3 - Sticks & Rolls


I was a very lucky woman and received a copy of the Culinary Institute of America's Baking & Pastry book along with their culinary dvd's from my family for my birthday and our anniversary. After watching all the DVDs, I decided to work my way through the CIA's Baking and Pastry book - of course making it gluten free. There were so many skills that I wanted to develop and work on. I hope you will be interested in sharing my journey with me.


This week I'm making Soft Rolls and Grissini. What are grissini you ask? They are thin breadsticks. You can roll them out with a pasta machine or you can fix them by hand. Over at Delicious Days, you can find some she made with squid ink making them a dense black color. Or over at the LA Times there are some made with whole wheat flour.


You can follow my adventure daily on Twitter, where I'm glutenagogo.


Schedule for the Week of April 19th:


Tuesday - Soft Roll Dough & Bread (page 132)


Thursday – Grissini Dough & Grissini (page 133)


Shopping List


Brown Rice Flour (Fine or Superfine grind)
Sweet Rice Flour (also called glutinous rice flour)
Arrowroot Starch
High Protein Flours such as: Soybean, White Bean, Quinoa, Millet, Sorghum
Whole Grain Flour such as: Buckwheat, Millet, Sorghum, Quinoa, Amaranth, Teff
Instant Dry Yeast
Sea Salt
Binding Agents such as: Xanthan gum, Guar Gum, Chia Seed Meal, Agar Agar Powder
Toppings: Sesame Seeds, Poppy Seeds, Coarse Salt


Resources


Flours & Binding Agents:Authentic Foods, Barry Farm, Bob's Red Mill


Instant Dry Yeast:Barry Farm


Equipment


Other Messages in the Baking & Pastry Project


Baking & Pastry Project #4 - Rosemary Bread

Baking & Pastry Project #3 - Whole Grain Bread
Baking & Pastry Project #2 - Bagels
Baking & Pastry Project #1 - Lean White Bread
Baking & Pastry Project - Week 1

March 28, 2009

A New Baking Adventure Week 1 - Beans & Bagels


Baking & Pastry Project

I am a very lucky woman. My anniversary and birthday present this year from my family was a set of the Culinary Institute of America's (CIA) Culinary Arts and Baking DVDs. I was beyond speechless and praying that sounds reminiscent of a preteen girl at a Jonas Brothers concert wouldn't suddenly erupt from my mouth. Wow! My family knows me so well and couldn't have given me anything that would have pleased me more.

After watching all the DVDs, I decided that I wanted to work my way through the CIA's Baking and Pastry book. They are so many skills that I want to develop and work on. Plus, I thought some of you might be interested in sharing my journey with me.

Starting this week, I will begin baking my way through the book starting with breads. On Sundays, I will post the baking schedule for the week along with a shopping list with resources. The two recipes I tackle for the week will be posted on Tuesdays and Thursdays.

Schedule for the Week of March 29th

Tuesday - Lean White Bread
Thursday – Bagels

Shopping List

Brown Rice Flour (Fine or Superfine grind)
Sweet Rice Flour (also called glutinous rice flour)
Arrowroot Starch
High Protein Flours such as: Soybean, White Bean, Quinoa, Millet, Sorghum
Instant Dry Yeast
Salt
Binding Agent such as: Xanthan gum, Guar Gum, Chia Seed Meal
White Sorghum Malt Extract (Gluten Free & High Maltose)

Resources

Flours & Binding Agents:

Authentic Foods
Barry Farm
Bob's Red Mill

Instant Dry Yeast:

Barry Farm

Briess White Sorghum Malt Extract:

Midwest Homebrewing and Winemaking Supplies

Equipment

Kitchen Scale
Measuring Cup (with fluid ounces or mL)
Large Pot (i.e. Stock Pot, Dutch Oven or Wok)
Baking Sheets
Digital Thermometer
Parchment Paper

June 14, 2008

Rustic Millet Bread - Testing A Biga

It has been a busy time at our house the last week and a half. School and sporting activities are finishing off for the summer. We've been darting here and there around town for the last ten days. There have been school programs, last dance classes and several karate belt tests.

In the midst of all this I was trying to finesse a special request cake recipe for the kids. I thought I had it just right and the power goes out. Five hours of twilight and a cake in a rapidly cooling oven. High temperatures and the need for air conditioning had over whelmed the utilities. I hoped the residual heat in the oven would keep the cake baking, but instead it deflated and turned into a flabby Frisbee.

I decided to drown my cake baking sorrows in another kitchen experiment. I pulled out my copy of Peter Reinhart's Crust and Crumb and flipped to the pages on making pre-ferments. I'd tried my hand at making bread with a poolish and this time I would try to making bread with an Italian style biga pre-ferment.

An Italian style biga is usually firm pre-ferment for making bread. Like making sourdough, the biga is a sponge of flours, yeast and water. The difference is that the biga is made with cool water and the texture is firmer than other styles, like the poolish. They also take longer to rise, due to the thicker dough. According Reinhart, a biga will stay active for up to 3 days if kept refrigerated, will freeze for up to 6 months.

I didn't use a binding agent like xanthan gum or chia seed gel for this rustic bread. It's the combination of flours that keeps the bread together. If you alter the flours used in this recipe, make sure to add a binder when you make it. You would use 1 teaspoon xanthan gum or 1 teaspoon chia seed gel. Add both to the dry ingredients and thoroughly mix into the flours.

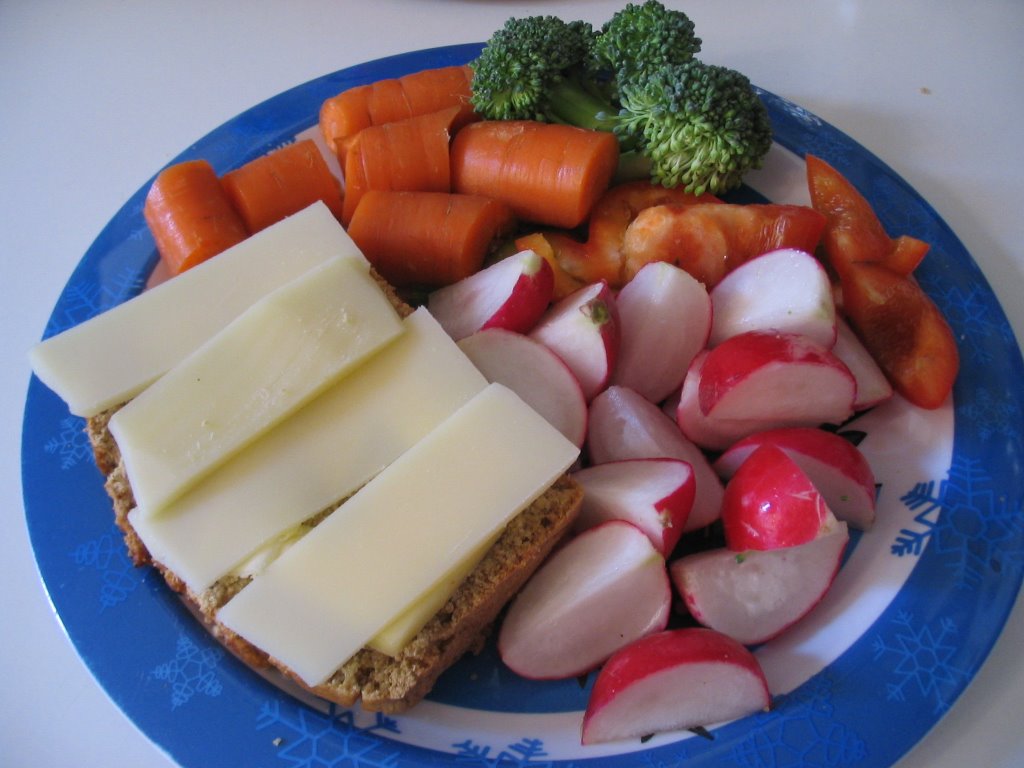
This is a lovely bread, full of holes and delightfully flavorful. I sliced thin strips of bread and toasted them. Then I made a bean relish of navy beans, carrots, radishes, dill, parsley, lemon juice, olive oil, salt and pepper to taste. It was delicious and made a wonderful appetizer to our meal. My husband and I thoroughly nibbled on these while we waited for dinner to cook. Our children preferred eating hunks of the bread all alone.

Making the Biga Pre-Ferment (Firm)

½ cup millet flour
½ cup gluten free oat flour
½ cup arrowroot starch
¼ cup sweet potato flour
1 package active dry yeast
2/3 to ¾ cup cool water (65 to 70 degrees Fahrenheit)
1 Tb agave syrup

1. In a small bowl, measure out a small amount of the water and then pour in the yeast. Allow it to soften for about 5 minutes before using.

2. In a large bowl, dump in the flours and stir together. Slowly add the softened yeast and agave syrup to the bowl. Then begin to stir, slowly add enough of the rest of the water until the dough is smooth and slightly firm. The dough shouldn’t be loose and runny.

3. Cover the dough and set aside for it to rise at room temperature for 3 to 5 hours.

4. Use right away or store the biga in the refrigerator to retard it overnight.


Rustic Bread*

1 1/3 cup biga
½ cup millet flour
½ cup oat flour
½ cup arrowroot starch
¾ cup sweet potato flour
2 tsp sea salt
1 package active dry yeast
¼ cup almond milk, room temperature
1 Tb agave syrup
1 ½ Tb olive oil
½ cup cool water (65 to 70 degrees Fahrenheit)
Olive oil
Hot water for steaming bowl

1. If the biga has been in the refrigerator, set out for an hour before using. Then measure out the biga into a large bowl.

2. Dump the various flours, salt, and yeast in the bowl. Stir until the yeast is thoroughly mixed throughout.

3. In a large measuring cup, pour in the agave syrup, olive oil and water. Gently stir together and pour into the bowl of dry ingredients. Use the spoon to work the dough together taking care to work the biga into the dough.

4. Cover the dough and set aside to rise for 2 to 4 hours or until the dough is 1 ½ times its original size.

5. Set out 3 pieces of parchment paper and then divide the dough in to 3 equal pieces. Place the individual portions dough into the center of each piece of parchment paper. Shape into a rectangular shape and brush olive oil over the top of the bread. Do not press or squeeze, so that the air remains in the dough. Cover the loaves and allow to rise for 2 hours or until it rises 1 ½ times its original size.

6. Place a pizza stone or bread baking stone on a rack placed into the center of the oven. Place a heat proof bowl on a rack below the baking stone for steaming. When the bread is just about finished rising, preheat the oven to 500 degrees Fahrenheit.

7. Place a loaf on parchment paper on the baking stone. Pour about 2 cups of hot water into the heat proof bowl. Then spritz water over the loaf and the sides of the oven.

8. Bake for 2 minutes. Spritz the oven with water again. Bake for another 5 minutes and then reduce the oven’s heat to 425 degrees Fahrenheit. Bake for 20 minutes until the loaf is a golden brown or sounds hollow when thumped.

9. Cool for 1 hour before cutting and eating.

* I didn't use a binding agent like xanthan gum or chia seed gel for this rustic bread. It's the combination of flours that keeps the bread together. If you alter the flours used in this recipe, make sure to add a binder when you make it. You would use 1 teaspoon xanthan gum or 1 teaspoon chia seed gel. Add both to the dry ingredients and thoroughly mix into the flours.

June 2, 2008

Muffuletta


If you haven't been introduced to a fabulous New Orleans sandwich, the Muffuletta, then read on. The layered sandwich originated at the Central Grocery, a small Italian-American grocery store in the French Quarter of New Orleans. The muffuletta is a delightful meal of a soft light bread filled with a variety of meats, cheeses and a zesty olive salad.

My gluten free version of the muffuletta is based on the recipe from Nola Cuisine. Danno has created a wonderful sandwich that he based on the one from Terry Thompson-Anderson's book, Cajun-Creole Cooking. This recipe makes a fabulous tender loaf of bread that's perfect for letting the filling of a sandwich shine through and a spicy olive salad for the filling.

Since this was one of our favorite sandwiches, my husband and I were thrilled with how it turned out. Our children really enjoyed it, however they weren't as keen on the olive salad. This recipe makes enough for one meal for four people, but don't count on leftovers. My family made sure that every scrumptious bit was devoured, before asking me to make this one again.

Recipes


Muffuletta Bread

1 cup warm water (110 - 115 degrees Fahrenheit)
1 pkg active dry yeast
1 1/2 tsp cane sugar
2 tsp chia seed meal
1/2 cup millet flour
1/2 cup gf oat flour
1/2 cup arrowroot starch
3/4 tsp sea salt
1 Tb vegetable shortening
sesame seeds

Egg Wash
1 egg, beaten
2 Tb cold water

1. In a large bowl, pour in the yeast, sugar and water. Stir and let stand for 30 minutes or until the yeast is bubbly. While the yeast is proofing, cover a cookie sheet with parchment paper.

2. In a medium sized bowl, dump in the flours, chia seed meal, salt and shortening. Using a fork, work the shortening into the flour until it is in small bits.

3. Slowly stir the flour into the yeast until the dough comes together. Then set the dough on the paper covered cookie sheet and shape into a round loaf. Set the cookie sheet in a warm location and allow the bread to rise for 1 1/2 hours.

4. Preheat the oven to 425 degrees Fahrenheit. With a pastry brush cover the egg wash over the top of the loaf. Then sprinkle the top with sesame seeds. Place the cookie sheet in the loaf in the oven and bake for 10 minutes. Reduce the heat to 375 degrees Fahrenheit and cook the loaf for an additional 25 minutes. The bread should be golden brown and sound hollow when tapped.

Substitutions

1. You can substitute 1 1/2 cups gluten free flour blend for the flours in this recipe.

2. You can substitute 1 tsp xanthan or guar gum for the chia seed meal in this recipe.

3. You can substitute agave syrup for the cane sugar in this recipe.


Olive Salad


2/3 cups green olives with garlic, pitted & chopped
1/2 cup Calamatta olives (or black), pitted & chopped
1 cup cauliflower, chopped
2 Tb capers
1/2 cup celery, thinly sliced
1/3 cup carrot, sliced thin
1/3 cup jarred pearl onions, chopped
1/3 cup radish, sliced thin
1 Tb parsley, finely chopped
3 tsp dried oregano
1/4 tsp grains of paradise
2 Tb red wine vinegar
1/2 cup olive oil
1 Tb lemon juice
2 tsp olive brining liquid (from the green olives)
Sea salt & black pepper to taste (salt may not be needed)

1. In a large bowl, dump all the ingredients into the bowl and stir together. Cover the bowl and place in the refrigerator.

2. Allow the salad to sit for at least 3 days before eating. The salad gets better with time.

Substitutions

My version is nightshade free, if you can eat them you can add pepperoncini, 1 tsp crushed red pepper flakes and 1/4 cup pimentos to increase the spiciness of the dish.

Building the Sandwich

1 loaf Muffuletta Bread
Salami
Ham
Mozzarella
Provolone
Olive Salad

1. Slice the loaf in half, using a pastry brush coat each side of the loaf with the olive oil from the olive salad.

2. Layer the meat and cheese on the bottom of the bread. Then top with the olive salad. Put the top on the salad and lightly press down. Slice into quarters or eighths and serve.

March 13, 2008

Irish Soda Farls


Each year for Saint Patrick's Day, I pull out my favorite Irish Soda Bread recipe and start baking. Sometimes, we'll even eat three loaves all before Saint Patrick's Day has even arrived. After so many years of a great baking tradition, why was I contemplating changing things? It all boiled down to a new challenge, the Irish Soda Farl. The farl is a soda bread cooked on a griddle placed either in or on the embers of the kitchen fire, whereas the cake form was cooked in the oven.

Soda bread can be found in a wide variety of versions from white or brown, cake or farl, and treacle or wheaten. Every day soda breads were eaten plain and those served for tea time were made with fruits. Many may know of soda farls as the bread served with the Ulster breakfast, an awe inspiring meal of fried foods.

I was set with a new recipe for a variation on one of my favorite breads. I began baking in a blast of happiness that didn't diminish as my first batch of farls turned out simply gorgeous. Yet all was not well, if the looks on my family's faces were anything to go by. One by one they meandered over to the kitchen trash can and said they were to horrible to save for the birds. I hurried to taste them and was shocked to find my tongue assaulted by the intense flavor of leavening. The writer of the recipe I had chosen used not only soda, but cream of tartar to ensure that the farls would rise to lofty heights. This was more than human taste buds could stand, so off I went in search of another recipe.

Late in the evening, I happened upon the website European Cuisines. They have a history of soda bread, a recipe and a few handy tutorials on YouTube for anyone interested in learning how to make farls. I made a quick note of how much leavening they used in their recipe and was delighted to see a much more tasty quantity. I worked up my gluten free conversion, selected my flours and off I went to try again.

This batch turned out richly colored and very tasty, with just a hint of soda. They were the perfect accompaniment to a breakfast of scrambled eggs and sausage. My husband and I enjoyed how the tang of the soda blended with the creamy flavor of the butter we spread on the farls. Our children, however didn't care for the slight tangy flavor of the bread at all. Which we thought was interesting, because they like sourdough.

Consider sharing a batch of Irish Soda Farls with those with whom you work, volunteer or simply in need of a kind gesture on April 12th, Spread the Bread's World Day of Bread.

Hot and crisp, soda farls are a wonderful way to start the day or to enjoy at a late afternoon tea time.


Recipe

2/3 cup brown rice flour
3/4 cup arrowroot starch
2/3 cup sweet rice flour
1 cup gluten free oat flour
2 tsp chia seed meal
1 tsp sea salt
1 tsp baking soda
1 tsp agave syrup
1 cup + 3 Tb buttermilk, sour milk or soured nut, seed or grain milk*

1. If you are making farls, use a heavy duty griddle or skillet for cooking. If you are making soda cake, then cover a cookie sheet with parchment paper and preheat the oven to 450 degrees Fahrenheit.

2. In a large bowl, dump in all the dry ingredients and stir well so that the soda is evenly distributed. Create a well in the center of the flour mixture.

3. Add the agave syrup to the measuring cup of buttermilk, sour milk or soured non-dairy milk. Stir together.

4. Pour about 3/4 of the milk mixture into the well and begin stirring. The dough should have a dry and slightly ragged appearance. Add the rest of the milk mixture to the bowl (if needed) and stir until the dough looks raggy.


5. Turn the dough out onto a sheet of parchment paper. Dust your hands with flour as you need to and work the dough just until it forms a cohesive ball. For large farls use one ball of dough, for smaller farls divide the ball into two smaller balls. Then press the dough into a circle that is about 1/2 inch high. Cut the circle in half and then cut it into quarters.

6. Preheat the skillet or griddle on medium low heat until a drop of water sizzles. Melt a bit of butter or shortening in the skillet or griddle. Then place the soda farls into the skillet or onto the griddle. Cook each side of the farls for 20 to 30 minutes. You may need to stand the farls on their edge or cut them in half to cook them all the way through. Keep checking the farls to make sure they aren't burning. If they start to burn, turn down the heat on the burner a little. Allow to cool before serving. Makes 4 large farls or 8 small farls.

* How to make soured milk or soured nut/seed/grain milk: Add 1 tsp white vinegar to 1 cup milk or non-dairy milk. If you don't have any white vinegar, then use regular milk or non-dary milk and 1/2 tsp of baking powder.

July 10, 2007

Olive Bread - Gluten, Dairy & Egg Free

A long time food blogger, Karina of Karina's Kitchen: Recipes from a {gluten free} goddess, has been diagnosed with a multitude of food allergies in addition to having Celiac Disease. Gluten Free By The Bay is hosting a Cooking for Karina blogging event so that we can help her with recipes that will encompass not only her need for gluten free food, but also her new food allergies.

For the food event, I chose to make Olive Bread. It is a gluten, dairy and egg free bread filled with black olives, rosemary and minced garlic. I hope she enjoys it.

Recipe

1 cup brown rice flour
3/4 cup sweet rice flour
3/4 cup arrowroot starch
1/2 cup buckwheat flour
1 package dry yeast
1 tsp sea salt
1 Tb dried rosemary
2 tsp minced garlic
1 1/4 cup water, divided
3 Tb agave syrup
4 Tb olive oil
1 Tb agar agar
1/2 cup sliced black olives

1. In a small bowl, pour in the dry yeast and 1/2 cup of warm water (110 degrees F). Allow the yeast to soften.

2. In another small bowl, pour in the agar agar and 1/4 cup of water. Place in the microwave and heat for approximately 30 seconds or until the agar agar becomes a gel.

3. In a large bowl, toss in all the flours, salt and rosemary and stir together.

4. Pour in the yeast and water mixture, the agar agar gel and agave syrup and stir together. Pour in the rest of the water (1/2 cup) and the olive oil and stir. Toss in the garlic and olives, then stir together.

5. Place the dough in a warm location to rise for approximately 2 hours.

6. Scrape the dough into a parchment paper lined 9 x 5 bread pan and allow to rise for 1 hour.

7. Preheat the oven to 400 degrees F. Brush olive oil over the top of the loaf, then bake for 35 minutes. Allow to cool before serving.

How did it taste? Hearty and satisfying. It was wonderful with butter and a glass of red wine.

May 21, 2007

Lemon Chia Seed Bread - Gluten Free

Early in the morning having a slice of a flavorful quick bread and a hot cup of coffee is like a warm hug. I find quick breads to be wonderful comfort foods as they bring back memories of happy times. Lately my husband and I have really enjoyed having a quick bread for breakfast, but we've been wanting a little more variety. I also wanted to use some of my other ingredients to see how they would work out. This is where the idea for Gluten Free Lemon Chia Seed Bread was born.

The ingredients that I wanted to use from my pantry were chia seeds and agave syrup. I have a bag of Chia Seed that I bought from Native Seeds/SEARCH. Chia Seeds are versatile in that they can provide gelling, fiber and Omega-3 oils. I wanted to see if I could substitute chia seed for another binding agent (kudzu powder, agar agar, xanthan gum). Agave syrup can replace sugar in a recipe, plus it is low on the Glycemic Index. It has the added benefit of being metabolized slower by the body. Agave syrup can replace sugar at 3/4 cup to 1 cup of sugar.

I started with my recipe for Lemon Poppy Seed Bread. Then I made my modifications and started my baking tests. The results were beautiful and the aroma...heavenly.

Recipe

1/2 cup brown rice flour
1/2 cup oat flour (Cream Hill Estates)
1/4 cup sweet rice flour
1/4 cup arrowroot starch
1 tsp baking powder
1/2 tsp sea salt
1/4 cup milk
2 Tb lemon juice
2 Tb chia seed
1/2 cup butter, softened
3/4 cup agave syrup
2 eggs, beaten
1 tsp grated lemon peel

1. Preheat the oven to 350 degrees F and line a 9 x 5 inch loaf pan with parchment paper.

2.
In a small bowl, place the milk, lemon juice and chia seed. Allow the mixture to sit as this will give the chia seed a chance to begin gelling.

3.
In a medium sized bowl, place the first six (dry) ingredients and blend.

3. In a mixing bowl put in your softened butter, agave syrup and blend. Add the eggs and grated lemon peel and blend again. Next add the chia seed mixture and blend. Then slowly add the dry ingredients to the bowl. Mix until just blended taking care not to over mix.

4. Pour the batter into the loaf pan and bake for 50 minutes. Then remove the bread and cover with aluminum foil. Return the loaf to the oven and bake for another 15 minutes or until a pick comes out clean. Allow to cool before serving.

What did my family think of Lemon Chia Seed Bread? My son, who is not a fan of lemons, didn't care for the bread at all. My daughter thought it was okay, but she'd rather eat a slice of fresh lemon than eat lemon bread. My husband and I thought it was wonderful. It was moist, flavorful and healthy too. The chia seed gel held the bread together beautifully and it wasn't crumbly. The agave syrup gave the bread a more complex fruity flavor. We thoroughly enjoyed it. This one is a keeper.

What about my test results for substituting chia seeds for another binding agent? Yes, you can use chia seed gel to replace another binder, such as kudzu powder or xanthan gum. The Lemon Chia Seed Bread has a nice texture and stays together when you hold it.

March 10, 2007

Irish Soda Bread - Gluten Free

In honor of Saint Patrick's Day, I worked up a gluten-free version of Irish Soda Bread. My baking efforts began with my copy of "Beard on Bread" by James Beard. I worked on modifying the recipe, whipped it up and then eagerly awaited the results.

It was beautiful coming out of the oven, although the aroma from the bread was rather like baking soda. How did it taste? Well...vile. No second tastings...straight to the compost bin it went. And by the way, don't try brown rice, oat, arrowroot, teff flours and hazelnut meal as a gluten-free flour blend...trust me.

Pondering the flavors lingering in my mouth made me wonder if I ought to start with a different recipe. At Epicurious.com I found a recipe from Bon Appetit, February 2005 issue. The Irish Soda Bread with Raisins recipe was created by Anitra Earle of Yonkers, NY, and it seemed to be perfect base to modify into a gluten free version.

Recipe

2/3 cup rice flour
2/3 cup oat flour
1/3 + 2 Tb sweet rice flour
1/3 + 2 Tb almond meal
2 Tb Turbinado sugar
2 Tb cane sugar
1 1/2 tsp baking powder
1/2 tsp salt
3/4 tsp baking soda
3 Tb butter, chilled
7/8 cup buttermilk or sour milk
1/2 cup raisins
2 tsp kudzu powder, dissolved in buttermilk

Preheat oven to 375 degrees. Line a 6 inch round cake pan with parchment paper. Place all dry ingredients in a bowl and blend. Cut in the butter with a fork until mixture is crumbly. Then add the buttermilk and raisins. Blend. Pour the batter into the cake pan. Bake for 50 minutes or until a pick comes out clean.

How did it turn out? Beautiful and smelled delicious. The bread has a lovely rich taste with a lingering hint of soda. It was perfect with a small swirl of butter. My son liked the bread, but would have preferred it without raisins. Eating it with butter is the only way to go, according to my daughter. My husband didn't have any preferences, he said it was great.

December 21, 2006

Mesquite Pumpkin Bread - Gluten Free

With Christmas only a few days away, I wanted to have some nice gluten-free sweet batter breads around the house for breakfast. Pumpkin Bread is a family favorite and I had a can of organic pumpkin, so the decision was made. Next step was trying to figure out which flours to use in the recipe. While I was contemplating what flours I had in the pantry, I remembered my bag of mesquite flour and realized that the light caramel-like of mesquite would go beautifully with pumpkin.

The basic wheat version of this recipe for Mesquite Pumpkin Bread comes from a church cook book that belonged to my mother. Her dear friend shared this recipe with their church community and now I'll share it with you.

Mesquite Pumpkin Bread

1/3 cup vegetable shortening
1 1/3 cup sugar
2 eggs
1 cup pumpkin (fresh or canned)
2/3 cup brown rice flour
1/3 cup mesquite flour
1/3 cup oat flour
1/3 cup sweet rice flour
1/4 tsp baking powder
1 tsp baking soda
1/4 tsp ground cloves
1/2 tsp cinnamon
1/2 tsp salt
1/3 cup water with 1 1/2 tsp kuzu powder dissolved in it
Optional: 1/2 cup nuts

Preheat the oven to 325 degrees. Line a bread pan with parchment paper. Cream the shortening with the sugar. Then add the eggs and pumpkin. Slowly add the dry ingredients. Bake for 1 hour. Remove and cover with aluminum foil. Return to the oven and bake until a stick comes out clean. Approximately 90 to 120 minutes total baking time for one loaf. Allow to cool before cutting.

Alternative: Divide dough into two parchment paper lined bread pans. Bake at 325 degrees until a test stick or toothpick comes out clean. Approximately 1 hour. (Note: I would make this recipe as two loaves rather than one. It takes a long time for the one loaf version to bake all the way through.)

The bread turned out a warm shade of dark caramel and smelled divine. Just the aroma brought back so many memories of pumpkin pie and holidays. I had just set the bread to cool on the counter, when in comes my son looking for snackage. "Ohhhhhhh," he says when he spies the bread, "I want that for my snack." Out comes the bread knife (actually a cake fork might work better) and away I went fixing up servings for my salivating critics.

The family critics voted this recipe as yummy, to be repeated, and there won't be enough to have for Christmas morning. Not to worry, I told my daughter I'll make some more. By the way, mesquite flour and pumpkin are very good together. Now, where's the cream cheese.....

September 30, 2006

Banana Bread Gluten-Free

Cooler fall weather seems to create cravings for warm quick breads like pumpkin, sweet potato and banana. I had five pretty ripe bananas, so it seemed my kitchen mission was clear. It would be gluten-free banana bread.

I selected my family's favorite wheat based banana bread recipe, which is from a church we belonged to in the early 1960's, as the to modify to be gluten free.


Recipe

1 stick of salted butter
1 cup sugar
1 egg
3 mashed ripe bananas
1 cup brown rice flour
3/4 cup oat flour
1/4 cup + 1 Tb sweet rice flour
1 1/2 tsp kuzu starch
1 Tb water
1 tsp baking soda
1/2 sea salt

Dissolve the kuzu starch in the water. Cream butter and sugar then add the egg. Alternately add flour mixture and mashed bananas and kuzu liquid. Bake in a parchment paper lined loaf pan for approximately 1 hr 15 minutes at 350 degrees. Note: I covered the bread at 50 minutes so it wouldn't get too brown on the top.

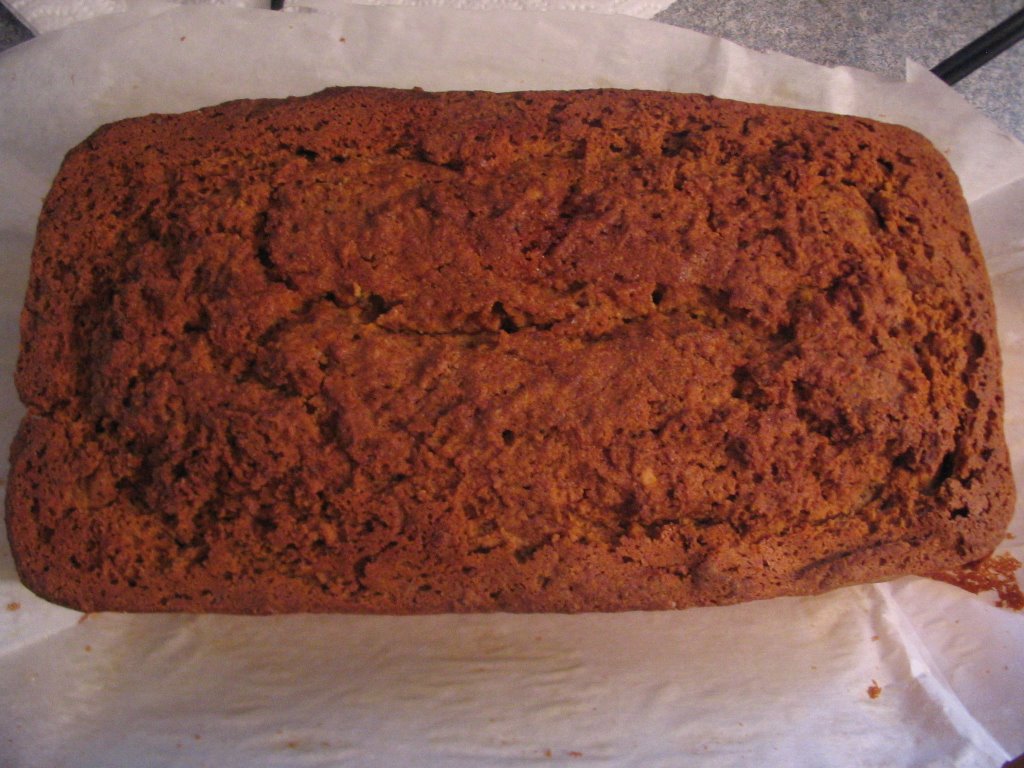
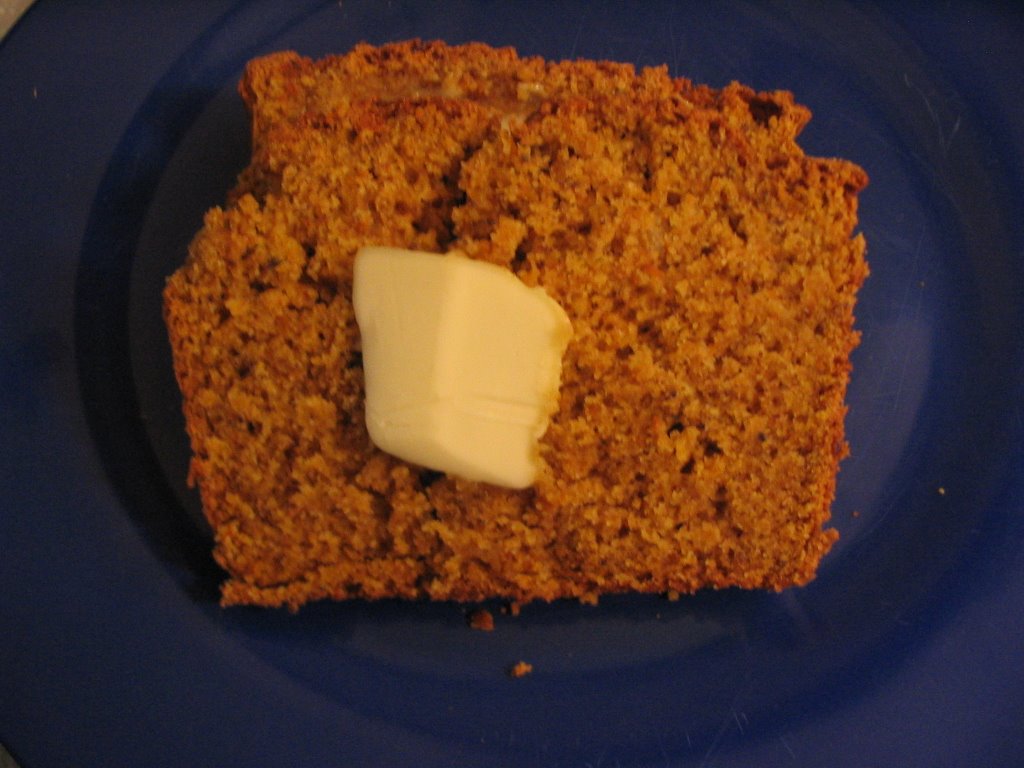
How did this recipe go over with my tough food critics? My husband and the kids loved it and liked that the half slice held up in their hands. They said I could make this recipe again. I liked the way this bread turned out. It's moist and has an excellent banana flavor.

September 20, 2006

Beer Batter Bread Gluten-Free

I had been reading Farmgirl's post on Beer Bread and was fondly remembering eating a yeast version of Beer Bread in years past. Since I had an unopened bottle of Ramapo Valley Gluten-Free Passover Beer in the fridge, I decided to modify Farmgirl's quick version of Beer Bread a try.

The recipe that Farmgirl uses is based on the Beer Bread recipe found at Epicurious.com. I modified her whole wheat version of the bread to make it gluten free. This is what I did:

Recipe

1 cup oat flour
1 cup millet flour
1 cup sorgham flour
1 Tb granulated sugar
1 tsp salt
1 Tb baking powder
14 ounces GF beer or 12 oz beer & 2 oz water
1 1/4 kuzu powder dissolved in the 2 oz of water
Optional Egg Glaze: 1 beaten egg & 2 tsp water

Preheat oven to 350 degrees. Line a 4 x 8 loaf pan with parchment paper. Combine all dry ingredients in a mixing bowl. Add the dissolved kuzu and water to the beer. Then pour both liquids into the dry ingredients. Stir only enough to blend and lumps are okay. The batter will be thick. Pour into parchment lined pan and bake for approximately 1 hour or until a toothpick inserted into the center comes out clean. Remove from oven and allow to cool. Serve warm or at room temperature.

The bread turned out beautifully, although it had too strong of a taste for my kids. They didn't care for it even with butter. The texture was beautiful although slightly crumbly when cut. It still held together enough to take bites out of the slice I covered with cheese. The bread tasted the best with savory companions, such as Emmenthaler cheese or pepperoni. However, it was quite tasty with just butter too.

This bread is better to eat within the first couple of days. After the third day the after taste becomes stronger until it is almost as strong as the aged Emmenthaler cheese.

September 16, 2006

Sweet Potato Bread - Gluten-Free

Fall is almost upon us. I'm finding I have a need for a gluten-free pumpkin bread. These cool mornings have been making me crave a slice of a warm batter bread and a hot cup of hot coffee.

I haven't tried making pumpkin or sweet potato bread since I had a major gluten free baking disaster last year. I was trying to explore beyond the gluten free recipes I'd tried when I first went gluten free and it was a well...a disaster. I tried making gluten free pumpkin bread in my bread maker. Lessons learned from that experiment were that the bread maker cooks too hot, the middle of the batter bread will never cook and the burning food smell will take a week to get out of your house. So, cook batter breads the traditional way...in the oven.

I had a monster of a baked sweet potato sitting in the fridge that looked like it had more than enough flesh to make a loaf of bread. Next, I was off to work on a recipe. Here's how it turned out:

Sweet Potato Bread

6 Tb of melted butter
1 tsp kuzu powder
1 cup of sugar
2 beaten eggs
1 cup cooked and mashed sweet potato or yams
1/4 tsp cloves
1/4 tsp cinnamon
1/2 tsp nutmeg
1/2 tsp salt
1/2 tsp baking soda
1 1/2 tsp baking powder
1 cup millet flour
1/2 cup oat flour
1/2 cup brown rice flour
4 tsp flax meal
1/3 cup milk
Optional: 1/2 cup ground nuts

Preheat oven to 350 degrees. Line a 4 x 8 loaf pan with parchment paper.

Dissolve the kuzu powder in the melted butter. Add the sugar and blend. Then add the beaten eggs and the mashed sweet potato. In another bowl sift together the cloves, salt soda, nutmeg, flours, meal, baking powder and cinnamon. Then slowly add it to the sweet potato mixture. Next slowly add the milk to the mixture.

Pour batter into the loaf pan and bake for 1 hour. Cover and bake until a tooth pick comes out clean. (My bread took 1 hour and 30 minutes to cook all the way through.)

All four of us voted this one a keeper. Unfortunately, there isn't much left to have for breakfast.

June 13, 2006

Montina Almond Bread - Gluten Free

I returned to working on my flour combination for my tastier gluten-free bread. This is a variant on my previous post on Montina rolls, but much better. Even my kids said it had lots of potential - fancy that!!

This variation is not only gluten-free, but dairy-free too. We have a number of food related issues at our house: lactose & soy intolerant, gluten-free and now an allergy to the nightshade vegetables. Some days it feels like I'm learning to cook all over again.

I used homemade almond milk (1 cup Almonds, 2 cups Water, 1 Tb Agave Syrup) in this recipe. Plus I wanted to try using Agar Agar as the binder rather than xanthan gum. Agar Agar contains iodine and has nutritional value unlike xanthan gum. I used Agave Syrup to keep the glycemic index of the bread down and coconut oil for its contribution of medium chain fatty acids.

Here is the variation on the recipe:

1/4 cup Coconut Oil
1 cup Almond Milk
Not quite 1/4 cup Agave Syrup
1 Egg, beaten
1 cup Oat Flour
1/2 cup Montina Flour
1/2 cup Almond Meal
1/4 cup Tapioca Flour
3 Tb Coconut Meal
2 Tb Agar Agar
2 tsp Baking Powder
1/4 tsp Salt
1 package Dry Yeast

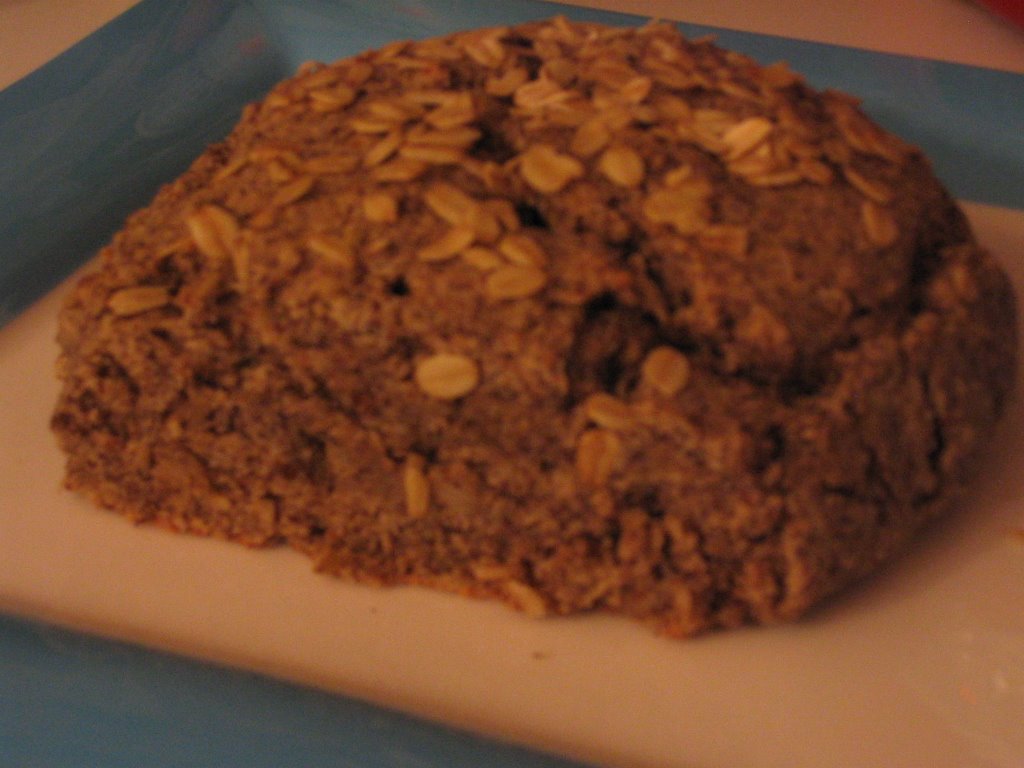
Heat the milk, coconut oil and agar agar until boiling. Cook for three minutes stirring constantly. Then turn down the heat. Add the agave syrup and salt. Stir until dissolved. Turn off the heat and add the yeast. Stir and then allow time for the yeast to begin working. Add the beaten egg and mix together. Then add each of the flours and baking powder and beat until combined. Knead in the bowl for about 3 minutes. Place the batter (it should not be runny) into a parchment lined baking dish. Shape into a loaf and sprinkle the top with whole oats. Place in a warm location to allow it to rise for 1 hour. Bake at 350 degrees for approximately 20 to 30 minutes.

What did we think? Everybody said it was a nice bread, but still a little bland. They want me to try again and beef up the flavor. I agreed with them. How did the agar agar work? It did pretty good. It worked better when the bread wasn't toasted. When toasted the bread was more fragile and broke apart easily.

You can find agar agar in the Asian food section of your grocery store. The brand I purchased by made by Eden Foods.

May 21, 2006

Montina Bread Gluten Free - Try, Try Again

It was time renew my search for a gluten free bread that didn't make me want to chuck it in the garbage. At our house these experiments are called, 'yuck & chuck.' I chose for my bread baking challenge my bag of Montina flour (a gluten free Indian rice grass). A rich grainy flour that has a lot of nutritional value when compared to the traditional rice, tapioca & potato mixture -- not to mention fiber. When I ordered my Montina flour and I also picked up a copy of their recipe book. The book has quite a few gluten free and gluten containing recipes for the adventurous spirit.

I chose as my candidate the Montina Yeast Bread recipe, which won 2nd prize in the Montina Flour competition. I have made this recipe before and it turned out nicely -- so I decided to try substituting brown rice and millet flour for the white rice & tapioca combination. The batter was supposed to get sticky, but never made it. It stayed very liquid -- so I added about another 1/3 cup of millet flour. It didn't help, but I was hesitant to add too much more.

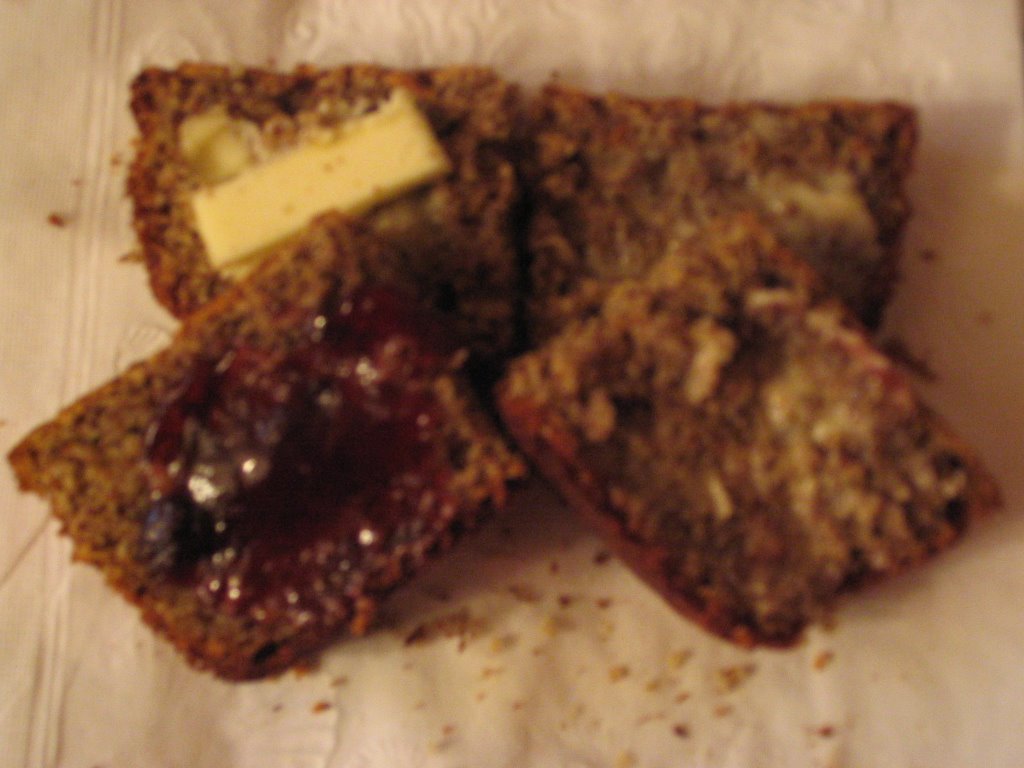
How did it taste? Rather like pumpernickel bread -- dark and intensely flavored. It tasted better with jam and butter rather than just the butter. What did the kids think? After a tiny nibble they put it down and said, 'ick.'

Back to the planning stages and this bread can head out to the compost pile.