December 29, 2007

Maple Chicken with Pears, Wild Rice Pilaf and Acorn Squash


Maple is one of my favorite flavors. I like to nibble on maple sugar treats or chocolate covered maple creams. Drizzle my pancakes with a dark amber swath of the warm syrup and add it to my barbecue marinades.

My neighbors are from Vermont. Each year after they've gone home, they bring us back a jug of maple syrup produced by one of their friends. This is the wonderfully rich and flavorful grade B syrup that sings out a deep maple flavor in your mouth.

I decided to celebrate the flavor of maple syrup without any other spices with this recipe. I baked the maple glazed chicken with fresh Anjou pears. Then I served it with a wild rice pilaf and acorn squash. The recipe for the acorn squash and wild rice pilaf come from OU Kosher where it was contributed by Eileen Goltz.

This recipe is also being submitted to the New Year's Gluten Free Blogging Event. It is being hosted by Ellen of I Am Gluten Free.

Recipe

Maple Glazed Chicken

4 chicken breasts, boneless and skinless
1/4 cup grade B maple syrup
1/2 cup chicken broth
1 Bosc or Anjou pear, cored & sliced lengthwise
olive oil
salt

1. Preheat the oven to 350 degrees Fahrenheit and grease a 7 x 11 baking pan with with olive oil.

2. Place the chicken in the baking dish and sprinkle with salt. Arrange the sliced pears around the chicken.

3. In a small saucepan, pour in the maple syrup and the broth. Bring to a simmer. Then pour the liquid over the chicken and pears.

4. Place the baking dish in to the oven uncovered and bake until the internal temperature of the chicken reaches 170 degrees, approximately 1 to 1 1/2 hours.

What did my family think of the dish? The kids loved the chicken and squash, but they weren't too thrilled with the wild rice pilaf. They didn't really care for the texture of the wild rice. My husband and I thoroughly enjoyed the meal. My husband and I enjoyed the complex herb flavor of the pilaf and thought it went well with the squash and chicken.

December 23, 2007

Chestnut Yule Log - Gluten Free

A December Daring Baker's Challenge

This month's Daring Baker's Challenge for a Yule Log is brought to us by Lis of La Mia Cucina and Ivonne of Cream Puffs In Venice. Yule Log's have a long tradition going back to Scandinavia when a decorated pine log was burned in the family fireplace at Christmas. Then during the late 18th to early 19th century the yule log or "Buche de Noel" was translated into a dessert served during the Christmas season in France.

The Daring Baker's hail from around the world and not all of us celebrate the holidays or Christmas. So Lis and Ivonne wanted our December baking challenge to be about the "sharing of warmth and light...something that we all need in our lives, regardless of race, creed or religion."

I was very excited about this month's baking challenge, since this is one of those holiday desserts that I have missed since being gluten free. While at Whole Foods last week, my daughter and I checked out the pastry counter to see if they would have any gluten free cakes or yule logs for the holidays. My daughter was so saddened to learn that the yule logs and other pastries they had were all made from wheat and we couldn't bring any home. I told her not to worry as I was going to make one of those lovely cakes for us for Christmas. The smile on her face was so delightful...I had made her day.

My version of the Daring Baker's Yule log is based on the classic chestnut flavor that is typically found in the butter cream filling. My cake has chestnut flour, the butter cream filling has chestnut spread in it and the outer log covering is chocolate chestnut butter cream. I used chia seed meal as the binder for the cake. Then I made marzipan mushrooms to decorate the log.

Recipe

This recipe is in 3 parts. First is the recipe for the plain genoise, second the chestnut & chocolate chestnut butter cream and then the marzipan.

Plain Genoise

2 large eggs
2 egg yolks
dash of sea salt
6 Tb cane sugar
1 Tb brown rice flour
1 Tb sweet rice flour
1 Tb arrowroot starch
1 Tb chestnut flour*
2 Tb corn starch
1 Tb chia seed meal

1. Preheat the oven to 400 degrees Fahrenheit and set an oven rack in the middle of the oven. Then line a 11 1/2 in x 7 1/2 in x 1 in pan with parchment paper.

2. Fill a medium sauce pan half full with water and bring it to a simmer.

3. Whisk the eggs, egg yolks, salt and sugar together in the bowl of a heavy-duty mixer. Place over the pan of simmering water and whisk gently until the mixture is lukewarm (100 degrees Fahrenheit). Remove from the pan and return the mixing bowl back to the mixer.

4. Using the whisk attachment, whip on medium-high speed until the egg mixture is cooled and tripled in volume. The egg foam will be thick and will form a slowly dissolving ribbon falling back into the bowl of whipped eggs when the whisk is lifted.

5. While the eggs are whipped, stir together the flours and cornstarch.

6. Sift one-third of the flour mixture over the beaten eggs. Use a rubber spatula to fold in the flour mixture, making sure to scrape all the way to the bottom of the bowl on every pass through the batter to prevent the flour mixture from accumulating there and making lumps. Repeat with another third of the flour mixture and finally with the remainder.

7. Scrape the batter into the prepared pan and smooth the top.

8. Bake the genoise for 10 minutes. Make sure that the cake doesn't overbake and become too dry or it will not roll properly.

9. While the cake is baking, being making the butter cream.

10. Once the cake is done (a tooth pick will come out clean and if you press the cake lightly it will spring back), remove it from the oven and let it cool on a rack.


Chestnut Butter Cream & Chocolate Chestnut Butter Cream:

2 large egg whites
1/2 cup cane sugar
2 sticks butter, softened
1 Tb + 1 tsp chestnut spread**
1 Tb vanilla extract
1 Tb cocoa powder (saved for the second half of the butter cream)

1. Turn the heat back on the pan of water on the cook top. Make sure the water comes to a simmer.

2. Whisk the egg whites and sugar together in the bowl of an electric mixer. Set the bowl over simmering water and whisk gently until the sugar is dissolved and the egg whites are hot.

3. Attach the bowl to the mixer and whip with the whisk on medium speed until cooled. Switch to the paddle attachment and beat the softened butter and continue beating until the butter cream is smooth. Then dump in the chestnut spread and vanilla extract and beat together.

Note: If the butter cream curdles or separated once the vanilla extract and chestnut spread goes in, then remove a quarter of the butter cream and place in a measuring cup or other heat proof bowl. Place into the simmering water and warm until the butter begins to melt a little bit. Return to the mixing bowl and rewhip. It should come back together.

4. After spreading some of the chestnut filling over the genoise, return the mixing bowl to the mixer. Then dump in the cocoa powder and whip into the butter cream. This butter cream will be used for the outside of the yule log.

Filling and Frosting the Log:

1. Lift the genoise out of the pan by the sides of the parchment paper.

2. Cover a cookie sheet with parchment paper and then turn the genoise over (unmolding it from the jelly roll pan onto the parchment paper) and peel away the paper.

3. Spread about half the chestnut butter cream over the genoise.

4. Use the parchment paper to help you roll the cake into a tight cylinder.

5. Transfer the parchment covered cake back to the baking sheet and refrigerate for several hours.

6. Unwrap the cake. With a sharp knife cut off one end on the diagonal.

7. Place the smaller piece of the log on top of the larger log.

8. Cover the log with the chocolate chestnut butter cream, make sure to curve around the piece placed on top as a protruding stump.

9. Streak the butter cream with a fork or a decorating comb to resemble bark.

10. Transfer the log to a platter and decorate with your mushroom or other decorations you've chosen.


Marzipan Mushrooms:

4 oz. almond paste***
1 cup + 1/4 cup powdered sugar
3 Tb agave syrup

1. Combine the almond paste and the powdered sugar in the mixing bowl of an electric mixer. Beat with a paddle attachment on low speed until the sugar is almost absorbed.

2. Add the agave syrup and continue mixing until the marzipan holds together when squeezed.

3. Transfer the marzipan to a work surface and knead until smooth.

4. Roll out small balls of the marzipan for the bases of the mushrooms. Roll the balls into logs.

5. Roll out medium sized balls of the marzipan and for the mushroom tops. Shape each ball over a finger tip to allow for a bowl type shape for the tops.

6. Trim a toothpick into a smaller piece, then push the toothpick into the base of the mushroom. Some of the toothpick should be sticking out above the mushroom base. Place the mushroom top on this piece of the toothpick.

7. Dust the mushroom with cocoa powder.

8. Dust the entire yule log with powdered sugar to simulate snow.

What did my family think of the yule log? They thought it was wonderful and had a nice flavor. My daughter decided that the Yule Log should be a new family tradition for us at Christmas.

* My chestnut flour is from Dowd & Rogers and I have bought it from both Whole Foods and Glutenfree.com.

** My chestnut spread is by Clement Faugier. Privas. I purchased it from Whole Foods.

*** I used Almond Paste from Love'n Bake as it is wheat free. I purchased it from Whole Foods.

December 19, 2007

Tiger Cookies - Gluten Free


Each time I get ready to make any baked goods, there is a standard discussion between my children..."I want chocolate," says my daughter..."No, this time it needs to be vanilla," says my son. And on it goes until the discussion ends in the toss of a coin. Only to return again when I begin to gather my baking ingredients together in the kitchen.

Our Sheltie is the ultimate diplomat. She likes to have a taste of just about anything you are eating. She will delightedly remain at your side enjoying your company and whatever tidbits you choose to share with her. When it comes to flavors, she likes chocolate, vanilla, chocolate and vanilla swirled together. Following her example, I wanted to make a gluten free cookie that would please both of my children at the same time.

I have an old recipe for Tiger Cookies made with melted chocolate chips and corn flakes that I thought had the potential to save us from the flavor discussion. The recipe comes from Christmas Cookies by Oxmoor House that I've had for many years. I've modified the recipe to be gluten free and added flax seed meal as a binder so that the cookies will hold together nicely.

The cookies smelled delicious and maintained their lovely shaped look during baking. In spite of children's dubious glances at the multicolored cookies, their first taste showed them that cookies don't have to be just chocolate or just vanilla. Chocolate and vanilla are very delicious all swirled together.

Recipe

9 Tbs (1 stick + 1 Tb) butter
1/2 cup + 1 Tb cane sugar
1 egg
1/2 tsp vanilla extract
3 tsp flax seed meal
3/4 cup brown rice flour
1/2 cup sweet rice flour
1/2 cup arrowroot starch
1/4 cup corn flour *
1/2 tsp baking soda
1/4 tsp sea salt
1 1/2 cup frosted cornflakes, crushed **
3 oz. semisweet chocolate morsels

1. Preheat the oven to 375 degrees Fahrenheit and line a cookie sheet with parchment paper.

2. In a large mixing bowl, dump in the butter and cream. Beat on medium speed, then plop in the sugar and beat until light and fluffy. Pour in the egg and vanilla extract and continue to beat. Once blended, add the flax seed meal and beat until thoroughly blended. Allow the mixture to sit and rest. This will allow the flax seed meal to begin gelling.

3. In a medium bowl, dump in the flours, baking soda, sea salt and crushed corn flakes. Stir until blended.


4. Slowly pour the dry ingredients into the mixing bowl and beat on medium speed until it makes a collection of large and small blobs of dough.

5. Place the chocolate chips in a measuring cup and melt in the microwave or put them in the top of a double boiler and melt them. Pour the melted chocolate around the top of the dough balls. Using a spoon, lightly stir the chocolate into the dough until it makes multicolored dough balls.

6. Using a spoon, scoop out some cookie dough and place into the palm of your hand. Lightly press the dough together until it makes a nice sized ball (approximately 1 inches in diameter). Then set it on the cookie sheet. Continue in this manner until you have covered your cookie sheet with dough balls with a couple of inches between each ball.

7. Bake for 10-12 minutes at 375 degrees. Remove from the oven and allow to cool before serving. Yield: 2 1/2 dozen cookies.

What did my family think of tiger cookies? We all thought they were delicious. This recipe is now a keeper at our house.

* Corn Flour: You can buy gluten free corn flour from Authentic Foods or from Shiloh Farms carried by the Gluten Free Mall.

** Frosted Corn Flakes: I used Envirokidz Organic Amazon frosted flakes cereal which is gluten free. I purchased my box at my local Whole Foods, but they are also available at Glutenfree.com.

December 18, 2007

Holiday Baking - Gluten Free


Starting with Thanksgiving and going through New Year's Day, we are all planning, shopping and creating dishes to share with friends, co-workers or loved ones.This is a heady time of year when everyone is in the kitchen either eating or cooking.

To help with your plans for holiday cooking, I've highlighted some of my favorite recipes from the blog. The recipes are gluten and soy free, most are nightshade free (tomato, potato, eggplant and peppers), and some are dairy free as well. If you are looking for other recipes that are in my archives, click on the link in the sidebar which reads, Cook's Log.


Breakfast

Sweet Potato Biscuits

Chestnut Coffee Cake with Chocolate Filling

Hazelnut Waffles

Buckwheat Almond Pancakes

Upside Down Pear Pancake

Banana Coconut Macadamia Nut Muffins

Lemon Chia Seed Muffins

Maple Bran Chia Muffins

Applewood Smoked Ham Scones with Maple Butter

Cinnamon Rolls

Cornbread & Stuffing

Cornbread

Cornbread Stuffing

Breads

Buckwheat Brioche

Soups & Stews

Old Fashioned Beef Stew (contains potatoes)

Split Pea Soup

Salads

Kale with Fig & Grape Must Vinaigrette

Orange & Fennel Salad

Vegetables

Red Quinoa Pilaf

Sweet Potatoes with Onions & Rosemary

Desserts

Cola Cake with Cola Frosting

Sweet Potato Cake with Maple Glaze

Coconut Carob Truffles

Buckwheat Chocolate Chip Cookies

Chocolate Chestnut Biscotti

Rolled & Cut-Out Sugar Cookies

Mint Chocolate Cookies

Peanut Butter Oatmeal Sandwich Cookies

Peanut Butter Sauce Pan Cookies

Toll House Kookie Brittle


Happy Holidays to Everyone!

Sheltie Girl

December 16, 2007

Hazelnut Waffles - Gluten & Dairy Free


I have been spending more time in the kitchen over the last few weeks, trying to build up a store of gluten free foods that we can all enjoy for the holidays. One of recipes I've made is for Hazelnut Waffles from Fine Cooking Magazine. This is a gluten and dairy free adaptation of Nicole Rees' recipe and turns out a light waffle that teases your taste buds with flavors of vanilla and hazelnuts. A delightful combination that was pleasing even to the younger members of my family.

Over the last few weeks I've been discussing with a few people about whether or not flax seed will hold together gluten free baked goods and I decided to test this out in the hazelnut waffle recipe.

You: "How are flax seeds going to hold my gluten free cooking together?"

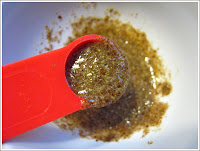
SG: "Flax seeds, like chia seeds or psyllium seeds (plantago), creates a gel when added to liquids. Flax seeds make a soft gel, psyllium seeds make a gel with medium firmness and chia seeds make a firm gel not unlike hair gel."

You: "A gel? How exactly is that going to help?"

SG: "Because the gel that these seeds make can be used instead of xanthan gum, guar gum or gelatin as a binder in gluten free cooking."

You: "How much of the flax seeds would I use to substitute for the xanthan gum?"

SG: "You can substitute 2 teaspoons of flaxseed meal for the xanthan gum called for in your recipe. The picture (above) shows you the type of gel that 1 tsp flax seed meal and 1 tsp water will make. The picture (below) shows you the texture and cohesion of the baked hazelnut waffle."

You: "Did it work?"

SG: "It worked very nicely. It held the waffle together and it wasn't crumbly. In addition, it provides additional nutrients from the flax seed meal."

To keep your waffles crisp once you've made them, place them in the oven on 175 to 200 degrees Fahrenheit on a parchment paper lined cookie sheet or on racks. Then serve with warm maple syrup for a hearty breakfast meal.

Recipe

2/3 cup hazelnut meal*
1 cup brown rice flour
1/3 cup cornstarch
1/3 cup sweet rice flour
1 1/2 tsp baking powder
1/4 tsp baking powder
1/4 tsp + pinch of sea salt
2 large eggs, beaten
3 Tb cane sugar
1 tsp vanilla extract
3 tsp flax seed meal
1 1/2 cup gluten free oat milk**
1/4 cup vegetable shortening, melted
Vegetable oil for the waffle iron

1. In a large bowl, dump in the hazelnut meal, flours, baking powder, baking soda and salt. Stir together.

2. In a large bowl, dump in the eggs and sugar. Beat together and then pour in the vanilla extract and flax seed meal. Stir together and make sure there aren't any lumps. Pour in the oat milk and a little bit of the vegetable shortening. Stir together. Then slowly add the rest of the melted shortening. Continue stirring until combined.

3. Slowly pour the liquid ingredients into the dry ingredient bowl. Stir to combine. Allow the mixture to sit and rest for 15 to 20 minutes before starting the waffles. This will allow the flax seed meal to gel completely.

4. Bake waffles according to your waffle iron instructions. Yield: 4 Belgian style waffles.

What did my family think about the hazelnut waffles? Everyone thoroughly enjoyed them. This recipe is a keeper.


* Hazelnut Meal: I purchased my hazelnut meal from Bob's Red Mill, but you can also make your own.

** Oat Milk: I used 1/2 cup of cooked certified gluten free oats, 1 Tb agave syrup and 2 cups of water. Dump the oats into your food processor and pulse until finely chopped. Then add the agave syrup and pulse. Pour in the water and pulse to blend. Be careful not to pulse too long as the water might/will leak out from under the lid of your food processor and onto the counter. Store oat milk in the refrigerator.

December 12, 2007

Chestnut Coffee Cake with Chocolate Filling - Gluten Free


One of the wonderful things about the holidays is that we always have an abundance of good food to share together. From candy to stuffing, vibrant greens to winter fruits, I try to cook ahead so we have a variety of foods to eat without spending a lot of our family time in the kitchen.

My husband and I used to enjoy having coffee cakes for breakfast on weekends. On Saturday's after sleeping late, we get up and share a cup of coffee and some coffee cake while we read the paper. Then we decide what we were going to do for the day. After our son was born, we had to start taking turns on who got to sleep in on Saturday. When our daughter was born, neither one got to sleep in late, instead there was the late morning nap. Now that the kids are older, they have joined my husband in the Saturday morning sleep in, while the Sheltie and I share the early morning together. She to protect her house and yard from any sleepy eyed jogger going by and I to have a cup of hot spiced Rooibos tea and a slice to warm coffee cake.

This recipe is a gluten free adaptation of the French Chocolate Coffee Cake from Better Homes and Garden's Homemade Bread Cook Book. I used to make this recipe in my gluten eating days and I wanted to have a chance to enjoy it again for the holidays. This recipe is also part of the Holiday Blogging Event for Christmas, Hanukkah and Kwanzaa that is being hosted by the lovely Sally at Aprovechar.

Recipe

Coffee Cake

1/2 cup brown rice flour
1/2 cup chestnut flour*
1/2 cup sweet rice flour
1/2 cup arrowroot starch
2 Tb chia seed meal**
2 pkg. dry active yeast
6 Tb cane sugar
5 Tb water
4 Tb vegetable shortening
2 Tb + 1 1/2 tsp gf oat milk***
1/4 tsp sea salt
2 eggs, beaten

Chocolate Filling

6 Tb semi sweet chocolate chips
2 Tb + 1 1/2 tsp gf oat milk**
1 Tb cane sugar
1/4 tsp ground cinnamon

Topping

1 Tb brown rice flour
1 Tb chestnut flour
2 Tb butter, softened
2 Tb chopped pecans
1/2 tsp ground cinnamon

Equipment Needed: 7" Angel Food Pan (mine is made by Wilton)

Coffee Cake

1. In a large mixing bowl, dump in the flours and the yeast. Stir together.

2. In a small sauce pan warm the sugar, water, butter oat milk and salt until the temperature is between 110 degrees Fahrenheit and 115 degrees Fahrenheit. Stir constantly to melt the butter. If the temperature rises above 115 degrees allow it to cool to 115 degrees at the highest before adding it to the bowl with the flour and yeast.

3. Pour the liquid mixture into the bowl with the flour and yeast, then dump in the beaten eggs. Stir until it makes a soft dough. Cover and allow to rise for 1 1/2 to 2 hours or until doubled. While the dough is rising make the topping and the chocolate filling.

Chocolate Filling

4. In a small saucepan, dump in the chocolate chips, oat milk, sugar and cinnamon. Stirring constantly, warm the mixture until the chocolate chips melt and then allow to cool. While the chocolate filling is cooling and the bread dough is rising, make the topping.

Topping

5. In a small bowl, dump in the flours, sugar, butter, and cinnamon. Using a spoon or fork cut or press in the butter until it is mixed well with the flour, sugar and cinnamon. Pour in the chopped nuts and stir together. Set aside.

Putting It Together
6. Line a 7 inch angel food pan with parchment paper. Pour half of the bread dough into the angel food pan. Using a spatula or spoon, spread the dough around until it covers the bottom of the pan.

7. Spoon the chocolate filling over the bread dough in the pan. Then pour the rest of the bread dough on top of the chocolate filling. Use a spatula or spoon to spread the bread dough evenly over the top of the pan.

8. Sprinkle the topping over the top of the bread dough. Set in a warm place to rise for 1 1/2 hours or until doubled.

9. Bake at 350 degrees Fahrenheit for 30 to 40 minutes or until a pick comes out clean. Allow to cool before removing from the pan.

What did my family think of the chestnut coffee cake with chocolate filling? My children preferred the chocolate filling, but not the bread. My husband and I though it was delightful, and tasted the best when it was served warm. It reminded us both of the Chocolate Babka's that we used to get from Whole Foods.

* Chestnut Flour: I purchased my chestnut flour from Whole Foods, but you can also find it at Glutenfree.com. It's made by Dowd & Rogers.

** Chia Seed Meal: I purchased my chia seeds from Native Seeds/SEARCH. I ground them in my Braun coffee grinder that I use only to grind spices. Chia seed meal will act as a gluten free binder just like chia seed gel (made with chia seed and water).

*** Oat Milk: I used 1/2 cup of cooked certified gluten free oats, 1 Tb agave syrup and 2 cups of water. Dump the oats into your food processor and pulse until finely chopped. Then add the agave syrup and pulse. Pour in the water and pulse to blend. Be careful not to pulse too long as the water might/will leak out from under the lid of your food processor and onto the counter. Store oat milk in the refrigerator.

December 5, 2007

Maple Bran Chia Muffins With Raisins - Gluten Free


One of my favorite muffins, prior to becoming gluten free, was the humble bran muffin. I used to make the bran muffin recipe off the box of the Kellogg's All Bran Cereal. We would enjoy these hearty muffins for breakfast or I would pack them up and take them to work to have for a mid-afternoon snack. They were satisfying enough to keep you going until supper time.

I wanted to add this nourishing and fiber filled quick bread to my list of favorite gluten free foods. It was time for baking and experimenting. Using the recipe from the Kellogg's All Bran box as my source of inspiration, I added my own touches and made it gluten free. Instead of wheat bran, I used rice bran from Bob's Red Mill. I used maple syrup instead of sugar and gluten free oat milk in place of milk. Then I experimented with adding a larger quantity of ground chia meal, not only for it's ability to act as a binder, but for it's healthy Omega-3 oils.

Maple syrup has long been used by the Native Americans for sweetening food. According to an Iroquois legend, Chief Woksis one evening, had set his tomahawk into a maple tree. When he needed it the next day, he removed it and the sap from the tree started flow into a container laying at the base of the tree. Chief Woksis' wife used this watery liquid to cook their meat which then had a sweet maple flavor. Colonists who came to North America followed the Native American tribes example and began to harvest the sap from the maple trees. They made maple sugar and later made maple syrup.

"Native Harvest" by Barrie Kavash, uses maple syrup to sweeten stewed wild cherries and elder blossom fritters. Siksika Boy from the blog, Native American Recipes notes that maple syrup was commonly used in Native American recipes. Siksika Boy has a recipe for Native Holiday Cake that uses maple sugar for the cake and maple syrup in the frosting.

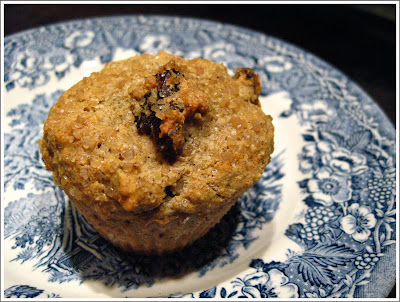
The muffins turned out beautifully. They tasted like the hearty bran muffins I remembered. The chia seed meal added an extra layer of flavor to the muffins and the dough wasn't gummy at all. The chia seed meal experiment was a success.

Recipe

1/2 cup brown rice flour
1/4 cup + 2 Tb sweet rice flour
1/4 cup + 2 Tb arrowroot starch
1/4 cup rice bran
1/4 cup chia seed meal*
1 tsp baking powder
1/2 tsp baking soda
1/8 tsp sea salt
1/3 cup raisins
1/4 cup maple syrup
1/2 cup + 2 Tb oat milk**
1 egg, beaten
2 Tb melted vegetable shortening
Optional: Turbinado sugar or maple sugar to sprinkle over the tops of the muffins

1. Preheat the oven to 350 degrees Fahrenheit and place 1 dozen silicone muffin cups on a cookie sheet.

2. In a medium sized bowl, dump in the flours, chia meal, baking powder, baking soda, raisins and salt. Then stir to blend the ingredients together.

3. In another medium sized bowl, pour in the maple syrup, oat milk, beaten egg and melted shortening. Then stir to combine the liquids.

4. Pour the liquid ingredients into the dry ingredients and quickly stir them together. Stir just until blended.

5. Spoon the batter into the muffin cups, sprinkle with Turbinado sugar or maple sugar and bake at 350 degrees Fahrenheit for 20 minutes. Cool and serve. Makes 1 dozen muffins.

What did my family think of my Maple Bran Chia Muffins? Everyone thought they tasted wonderful. Although they were the best when warmed and served with butter. This one is a keeper.


* Chia Seed Meal: I purchased my chia seeds from Native Seeds/SEARCH. I ground them in my Braun coffee grinder that I use only to grind spices. Chia seed meal will act as a gluten free binder just like chia seed gel (made with chia seed and water).

** Oat Milk: I used 1/2 cup of cooked certified gluten free oats, 1 Tb agave syrup and 2 cups of water. Dump the oats into your food processor and pulse until finely chopped. Then add the agave syrup and pulse. Pour in the water and pulse to blend. Be careful not to pulse too long as the water might/will leak out from under the lid of your food processor and onto the counter. Store oat milk in the refrigerator.

December 3, 2007

Red Quinoa Pilaf - Gluten Free


My vegetable market closed for the season at the end of last week. I took advantage of their last day to stock up on different root vegetables and apples that would store for a while. Plus, I picked up the last of some of my favorite vegetables like leeks, celery, carrots and celeriac.

I wanted to use the last of these wonderful vegetables in a dish my family would enjoy. I chose to make a red quinoa pilaf and use a variety of spices to enhance the dish. I used garlic powder, onion powder, salt, pepper and file powder (also called gumbo file).

File powder is made from ground and dried sassafras leaves. It is similar in aroma to ground sage, although to some it is more like thyme and savory. Our first reference to the use of ground sassafras leaves comes from the Cajun's who arrived in Louisiana from Acadia in the 1600s. They noticed that the Choctaw people used the ground leaves in their cooking. The Cajuns began to use file powder in their cooking and it became a necessary ingredient in making gumbo.

If you'd like to make your own file powder, Nola Cuisine has instructions. Dr. David Reed at Horticultural Department at Texas A&M gives a step by step instructions with pictures on collecting sassafras leaves, drying them and then grinding them for file powder.

Recipe

1 cup red quinoa
2 cups water
1 chopped leek, white & light green parts
1/2 cup chopped celery
1/2 cup chopped carrot
1/2 cup chopped celeriac
1 1/2 tsp sea salt
1/2 tsp black pepper
1/2 tsp garlic powder
1/2 tsp onion powder
1/4 tsp file powder (gumbo file)

1. In a large sauce pan (2 qt), pour in the quinoa, water and salt. Bring the mixture to a boil. Then reduce the heat to a simmer. Cook for about 5 minutes.

2. Add the vegetables, then cover and cook for about another 10 minutes or until the liquid is gone.

3. Dump in the spices and stir together. Serve warm.

What did my family think of my red quinoa pilaf? My husband and I loved it, but the kids weren't so sure about the flavor. Overall they thought it was okay, but this is the first time they had tried file powder. They agreed that they might like it more the next time they tried it.