Showing posts with label Cocoa. Show all posts

November 27, 2009

Cranberry Riesling Cannoli


HAPPY THANKSGIVING!


A Daring Baker's November Challenge


The November 2009 Daring Bakers Challenge was chosen and hosted by Lisa Michele of Parsley, Sage, Desserts and Line Drives. She chose the Italian Pastry, Cannolo (Cannoli is plural), using the cookbooks Lidia’s Italian-American Kitchen by Lidia Matticchio Bastianich and The Sopranos Family Cookbook by Allen Rucker; recipes by Michelle Scicolone, as ingredient/direction guides. She added her own modifications/changes, so the recipe is not 100% verbatim from either book.

Cannoli are known as Italian-American pastries, although the origin of cannoli dates back to Sicily, specifically Palermo, where it was prepared during Carnevale season, and according to lore, as a symbol of fertility. The cannoli is a fried, tube-shaped pastry shell (usually containing wine) filled with a creamy amalgamation of sweetened ricotta cheese, chocolate, candied fruit or zest, and sometimes nuts. Although not traditional, mascarpone cheese is also widely used, and in fact, makes for an even creamier filling when substituted for part of the ricotta, or by itself. However, cannoli can also be filled with pastry creams, mousses, whipped cream, ice cream etc. 

I made my cannoli as an accompaniment to our Thanksgiving dinner. I served turkey, cornbread dressing, roasted potatoes, roasted brussel sprouts and corn. The white wine I served with dinner, is also the same wine I used to make the cannoli. I chose our favorite Riesling-Traminette-Vidal Blanc white wine, called Our Dog Blue from Chateau Morrisette Winery in  Floyd County, Virginia. It's a wonderful wine that goes well with turkey, fish, fruits and cheeses - in other words, perfect for cannoli. 

I hope you enjoy this month's Daring Baker Challenge recipe as much as we did. Happy Thanksgiving from my house to yours.


Equipment:

Cannoli forms/tubes - optional, but recommended if making traditional shaped cannoli.
Deep, heavy saucepan, enough to hold at least 2-3-inches of oil or deep fryer
Deep fat frying thermometer. although the bread cube or bit of dough test will work fine.
Metal tongs
Brass or wire skimmer OR large slotted spoon
Pastry bag with large star or plain tip, but a snipped ziplock bag, butter knife or teaspoon will work fine.
Cooling rack
Paper bags or paper towels
Pastry Brush
Cheesecloth
Sieve or fine wire mesh strainer
Electric Mixer, stand or hand, optional, as mixing the filling with a spoon is fine.
Food Processor or Stand Mixer – also optional, since you can make the dough by hand, although it takes more time.
Rolling pin and/or Pasta roller/machine
Pastry or cutting board
Round cutters - The dough can also be cut into squares and rolled around the cannoli tube prior to frying. If making a stacked cannoli, any shaped cutter is fine, as well as a sharp knife.
Mixing bowl and wooden spoon if mixing filling by hand
Plastic Wrap/Clingfilm
Tea towels or just cloth towels


Lidisano’s Cannoli

Makes 22-24 4-inch cannoli
Prep time:
Dough – 2 hours and 10-20 minutes, including resting time, and depending on whether you do it by hand or machine.
Filling – 5-10 minutes plus chilling time (about 2 hours or more)
Frying – 1-2 minutes per cannoli
Assemble – 20–30 minutes


CANNOLI SHELLS

1/3 cup brown rice flour
1/4 cup arrowroot starch
1/4 cup sweet rice flour
2 Tb almond meal
2 tablespoons(28 grams/1 ounce) sugar
1 teaspoon (5 grams/0.06 ounces) unsweetened baking cocoa powder
1/2 teaspoon (1.15 grams/0.04 ounces) ground cinnamon
1/2 teaspoon (approx. 3 grams/0.11 ounces) salt

1 teaspoon chia seed powder

1/4 teaspoon agar agar powder
3 tablespoons (42 grams/1.5 ounces) vegetable or olive oil
Approximately 1/2 cup (approx. 59 grams/approx. 4 fluid ounces/approx. 125 ml) Riesling wine
1 large egg, separated (you will need the egg white but not the yolk)
Vegetable or any neutral oil for frying – about 2 quarts (8 cups/approx. 2 litres)
1/2 cup (approx. 62 grams/2 ounces) toasted, chopped pistachio nuts, mini chocolate chips/grated chocolate and/or candied or plain zests, fruits etc.. for garnish
Confectioners' sugar


CANNOLI FILLING
2 lbs (approx. 3.5 cups/approx. 1 kg/32 ounces) ricotta cheese, drained
1 2/3 cups cup (160 grams/6 ounces) confectioner’s sugar, sifted

1/4 - 1/3 cup Riesling wine


Optional:
3 tablespoons (approx. 28 grams/approx. 1 ounce) finely chopped good quality chocolate of your choice
2 tablespoons (12 grams/0.42 ounces) of finely chopped, candied orange peel, or the grated zest of one small to medium orange
3 tablespoons (23 grams/0.81 ounce) toasted, finely chopped pistachios


Note - If you want chocolate ricotta filling, add a few tablespoons of dark, unsweetened cocoa powder to the above recipe, and thin it out with a few drops of warm water if too thick to pipe.


CRANBERRY ORANGE RIESLING TOPPING


1 - 8 oz package frozen cranberries
1 tangerine, peeled & diced
1/4 cup pecans, roughly chopped

1/2 cup cane sugar
1/4 cup Riesling wine

DIRECTIONS CRANBERRY TOPPING


Place the cranberries, tangerine, pecans, sugar and wine into a small saucepan. Heat the sauce until it comes to a simmer. Cook until the cranberries have popped and the sauce has thickened.


DIRECTIONS FOR SHELLS

1. In the bowl of an electric stand mixer or food processor, combine the flour, sugar, cocoa, cinnamon, and salt. Stir in the oil, vinegar, and enough of the wine to make a soft dough. Turn the dough out onto a lightly floured surface and knead until smooth and well blended, about 2 minutes. Shape the dough into a ball. Cover with plastic wrap and let rest in the fridge from 2 hours to overnight.


2. Cut the dough into two pieces. Keep the remaining dough covered while you work. Lightly flour a large cutting or pastry board and roll the dough until super thin, about 1/16 to 1/8” thick (An area of about 13 inches by 18 inches should give you that). Cut out 3 to 5-inch circles (3-inch – small/medium; 4-inch – medium/large; 5-inch;- large. Your choice). Roll the cut out circle into an oval, rolling it larger and thinner if it’s shrunk a little.


3. Oil the outside of the cannoli tubes (You only have to do this once, as the oil from the deep fry will keep them well, uhh, oiled..lol). Roll a dough oval from the long side (If square, position like a diamond, and place tube/form on the corner closest to you, then roll) around each tube/form and dab a little egg white on the dough where the edges overlap. (Avoid getting egg white on the tube, or the pastry will stick to it.) Press well to seal. Set aside to let the egg white seal dry a little.


4. In a deep heavy saucepan, pour enough oil to reach a depth of 3 inches, or if using an electric deep-fryer, follow the manufacturer's directions. Heat the oil to 375°F (190 °C) on a deep fry thermometer, or until a small piece of the dough or bread cube placed in the oil sizzles and browns in 1 minute. Have ready a tray or sheet pan lined with paper towels or paper bags.


5. Carefully lower a few of the cannoli tubes into the hot oil. Do not crowd the pan. Fry the shells until golden, about 1 minutes, turning them so that they brown evenly.


6. Lift a cannoli tube with a wire skimmer or large slotted spoon, out of the oil. Using tongs, grasp the cannoli tube at one end. Very carefully remove the cannoli tube with the open sides straight up and down so that the oil flows back into the pan. Place the tube on paper towels or bags to drain. Repeat with the remaining tubes. While they are still hot, grasp the tubes with a potholder and pull the cannoli shells off the tubes with a pair of tongs, or with your hand protected by an oven mitt or towel. Let the shells cool completely on the paper towels. Place shells on cooling rack until ready to fill.


7. Repeat making and frying the shells with the remaining dough. If you are reusing the cannoli tubes, let them cool before wrapping them in the dough.


For stacked cannoli:

1. Heat 2-inches of oil in a saucepan or deep sauté pan, to 350-375°F (176 - 190 °C).


2. Cut out desired shapes with cutters or a sharp knife. Deep fry until golden brown and blistered on each side, about 1 – 2 minutes. Remove from oil with wire skimmer or large slotted spoon, then place on paper towels or bags until dry and grease free. If they balloon up in the hot oil, dock them lightly prior to frying. Place on cooling rack until ready to stack with filling.


DIRECTIONS FOR FILLING:

1. Line a strainer with cheesecloth. Place the ricotta in the strainer over a bowl, and cover with plastic wrap and a towel. Weight it down with a heavy can, and let the ricotta drain in the refrigerator for several hours to overnight.


2. In a bowl with electric mixer, beat ricotta until smooth and creamy. Beat in confectioner’s sugar, cinnamon, vanilla and blend until smooth. Transfer to another bowl and stir in chocolate, zest and nuts. Chill until firm. (The filling can be made up to 24 hours prior to filling the shells. Just cover and keep refrigerated).


ASSEMBLE THE CANNOLI:

1. When ready to serve..fill a pastry bag fitted with a 1/2-inch plain or star tip, or a ziplock bag, with the ricotta cream. If using a ziplock bag, cut about 1/2 inch off one corner. Insert the tip in the cannoli shell and squeeze gently until the shell is half filled. Turn the shell and fill the other side. You can also use a teaspoon to do this, although it’s messier and will take longer.

2. Press or dip cannoli in chopped pistachios, grated chocolate/mini chocolate chips, candied fruit or zest into the cream at each end. Dust with confectioner’s sugar and/or drizzles of melted chocolate if desired.

May 5, 2009

Black Bean Millet Pullman Loaf with Caraway Seeds (B&P-9)


Baking & Pastry Project #9 - Black Bean Millet Pullman Loaf with Caraway Seeds


Each loaf I've made while working on the Baking & Pastry Project has been a learning experience. The Rye Dough with Caraway Seeds for a Pullman Loaf (pg. 135) turned out to be a bit of a journey and ended up taking me a few trys to get right.

This loaf was originally made of bread flour (14.58 g protein per 100 g flour) and a medium rye flour (5 g of protein per 100 g flour). My millet flour blend replaced the bread flour and had 13.98 g of protein per 100 g of flour. While the sorghum, black bean and cocoa blend with 5.8 g protein per 100 g of flour replaced the rye flour.

My original plan was based around using a gluten free rye seasoning that I located. I selected milder flours with the thought that the rye seasoning would carry the flavor load. This was all fine and good except for the fatal flaw in my plan...I hadn't yet checked out the rye seasoning. When I did, I was blasted with an acidic aroma more suited to drain cleaner than a food seasoning. Thinking it was because the bottle had been sealed for a while, I let the bottle air before checking it out again. It wasn't expired and it had been sealed, so I was left with thoughts about better uses for this powder rather than seasoning. Hmmm...replacement for smelling salts...

This led to me a great and merry chase through my pantry experimenting with flour flavor combinations. Some combinations were good up until you added the caraway seeds, others went straight into the trash can (i.e. don't use carob), while a couple made it to the test loaf stage. The winner ended up have a larger variety of flours than I thought it would. Plus, the dough did taste a little more of beans, stronger than I thought it would have since I only used 10 grams of black bean flour. I wanted the dough to have a stronger taste, so I didn't add any extra sweetener to remove the slightly bitter edge it had.

The loaf turned out with a dense crumb typical of a pullman loaf and a fabulous rye-like taste. After tasting the sample that I gave him, my husband grabbed one of the mini loaves and glass of La Vendimia (a Spanish red wine). Then he settled in on a bar stool at the kitchen counter for an after work snack. I joined him after cutting some Cotswold cheese with chives and setting out the jar of dark mustard.

At the end of this journey, I was delighted to discover that I didn't have to rely on a jar of seasoning to create a loaf of bread with a rye-like taste. It was possible to do with the right combination of flours, molasses and some caraway seeds.

Recipe
Yield: 5 mini pullman loaves
Protein content per flour follows in parenthesis

2.1 Tb/30 g brown rice flour (2.7 g)
2.1 Tb/30 g sweet rice flour (1.8 g)
2.1 Tb/30 g sweet potato flour (0.63 g)
4.6 Tb/66 g millet (7.59 g)
1.2 tsp/6 g chia seed meal (1.26 g)
_____
2.1 tsp/10 g black bean flour (2.4 g)
2.4 Tb/35 g sorghum flour (2.45 g)
1 tsp/5 g cocoa powder (0.95 g)
.4 tsp/2 g agar agar powder
2.1 tsp/10 g instant dry yeast
.8 tsp/4 g cane sugar
1 tsp/5 g sea salt
.4 tsp/2 g caraway seeds
.58 cup/138 ml water
.8 tsp/4 g vegetable shortening, softened
.8 tsp/4 g molasses

1. In a large bowl combine all the dry ingredients and blend. Add the wet ingredients and stir into a cohesive dough.

2. On a sheet of parchment paper sprinkle some sweet rice flour and then set the ball of dough on it. Shape into an oblong loaf and then set into a parchment paper lined mini loaf pan. Set aside and allow to rise for 1 hour and then cover with a sheet of parchment paper and a baking sheet. Weigh down the top baking sheet with either foil covered bricks or rocks, a cast iron pan or a ceramic pie plate.

3. Preheat the oven to 400 degrees F/204 degrees C. Place the loaf pan with the top sheet onto a baking sheet and then set it in the oven. Set the weight on top of the baking sheet. Then bake for 40 minutes. Remove from the oven and allow to completely cool before serving.


Notes:

Flours & Binding Agents: Authentic Foods, Barry Farm, Bob's Red Mill


Instant Dry Yeast: Barry Farm


Other Baking & Pastry Project Posts

Baking & Pastry Project #8 - Whole Grain Pullman Loaf
Baking & Pastry Project #7 - Pain de Mie
Baking & Pastry Project Week 4
Baking & Pastry Project #6 - Grissini
Baking & Pastry Project #5 - Soft Rolls
Baking & Pastry Project Week 3
Baking & Pastry Project #4 - Rosemary Bread
Baking & Pastry Project #3 - Whole Grain Bread
Baking & Pastry Project Week 2

April 30, 2009

Cocoa Chia Whole Grain Pullman Bread (B&P-8)


Baking & Pastry Project #8 - Cocoa Chia Whole Grain Pullman Loaf

The last loaf for this week is the Whole Grain Pullman Loaf (page 134) from the Baking & Pastry Project. I received the Culinary Institute of America's Baking & Pastry book and all their learning DVDs for my birthday. This began my quest to bake my way through the Baking & Pastry book one recipe at a time and all gluten free. This dough is baked in a pullman loaf pan or a regular loaf pan with using a baking sheet for a top and something to weigh down the top like a foil wrapped brick or even a cast iron pan.

When I was getting prepared for the project, I worked up a list of the protein contents of all the flours. One of the flours that made me curious was cocoa. It has a fairly high protein content (19.70 g per 100 g flour) and quite a bit of fiber (33.7 g per 100 g). In addition, each cup has 11 percent calcium and 66 percent iron. This amount of protein is comparable to the bean flours. By comparison carob, a substitute for cocoa, only has 4.85 g protein per 100 g of flour. However, it has 39.8 g fiber (per 100 g) and each cup has 36 percent calcium and 17 percent iron. As a flour it worked out nicely in the dough, although it did I did need to add agave syrup to the dough to help take the bitter edge off the unsweetened cocoa and the Job's tears flour.

This dough turned out a lovely pullman loaf that sliced easily into sandwich slices. Each bite had a dense cocoa flavor that tasted heavely when served warm and slathered with butter. My husband and I thoroughly enjoyed this loaf, although our kids wanted it to be sweeter more like a sweet bread.


Recipe

2.8 Tb/40 g brown rice flour (3.6 g)
2.8 Tb/40 g sweet rice flour (2.4 g)
2.8 Tb/40 g arrowroot starch (0.3 g)
3.1 Tb/45 g Job's tears flour (4.5 g)
6.6 Tb/95 g chia seed meal (19.95 g)
2.5 Tb/37 g Montina flour (2.59 g)
___
2.8 Tb/40 g cocoa powder (7.6 g)
4.7 Tb/67 g teff flour, ivory (7.3 g)
1.4 Tb/20 g Job's tears flour (2 g)
1.6 Tb/24 g instant dry yeast
2.5/12 g cane sugar
1.8 tsp/9 g sea salt
1.5 cups/354 ml whole milk, warm
3.3 Tb/48 g vegetable shortening, softened
1.6 Tb/25 ml agave syrup

1. In a large bowl combine all the dry ingredients and blend. Add the wet ingredients and stir into a cohesive dough.

2. On a sheet of parchment paper sprinkle some sweet rice flour and then set the ball of dough on it. Shape into an oblong loaf and then set into the loaf pan. Set aside and allow to rise for 1
hour and then cover with a sheet of parchment paper and a baking sheet. Weigh down the top baking sheet with either foil covered bricks or rocks, even a cast iron.

3. Preheat the oven to 400 degrees F/204 degrees C. Place the loaf pan with the top sheet onto a baking sheet and then set it in the oven. Set the weight on top of the baking sheet. Then bake for 50 minutes to 1 hour. Remove from the oven and allow to completely cool before serving.

Notes:

Flours & Binding Agents: Authentic Foods, Barry Farm, Bob's Red Mill

Job's Tears (Yimi or Hato Mugi): Amazon.com, Gold Mine Natural Foods

Instant Dry Yeast: Barry Farm


Other Baking & Pastry Project Posts

Baking & Pastry Project #7 - Pain de Mie
Baking & Pastry Project Week 4
Baking & Pastry Project #6 - Grissini
Baking & Pastry Project #5 - Soft Rolls
Baking & Pastry Project Week 3
Baking & Pastry Project #4 - Rosemary Bread
Baking & Pastry Project #3 - Whole Grain Bread
Baking & Pastry Project Week 2
Baking & Pastry Project #2 - Bagels
Baking & Pastry Project #1 - Lean White Bread
Baking & Pastry Project - Week 1

February 11, 2008

Chocolate Chestnut Doughnuts


My children have been asking me for quite some time to try my hand at making doughnuts. I have to admit, I've been resisting their requests. I was feeling pretty rusty with my frying skills and the fried ravioli appetizer that went horribly wrong popped vividly into my mind (think smoke, burning food, panicked dog, crying toddler). However, my children are quite persistent and have developed some wicked negotiating skills. It wasn't long before I was relenting under the combined weight of their arguments.

With my fate sealed, I chose the Old Fashioned Chocolate Doughnut recipe from my Fanny Farmer cookbook. I was just praying that Fanny's recipe would save the day. Loaded with cocoa powder and relying on baking powder to give them a bit of loft, this sounded like something that could work for my first foray into making gluten free doughnuts. Then I selected a Creamy Chocolate Frosting and a Vanilla Glaze recipe to finish off these delectable little delights.

Doughnut frying novice that I am, I managed to burn the first batch of doughnuts. Thankfully, it was easy to modify my timing on flipping the doughnuts over and the following batches were saved from having a dense carbon coating. After they drained and cooled down, I dipped half of the doughnuts into a boiled chocolate frosting and the rest into a light vanilla glaze.

I was pretty pleased with myself on Saturday morning, decked out in my apron and pajamas, eating my own gluten free chocolate doughnuts. They had a dense cocoa flavor that wasn't too sweet. The texture was like cake and held together nicely in your hand without falling apart. My husband and I thought they were pretty good, although my children would have preferred a sweeter doughnut. Their favorite part was the much sweeter chocolate frosting.

This recipe is being submitted to Tartelette & Peabody's Time to Make the Doughnuts Baking Event. Stop by their sites after February 12th to see a round up of all the submissions.

Recipe

Doughnuts

1/2 cup almond milk
1/2 cup cane sugar or 1/3 cup agave syrup
1 egg, beaten
1 Tb melted butter or vegetable shortening
3 tsp baking powder
pinch nutmeg
1/2 tsp sea salt
1/2 cup cocoa powder
2 tsp chia seed meal
1/2 cup brown rice flour
1/2 cup chestnut flour
1/2 cup arrowroot starch
1/4 cup sweet rice flour

1. In a large bowl, dump in all the dry ingredients and stir together.

2. In a medium bowl, pour in the almond milk, agave syrup (if you are using it instead of cane sugar), butter and egg. Stir together.

3. Pour the liquid ingredients slowly into the large bowl holding the dry ingredients. Then stir together. If the mixture is too dry, add one tablespoon full of almond milk at a time until the dough is the right consistency. It should hold together and stay together when rolled into a ball.

4. Divide the dough in half and place one part on a piece of parchment paper. Cover the dough with another piece of parchment paper and roll out until the dough is about 1/2 inch thick. Place the rolled dough sandwiched in between the parchment paper in the refrigerator to cool for at least 1 hour.

5. Remove the dough from the refrigerator and using the cutter press out the doughnuts. Make sure to save the centers, so you can make doughnut holes. Place the cut doughnuts and holes on a parchment paper lined cookie sheet. Continue until you have cut doughnuts out of all the dough.

6. In a heavy sauce pan pour in enough oil so that it is at least 1 to 2 inches deep. (I used my electric wok to fry the doughnuts.) Place your frying thermometer on the side of the pan and bring up the temperature of the oil until it reaches 360 degrees Fahrenheit.

7. Fry 3 to 4 of the doughnuts at a time. Use a chopstick to flip them over to cook the other side. Keep an eye on them as they cook quickly and will burn if left on one side too long. Use a slotted spoon or a spider to remove the doughnuts from the oil. Place them on a paper towel lined pan to drain. Allow to cool fully before frosting.

8. Dip one side of the doughnuts into the chocolate frosting and set on a parchment paper lined pan to dry. For the glazed doughnuts, dip one side into the mixture and then flip them over. Use chopsticks to stand up the doughnut to roll the side of the doughnut through the glaze. Set the glazed doughnut on the parchment paper to dry.


Chocolate Frosting


2 ounces semi sweet chocolate grated
1 cup cane sugar
3 Tb cornstarch
1 Tb butter
1 tsp vanilla extract
1/8 tsp sea salt
1 cup water

1. In a medium bowl, dump in the sugar and cornstarch.

2. In a heavy bottomed sauce pan, bring the water to a boil. Once it is boiling, dump in the chocolate and stir. Then pour in the sugar and the cornstarch. Constantly stir the mixture over the heat until it is thick and smooth. Then remove the pan from the heat.

3. Dump in the butter, vanilla and salt and beat well.


Vanilla Glaze

1/3 cup powdered sugar
1 Tb water
1/2 tsp vanilla extract

1. In a small bowl, dump in the powdered sugar, water and vanilla extract. Stir together and using the back of the spoon press out any of powdered sugar that is still clumped together.

2. Once the mixture is smooth it is ready for the doughnuts.

June 30, 2007

Cola Cake - Gluten Free

Happy Fourth of July!

My family was together last week at my parent’s beach house. They have a home that is made for sharing family time. The type of house that is happier the more people it has in it and positively elated when filled with children squealing and laughing as they play hide and seek.

Their kitchen has enough space that we can all work at the counters together. Building memories and creating nourishment for our bodies. When we’re done we pile up at the long kitchen table to eat and share stories.

We crank up the grill for hamburgers, hot dogs and the Red Snapper a friend caught in the Gulf of Mexico the day before. Then we talk about going to the beach and what type of ice cream we bought to cool us down. The talk moves to what type of dessert we’re going to have with our ice cream and I’m nominated to do the baking as the one gluten-free member of the family. I decide on a Southern classic, the Cola Cake which makes the all the kids scream with laughter. “You can make a cake with a cola?” they cry. The adults all talk at once and agree that it’s the right dessert since none of us has had one in years.

My source of inspiration was the Coca Cola Cake recipe from Southern Living Magazine. I made my modifications to the recipe and selected which gluten free flours I was going to use. For the Cola Cake, you can use any cola from Boylan's Natural Cane Cola to the more traditional Coca Cola.

I chose to use kudzu (kuzu) powder as my binding agent. Normally, I create a slurry with one tablespoon of liquid to one tablespoon of crushed kudzu powder. This time I gelled the kuzu slurry by putting it in the microwave for ten seconds. The kuzu gel was still soft enough to be mashed and worked into cream.

As I’m working on the cake batter the children crowd around the countertop to check on my progress. Amazed at the way the cola and baking soda bubble together, just like their volcano experiments. Laughing they ask for my left over cola and take the greatest care in dividing it so each of them can have a little.


Recipe

Cola Cake

1/2 cup brown rice flour
1/2 cup buckwheat flour
1/2 cup sweet rice flour
1/2 cup arrowroot starch
1 tsp baking soda
1/4 cup + 1 Tb cocoa powder
1 cup cane sugar
3/4 cup Turbinado sugar
1 Tb crushed kudzu powder
1 cup Cola
1/2 cup sour milk or buttermilk
1 cup butter, softened
2 large eggs, beaten
2 tsp vanilla extract

Cola Frosting

1/2 cup butter
1/3 cup Cola
3 Tb cocoa powder
16 0z (1 lb) powdered sugar
1 Tb vanilla extract
Optional: 1/2 cup chopped pecans for topping

Cola Cake

1. Preheat the oven to 350 degrees F. Line a 9 x 13 inch pan with parchment paper, so that the bottom and sides are covered.

2. Measure out ½ cup of milk and pour in 1 ½ tsp of white vinegar to make the sour milk. Allow the sour milk to sit until needed later. Remove 2 Tb of the sour milk and pour it into a small bowl with the 1 Tb of kudzu powder. Stir the kudzu and sour milk together. Then place the small bowl into the microwave for 10 seconds or until a soft gel forms. Remove from the microwave and stir the gel until it has a soft creamy consistency. Set the kudzu gel to one side until it is needed later.

3. In a medium sized bowl, dump in all the flours, soda, and cocoa powder. Stir together.

4. Plop the butter into a mixing bowl and beat on medium speed until the butter is soft and creamy. Add the cane and Turbinado sugar and mix well. Then pour in the vanilla extract and dump in the eggs. Mix on low speed until combined with the butter and sugar.

5. Alternate between the dry ingredients and sour milk until the both are added to the mixing bowl using low speed. Plop in the kudzu gel and mix together. Slowly add the cola to the mixture and beat at low speed until it is just mixed together.

6. Pour the cake batter into the 9x13 inch pan and bake at 350 degrees F for 45 to 50 minutes or until a toothpick comes out clean. Remove from the oven and allow it to cool before icing.

7. Turn the cake out on to a cake plate or cookie sheet and peel off the parchment paper. Then frost with the Cola Frosting.

Cola Frosting

1. Plop the butter in to a mixing bowl and beat on medium speed until the butter is soft and creamy.

2. In a medium sized bowl, dump in the powdered sugar and cocoa powder and stir together.

3. Alternating between the sugar mixture and the cola, add them to the butter mixing them together using low speed. Add the vanilla extract and mix on low speed.

4. Spread the frosting evenly over the Cola Cake and sprinkle with pecans if desired.

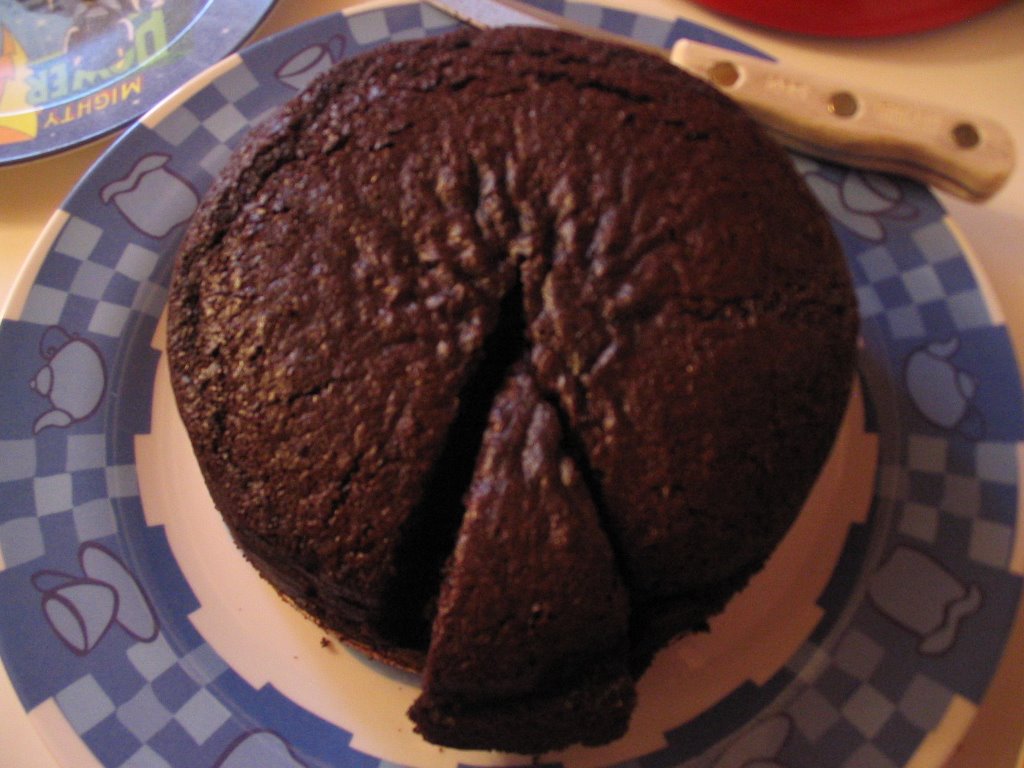
What did my extended family think of my gluten free Cola Cake? The cake received eight votes for being very delicious and something they would want to eat again. It had one vote for liking the cake, but not the icing from my son. My daughter rounded up the voting with two thumbs down for for the whole cake. She preferred mint chocolate chip ice cream.

The cake had a nice texture that was slightly firm and held together when it was broken off with your fork. For nibbling, it stayed together when you were holding in between your fingers.

March 21, 2007

Chocolate Chestnut Cake - Gluten Free

My daughter is turning eight and I've been gearing up for the big event. The birthday party with party favors and the all important birthday cake. For my children, their cake is thought about and planned months ahead of time.

What shape shall my daughter challenge me with this year? I've done the space shuttle, G.I. Joe strategically placed behind a tree, Spirit and Rain (from the movie, Spirit), a fairy garden, a knight's castle and many others. When I asked my daughter what she wanted her cake to be like, she said a dolphin. Okay, I can do it...however I need a recipe for the cake first.

Pen in hand and my lovely sheltie note paper in front of me, I got to work on a draft recipe. I consulted a couple of recipe books for more information on leavening agents (The Cake Bible by Rose Levy Beranbaum and the Fanny Farmer Cookbook). The Cake Bible has a "Special Section" that discusses the various leavening agents, liquids, and cocoa versus chocolate in cakes. Then I double checked my choices and made recipe #1. After the taste test, I went back to Rose's book to read more. Recipe #2 was crafted, baked and was promptly deemed in need of work by my trusty crew of taste testers.

I tweaked the recipe again and while it baked, we watched a movie. All of us patiently waiting for the all important taste test. When the timer went off, I pulled the cake out of the oven and the aroma was simply lovely.

Recipe

2/3 cup brown rice flour
1/3 cup chestnut flour
1/4 cup arrowroot starch
1/4 cup sweet rice flour
1/2 cup + 1 Tb buttermilk or sour milk*
1/4 cup +1 Tb cocoa powder
2/3 cup cane sugar
1 tsp vanilla
1/2 tsp salt
1/2 tsp baking powder
2 tsp kudzu/kuzu powder, dissolved in 1 Tb of buttermilk
2 eggs, beaten
1 stick butter, softened

*To make sour milk - add 1 1/2 tsp of white vinegar to a 1/2 cup of milk or cream

Preheat oven to 350 degrees. Line a 6" spring form pan with parchment paper.

Place the softened butter into the bowl of your mixer and beat until fluffy. Add the sugar and vanilla and blend. Slowly add the eggs, buttermilk and the dissolved kudzu and blend. In a separate bowl, place all of the dry ingredients and mix. Then slowly add the dry ingredients to the mixing bowl. Scrape down the sides and blend again. Pour the cake batter into the parchment paper lined spring form pan. Bake for 1 hour 20 minutes or until a bamboo skewer comes out clean.

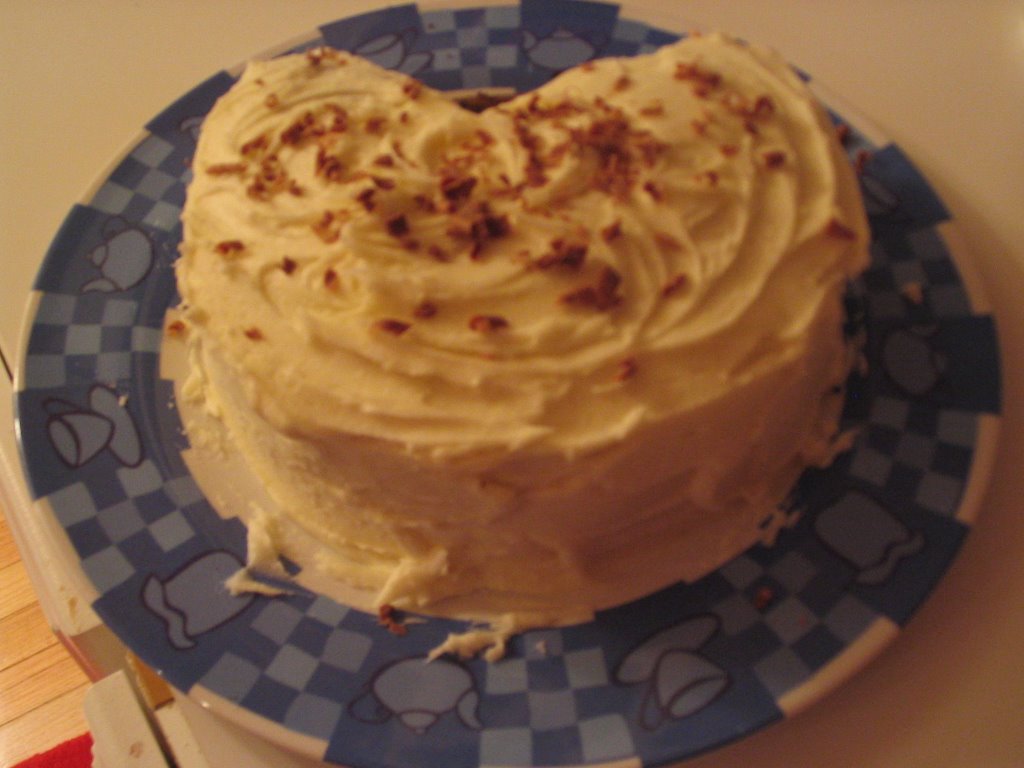
The cake came out beautifully. I topped it off with a sprinkling of powdered sugar. How did it taste? My son and I thought it was wonderful. My daughter wasn't so thrilled with the powdered sugar, but she thought the cake tasted pretty good.

Now, to plan out that dolphin....

If you'd like to learn more about Rose Levy Beranbaum, visit her websites, www.realbakingwithrose.com and www.thecakebible.com.

February 26, 2007

Chocolate Chestnut Biscotti - Gluten-Free

The challenge I set for myself was to create a decadent gluten-free chocolate chestnut biscotti that was reminiscent of the ones I used to eat. Plus, I needed a recipe that didn't contain xanthan gum...which I have had to eliminate from my gluten free diet.

Back during the days when I could eat gluten, one of the things I really enjoyed was dipping crispy biscotti into a hot cup of coffee with cream. The flavors would melt in your mouth and the indulgence was divine. My husband and I would to go to a local coffee shop and indulge in coffee and biscotti while we sat outside and watch people go by.

Some of my local favorites came from Whole Foods. They sold a wonderful intense chocolate variety and an almond biscotti with the most heavenly aroma. The biscotti were divine. When I went shopping, I'd buy a small bag and let the kid's nibble on pieces while we went around the store.

Since becoming gluten free I've missed my little indulgences. There aren't many local places that sell baked goods that aren't made of wheat much less gluten free.

I've been working on a biscotti recipe that was crunchy and deliciously chocolate. They are softer when finished, however they will crisp up as the chocolate on the bottom dries.

Recipe

3 Tb Cocoa
6 Tb Butter, softened
1/2 cup Cane Sugar
1/2 cup Turbinado sugar
2 eggs
1/2 cup Chestnut Flour
1/2 cup Brown Rice Flour
1/2 cup Sweet Rice Flour
1/2 cup Almond Meal
1/2 tsp Sea Salt
1 tsp Baking Soda
1 1/2 tsp Kuzu/Kudzu Powder
2.5 oz dark chocolate
Optional: 1/2 cup chopped almonds or 1/2 cup chocolate chips

Preheat oven to 350 degrees and cover a cookie sheet with parchment paper.

In your machine mixing bowl, beat two eggs and add kudzu powder. Allow the mixture to sit and the kudzu dissolve. In another bowl, place the cocoa, sugar, flours, almond meal and salt and blend. Add the butter to the mixing bowl and blend. Then slowly add the dry ingredients to the mixing bowl while blending. Add your choice of optional ingredients and blend.

Divide the dough in two and make two oblong loaves on the parchment paper. Take a small sheet of aluminum foil and cut into 3 inch wide strips. Connect the strips until they will go around the loaves of biscotti dough and fold the end onto the side of the ring so it will stay in place. The foil bands keep the dough from spreading during baking.

Bake for 30 minutes or until a toothpick comes out clean. Allow the dough to cool for 5 minutes. Transfer the loaf to a cutting surface and using a sharp knife cut diagonal slices off the loaf. Each slice should be about 1 inch wide. Arrange the cut slices on the cookie tray and return them to the oven for 10 minutes.

Place the dark chocolate in the top bowl of a double boiler that has simmering water in it. Once the chocolate is melted, dip the bottom of the biscotti into the chocolate. Lay the cookie back on the cookie sheet so the chocolate can dry. If you like a thicker layer of chocolate on your biscotti, simply repeat this step.

The biscotti were beautiful and smelled like dark chocolate brownies. It's the kind of smell that has everyone in the house hovering around the oven wondering what you are making and when can they eat it. We ate our first cookies before the chocolate had finished drying and they were a warm blast of dark chocolate. Everyone agreed that they had a wonderful flavor.

The biscotti were so good that the next morning my husband and I decided to start the day with dessert and have breakfast second. The chocolate had completely dried and the cookies were nice and crisp. They were scrumptious with a fresh cup of coffee. Outside it was a frigid 16 degrees so we passed on watching the world go by and watched each other instead. A wonderful way to start the day.

May 22, 2006

Dowd & Roger's Chocolate Chestnut Cake Mix - Gluten Free

I really needed a successful gluten free baking experience! At my kids insistence, I reached for the Dowd & Rogers chocolate cake mix. Made with rice flour, chestnut flour and tapioca flour, this mix is one even those who have an allergy to nightshade plants can handle. My daughter has an evolving/developing allergy problem with the nightshade plant family. Yep, there goes the potato flour.... The "evil shadow vegetables," as my daughter calls them, will no longer have a place in our evolving gluten-free cooking.

I found my Dowd & Rogers cake mix at our local Whole Foods market in the baking section. It comes in chocolate, dark vanilla and lemon. We have tried the chocolate and dark vanilla cake mixes -- both are delicious. If you can't find it at your local market, Dowd & Rogers does sell mixes over their website.

The box holds enough cake mix for a single layer cake. I bake mine in a 6 inch springform pan which yields a nice double layer height cake. I have sliced the cake in the middle to add frosting, but most often just frost the outside. I line the springform pan with parchment paper (sides & bottom) to make sure the cake comes out of the pan.

Our cake baked up beautifully and didn't make it to the frosting stage before the kids were asking to have some. The Dowd & Rogers cake mix is always moist and chocolately. It doesn't leave a grainy texture in your mouth when you eat it. I used butter cream frosting to top it off. Now I'm thinking that I should have decorated it like Pac-Man.....

The verdict on the taste test? Four thumbs up from the family. This is a keeper.