March 17, 2010
Focaccia (B&P42)
For the last three months, we've been living and working out of a temporary home in Michigan. My husband's on location contribution to a project here is nearing it's end. So, we've been trying to cram in all the Great Lakes tourist destinations that we can manage.
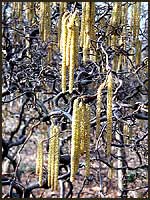
This past weekend, we headed off to the Sleeping Bear Dunes National Lakeshore on Lake Michigan. We had a lot of fun climbing hills, falling into the snow, banging up our knees, and taking pictures. Then we headed off to the lakeshore to look for rocks and fossils, plus seeing the lighthouses. Last, we cruised the coastline of the Grand Traverse Bay and looked at all the different birds frolicking in the frigid water.
I do have to admit that our little trips have been a bit challenging to coordinate. When you travel with kids, our dog and our various food issues, it can feel like a major war campaign just to go on a weekend getaway not to mention the two week vacation. We've been spoiled by the abundance of pet friendly hotels that are abundant on the eastern seaboard and in the south. Little did we realize that heading out into the forest lands of Michigan, that our hotel search would be more troublesome than our gluten free food planning.
I did use a couple of resources for this trip that proved to be pretty helpful, the Bed Bug Registry and Trip Advisor. I even used Google images to check for pictures of hotels, motels, plus bed & breakfast locations. After a great deal of searching, I located a family and pet friendly hotel in Traverse City, the Baymont Inn & Suites. It was a perfect lodging point for our trip and there were plenty of restaurants to try and negotiate a gluten free meal.
If you come out to Michigan to visit the Great Lakes, be aware that many lodging locations and tourist destinations are closed for the winter. The National and State Parks are mostly open, but have limited accessibility due to heavy snowfall. If you are interested in cross country skiing, snow shoeing or snow mobiling these are great destinations. Otherwise, you'll need to wait until there is enough of a thaw to allow for easier access to the trails.
To get us on the road, I made a loaf of focaccia drizzled with olive oil. fresh oregano and dotted with Kalamata olives. It was the perfect type of road food, easy to handle and not messy to eat. Delicious!
Enjoy!
Recipe
Protein Content
Original Amount: 43.94 g
GF Amount: 43.302 g
Biga
15 g brown rice flour (1.35 g)
14 g sweet rice flour (0.84 g)
14 g arrowroot starch (0.042 g)
22 g almond meal (4.4 g)
20 g white bean flour (4.3 g)
1 g instant dry yeast (120 - 130 degrees F/48 - 54 degrees C)
50 ml water
10 ml agave sweet
Final Dough
50 g brown rice flour (4.5 g)
40 g sweet rice flour (2.4 g)
40 g arrowroot starch (0.12 g)
73 g almond meal (14.6 g)
50 g white bean flour (10.75 g)
6 g chia seed meal
4 g agar agar powder
12 g instant dry yeast
7 g sea salt
126 g biga (from above)
15 g agave syrup
23 g olive oil
135 ml water (120 - 130 degrees F/48 - 54 degrees C)
Optional Toppings: fresh herbs, olives, roasted tomato slices, sauteed garlic or onion slices.
Biga Directions
In a medium sized bowl, combine the flours, water, agave syrup and yeast. Mix together, making sure the mixture is smooth. Cover the mixture or transfer to a container and allow to ferment at 75 degrees F/24 degrees C for 18 to 24 hours. When the biga is ready to use, it will have risen and receded, yet also look bubbly.
Final Dough Directions
1. In a large bowl, combine all the dry ingredients with the exception of the salt and yeast. Hold the salt out, so it can be added later in the mixing. Place the yeast into a small container, add the water and a little bit of the agave syrup. Stir to ensure the water mixes through the yeast. Allow the yeast to proof for 2 to 3 minutes.
2. Add the yeast mixture, biga, the rest of the agave syrup and blend together. Just before the dough comes together, sprinkle in the salt and then continue blending until a soft ball forms. Note: This dough should be a little looser than other types of doughs.
3. Place the dough in the center of a sheet of parchment paper that has been sprinkled with arrowroot starch. Gently pat the dough out into an 8-inch/20 cm circle and brush with olive oil. Slide the parchment paper onto a cookie sheet and place in a warm location to rise for 2 hours. Brush the focaccia with olive oil again and cover with your choice of toppings.
4. Place an oven proof bowl filled with water on the bottom shelf of the oven. Then place a baking stone on the top shelf. Preheat the oven to 460 degrees F/238 degrees C. Place the loaf in the oven and spray water over the oven box and the top of the loaf. Bake the loaf for 15 minutes. Prop the oven door open and continue to cook the bread for another 10 minutes. Remove the loaf and allow it to cool before serving.
What's Going On?
I was a very lucky woman and received a copy of the Culinary Institute of America's Baking & Pastry book along with their culinary dvd's from my family for my birthday and our anniversary. After watching all the DVDs, I decided to work my way through the CIA's Baking and Pastry book - of course making it gluten free. There were so many skills that I wanted to develop and work on. I hope you will be interested in sharing my journey with me.
Want more?
You can follow me on Twitter and on Flickr.
Other Baking & Pastry Project Posts
Index of the Baking & Pastry Project
Baking & Pastry Week 21 - A Biga & A Sourdough Starter
Baking & Pastry Project #41 - Ciabatta (Biga)
Baking & Pastry Project #40 - Rosemary Bread (Biga)
Baking & Pastry Project Week 20 - More Bigas
Baking & Pastry Project #39 - Cracked Rice & Potato Bread (Biga)
Baking & Pastry Project #38 - Almond & White Bean Batard (Biga)
Baking & Pastry Project Week 19 - Bigas
October 11, 2009
Baking & Pastry Project Week 15 - Lean & Multigrain
This week I'm making a lean bread and a multigrain bread with pate fermentee. You will only need to make one pate fermentee batch for both recipes. The lean bread dough from the Baking & Pastry Project #1 is the recipe you will need to follow to make the pate fermentee. Then use the left over pate fermentee to make a batch of rolls.
Tuesday - Lean Bread with Pate Fermentee
Shopping List
Sweet Rice Flour (also called glutinous rice flour)
Arrowroot Starch
Almond Meal
High Protein Flours, such as: Soybean, White Bean, Black Bean
Whole Grain Flour, such as: Buckwheat, Millet, Sorghum, Quinoa, Teff
Instant Dry Yeast
Binding Agents, such as: Xanthan or Guar Gum, Chia Seed Meal, Agar Agar Powder
Instant Dry Yeast: Barry Farm
Agave Syrup: Wild Organics, Native Seeds
Equipment
No special equipment is needed this week.
What's Going On?
I was a very lucky woman and received a copy of the Culinary Institute of America's Baking & Pastry book along with their culinary dvd's from my family for my birthday and our anniversary. After watching all the DVDs, I decided to work my way through the CIA's Baking and Pastry book - of course making it gluten free. There were so many skills that I wanted to develop and work on. I hope you will be interested in sharing my journey with me.
Other Baking & Pastry Project Posts
Baking & Pastry Project Week 12 - Pizza & Crackers
Baking & Pastry Project #22 - Soft Pretzels
Baking & Pastry Project #21 - Crescia al Formaggio
Baking & Pastry Project Week 11 - Parmesan & Pretzels
You can also follow me on Twitter, where I'm glutenagogo.
August 12, 2009
Baking & Pastry Project Week 9 - Twisted & Braided

After a wide variety of lean breads, it's time for sweet doughs. Yeah! I'm ready for a change.
This week it's a beautiful egg washed Challah loaf and a sweet dough coffee cake. Pick out your favorite fresh fruits and enjoy a delicious slice of gluten free coffee cake for breakfast. Bake up the Challah and enjoy a lovely slice of bread with preserves or a hearty sandwich for lunch.
Schedule
Thursday - Braided Challah
Shopping List
Sweet Rice Flour (also called glutinous rice flour)
Arrowroot Starch
Almond Meal
High Protein Flours, such as: Soybean, White Bean, Black Bean
Whole Grain Flour, such as: Buckwheat, Millet, Sorghum, Quinoa, Teff
Instant Dry Yeast
Sea Salt
Binding Agents, such as: Xanthan or Guar Gum, Chia Seed Meal, Agar Agar Powder
Instant Dry Yeast: Barry Farm
Agave Syrup: Wild Organics, Native Seeds
Equipment
No specific or unusual equipment is needed this week.
I was a very lucky woman and received a copy of the Culinary Institute of America's Baking & Pastry book along with their culinary dvd's from my family for my birthday and our anniversary. After watching all the DVDs, I decided to work my way through the CIA's Baking and Pastry book - of course making it gluten free. There were so many skills that I wanted to develop and work on. I hope you will be interested in sharing my journey with me.
Baking & Pastry Project #15 - Rustic Raisin Bread
Baking & Pastry Project Week 8 - Raisins & More Raisins
Baking & Pastry Project #14 - Cheddar & Onion Mock Rye Batard
Baking & Pastry Project #13 - Prosciutto & Provolone Bread
June 3, 2009
Raisin Cinnamon Swirl Bread (B&P16)

I have an admission to make...I'm not my neighbor's favorite person. Actually, my neighbor isn't fond of any of us. We set her teeth on edge. We're outdoor loving, gardening, barbeque cooking, skate boarding, scootering and ball playing folks. She can't stand it. Believe it or not, she's a school teacher who believes that children should play at the play ground and not in their own yards.
And now, we're going to thrill her even more...with drums. Our son, has been taking drum lessons and is now ready for a full drum set. The set, an older one that belongs to his uncle, is coming around the end of the month. My brother got a real kick introducing our son to the drums, since he knows about our neighbor. Although, he lives in Atlanta and no where near the vocal proximity of our neighbor.
The other morning, while we were discussing what our neighbor was going to say about the noise from the drum set, we noshed on toasted slices of raisin cinnamon swirl bread and cream cheese. Well, we'll wait to see what she says. Maybe now that her kids have gone away to college, and there aren't any more situations involving friend's who need remedial driver's education, skipping school, and standardized tests, she'll be a little more charitable. One can only hope.
Recipe
Yield: 1 loaf
Protein Amounts in parenthesis
Original protein content: 17.55 g
GF protein content: 17.005 g
3 1/8 tsp/15 g brown rice flour (1.35 g)
1 3/8 Tb/20 g sweet rice flour (1.2 g)
1 3/8 Tb/20 g arrowroot starch (0.06g)
1 3/4 Tb/25 g almond meal (5 g)
1 3/8 Tb + dash/24 g millet flour (2.76 g)
1 3/4 Tb/ 25 g white bean flour (5.375 g)
1 1/4 tsp/ 6 g chia seed meal (1.26 g)
2 3/8 tsp/11 g instant dry yeast
3/8 tsp/2 g agar agar powder
1 1/2 Tb/21 g cane sugar
1 tsp/5 g sea salt
3 Tb/42 g raisins
1/3 - 1/2 cup/100-125 ml whole milk, room temperature
1 1/2 Tb/21 g butter, soft
1 1/2 Tb/21 g eggs
5/8 tsp/3 g ground cinnamon
1. In a large bowl, combine the dry ingredients, except the cinnamon. Pour in the butter, eggs and milk then stir together. As you stir, pour in the cinnamon, so that it creates a swirl through the dough. Line a 7 1/2 x 3 3/4 x 2 1/4 inch(19 x 10 x 6 cm) loaf pan with parchment paper. Pour the dough into the loaf pan. Cover and allow to rise for 1 ½ hours.
2. Preheat the oven to 375 degrees F/191 degrees C and bake for 20 minutes. Prop open the door of the oven and allow the bread to cook for 10 minutes. Remove the bread from the oven, then let the bread cool about 1 ½ hours before cutting.
Notes:
1. White Bean Flour – You can purchase white bean flour from Barry Farm or you can grind your own using a coffee grinder. Make sure to sift your bean flour before using to make sure any bits that weren’t ground are removed
2. Chia Seed Meal – You can purchase chia seeds from Barry Farm and use a coffee grinder to turn them into meal.
Other Baking & Pastry Project Posts
Baking & Pastry Project #15 - Rustic Raisin Bread
Baking & Pastry Project Week 8 - Raisins & More Raisins
Baking & Pastry Project #14 - Cheddar & Onion Mock Rye Batard
Baking & Pastry Project #13 - Prosciutto & Provolone Bread
Baking & Pastry Project Week 7 - Ham & Cheese
Baking & Pastry Project #12 - Belgian Apple Cider Bread
Baking & Pastry Project #11 - Beer & Cheese Bread
Baking & Pastry Project Week 6 - Beer, Cheese & Cider
Want More?
You can find me on Twitter at glutenagogo.
June 1, 2009
Rustic Raisin Bread (B&P15)

We spent a busy weekend cleaning up after the carpenter and working on our yard. It was such a pleasure to see the changes in our kitchen. The carpenter takes care to vacuum while he works, but all the little bits of saw dust seems to float through the air and wedge into cracks around the kitchen. It's amazing how it travels, even though he's cutting all the wood outside.
It is taking him a while to trim all the entry ways, and each connection of the boards. You realize while he's working on the boards that there will be all these intersection points to work, but seeing him work all the angles and cuts is beauty and the mastery of wood with geometry. One area near our pantry looks almost like old English wood work.
I worked up some bread for our breakfasts for the weekend. Since we were trying to finish off some yard projects. I fixed us a breakfast of scrambled eggs with pancetta and a fresh fruit salad to go along with this bread. Afterwards, I headed out and finished off painting our patio furniture, a job that will hopefully last another 10 years.
Recipe
Yield: 1 loaf
Protein Content follows the flour in parenthesis
Original Protein Content: 22.88 g
GF Protein Content: 22.96 g
2 Tb/30 g brown rice flour (2.7 g)
1 3/4 Tb/25 g sweet rice flour (1.5 g)
1 3/8 Tb/20 g arrowroot starch (.06 g)
2 7/8 Tb/40 g almond meal (8 g)
1 7/8 Tb/26 g millet flour (2.99 g)
2 Tb/30 g white bean floour (6.45 g)1 1/4 tsp/6 g chia seed meal (1.26 g)
3/8 tsp/2 g agar agar powder
2 3/8 tsp/12 g instant dry yeast
1 1/2 tsp/7 g sea salt
1 1/2 Tb/21 g cane sugar
6 1/2 Tb/92 g raisins
1/2 - 2/3 cup/125-135 ml whole milk, room temperature
1 tsp/5 g honey
1. In a large bowl, combine the dry ingredients, along with the raisins. Pour in the honey and milk then stir together. Lay out a sheet of parchment paper. Sprinkle the parchment paper with sweet rice flour and place the bread dough in the center of the paper. Shape into a round ball and score four slashes down the top of the dough. Cover and allow to rise for 1 ½ hours.
2. Preheat the oven to 400 degrees F/204 degrees C. If you have a baking stone, place it in the oven at the same time on a shelf in the top third of the oven. Gather an oven proof bowl that can hold water and a squirt bottle filled with water for steaming your bread. Place the water bowl on a shelf in the bottom third of the oven.
3. Remove the stone or brick from the oven and slide the parchment paper with the loaf onto the baking stone. Squirt the sides of the oven with water and the top of the bread. Then bake for 30 minutes. Prop open the door of the oven and allow the bread to cook for 10 minutes. Remove the bread from the oven, then let the bread cool about 1 ½ hours before cutting.
Notes:
1. White Bean Flour – You can purchase white bean flour from Barry Farm or you can grind your own using a coffee grinder. Make sure to sift your bean flour before using to make sure any bits that weren’t ground are removed
2. Chia Seed Meal – You can purchase chia seeds from Barry Farm and use a coffee grinder to turn them into meal.
Other Baking & Pastry Project Posts
Baking & Pastry Project #14 - Cheddar & Onion Mock Rye Batard
Baking & Pastry Project #13 - Prosciutto & Provolone Bread
Baking & Pastry Project Week 7 - Ham & Cheese
Baking & Pastry Project #12 - Belgian Apple Cider Bread
Baking & Pastry Project #11 - Beer & Cheese Bread
Baking & Pastry Project Week 6 - Beer, Cheese & Cider
Want More?
You can find me on Twitter at glutenagogo.
May 31, 2009
Baking & Pastry Project Week 8 - Raisins & More Raisins

Baking & Pastry Project Week 8 - Raisins & More Raisins
I'm moving a little slowly this week with my kitchen under construction again. It's been quite a process and has taken almost a year. What we're working on now is all the finish carpentry work, trimming out the board and batten paneling and the door and window trim. Next it will be the last of the floor trim and rebuilding the screens for the windows over the kitchen sink.
Regardless of the dust, bits of wood and paint lying around, it infinitely satisfying to see the kitchen nearing it's completion. Especially when we remember how it looked before we started working on it. Or what it looked like when we gutted the room down to the subfloor. It is turning into the kitchen/gathering area we wanted, rather than our old squashed galley kitchen.
Mr. Carptenter - Thank you for all your hard work!
Schedule
Brown Rice Flour (Fine or Superfine Grind)
Sweet Rice Flour (also called glutinous rice flour)
Arrowroot Starch
Almond Meal
High Protein Flours, such as: Soybean, White Bean, Black Bean
Whole Grain Flour, such as: Buckwheat, Millet, Sorghum, Quinoa, Teff
Instant Dry Yeast
Sea Salt
Binding Agents, such as: Xanthan or Guar Gum, Chia Seed Meal, Agar Agar Powder
Honey
Flours & Binding Agents: Authentic Foods, Barry Farm, Bob's Red Mill
Instant Dry Yeast: Barry Farm
Agave Syrup: Wild Organics, Native Seeds
Baking & Pastry Project #11 - Beer & Cheese Bread
Baking & Pastry Project Week 6 - Beer, Cheese & Cider
May 22, 2009
Prosciutto & Provolone Bread (B&P-13)

Baking & Pastry Project #13 - Prosciutto & Provolone Bread
Happy Memorial Day! This is a four day weekend of us and we're planning loads of home and yard improvement.
We're working on finishing off the carpentry work on our kitchen remodel. Yesterday, my husband and daughter finished off the countertop trim. He was teaching her how to measure and set up the angles for cutting the wood. She got to counter sink the nails and schmear wood putty into the holes.
I was painting the strips for the batten of our board and batten paneling for the walls of the kitchen. There are so many strips that have to be primed and painted before they can be hung on the ceiling and walls. By the end of yesterday, I was covered in little droplets of paint. Our Sheltie had her own streaks of paint since she needed to share some love while I was trying to swing a paint brush.
Our son had his own project, to clean out his small bookcase so we can put a new one in his room. It's time to part with his young reader books to make room for the Redwall and Hardy Boys series he's collecting.
To round out the day, we started tackling our yard. We did a lot of trimming and shifted a few plants around. Due to the long cold winter, we had quite a few things die and others that suffered quite a bit of ice damage. I'm really sad about the loss of our Henry Lauder Walking Stick tree (also called a Corkscrew Hazel). It was a beautiful and unique tree that was remarkably lovely in the fall.
We took a break for lunch, crashing tiredly in the rocking chairs around the patio table. While our Sheltie aimed for the deepest part of the shade cast by the umbrella over the patio. We dined on prosciutto and provolone bread served with rainbow chard salad and a mixed fruit salad. Then we sat and indulged in multiple glasses of iced tea and frosty fruit jucies.
Recipe
Yield: 1 small loaf
Protein content: 23.57 g
1 Tb + 2 1/4 tsp/25 g brown rice flour (2.25 g)
1 Tb + 2 1/4 tsp/25 g sweet rice flour (1.5 g)
4 1/4 tsp/20 g arrowroot starch (.06 g)
2 Tb + 2 1/2 tsp/40 g almond meal (8 g)
1 Tb + 2 1/2 tsp/26 g millet flour (2.99 g)
1 1/4 tsp/6 g chia seed meal (1.26 g)
2 1/2 Tb/35 g white bean flour (7.5 g)
2 1/4 tsp + pinch/11 g instant dry yeast
1/2 tsp/2 g agar agar powder
3/4 tsp + dash/4 g sea salt
7 Tb + 1 tsp/109 ml water
1 Tb + 3/4 tsp/18 g olive oil
1 Tb + dash/15 g butter, soft
4 Tb/56 g prosciutto, diced
4 Tb/56 g provolone, diced
1. Lay out a sheet of parchment paper. In a large bowl, combine the dry ingredients and blend well. Pour in the olive oil, butter and water, then stir together. Sprinkle the parchment paper with sweet rice flour and place the bread dough in the center of the paper. Shape into a round ball and score an "X" in the center of the top of the dough. Cover and allow to rise for 2 hours.
2. Preheat the oven to 435 degrees F/225 degrees C. If you have a baking stone, place it in the oven at the same time on a shelf in the top third of the oven. Gather an oven proof bowl that can hold water and a squirt bottle filled with water for steaming your bread. Place the water bowl on a shelf in the bottom third of the oven.
3. Slide the parchment paper with the loaf onto the baking stone. Squirt the sides of the oven with water and the top of the bread. Then bake for 25 minutes. Prop open the door of the oven and allow the bread to cook for 5 minutes. Remove the bread from the oven, then let the bread cool about 1 ½ hours before cutting.
1. Bean Flour – You can purchase Black bean flour from Barry Farm or you can grind your own using a coffee grinder.
2. Chia Seed Meal – You can purchase chia seeds from Barry Farm and use a coffee grinder to turn them into meal.
3. Agar Agar Powder - Is available from Barry Farm as well.
Other Baking & Pastry Project Posts
Baking & Pastry Project Week 7 - Ham & Cheese
Baking & Pastry Project #12 - Belgian Apple Cider Bread
Baking & Pastry Project #11 - Beer & Cheese Bread
Baking & Pastry Project Week 6 - Beer, Cheese & Cider
Baking & Pastry Project #10 - Sunflower Honey Bran Bread
Baking & Pastry Project #9 - Black Bean Millet Pullman Loaf (mock rye)
Baking & Pastry Project Week 5 - Mock Rye & Sunflower Seeds
Want More?
You can follow me on Twitter, where I'm glutenagogo.
May 18, 2009
Belgian Apple Cider Bread (B&P-12)

I have to admit to being extremely psyched about making Belgian Apple Cider Bread. It sounded so fascinating to have bread recipe with a yeast paste spread on top. Then there was the challenge of making a triangular loaf of bread.
This recipe actually made a larger quantity of bread than I usually make. It was quite an arm workout to work the dough with my wooden spoon. So, if you need to you can mix this dough with your stand mixer. It was quite satisfying when it was all mixed and ready to shape.
I worked a little more sweet rice flour into the dough before shaping it to make it firm enough to hold the triangular shape when rising and baking. The loaves turned out triangular and had nicely rounded corners.
My husband and I loved how this bread turned out. The interior texture was quite nice with lots of small to medium sized air holes. It was great toasted and tasted fabulous with butter and even as a hot cheese and pepperoni sandwich.
Bread Recipe
Protein content is in parenthesis
Yield: 3 loaves or 2 loaves and 12 rolls
4 tsp + pinch/20 g brown rice flour (1.8 g)
4 tsp + pinch/20 g sweet rice flour (1.2 g)
4 tsp + pinch/20 g arrowroot starch (0.06 g)
1/4 cup + 3 pinches/59 g millet flour (6.78 g)
1 tsp + dash/6 g chia seed meal (1.26 g)
___________
5 1/2 Tb/80 g black bean flour (19.2 g)
1 2/3 cup/425 g sorghum flour (29.75 g)
4 Tb + 2 1/2 tsp /70 g cocoa powder (13.3 g)
1/2 tsp/2 g agar agar powder
2 1/4 tsp/11 g instant dry yeast
3/4 tsp/4 g sea salt
1 2/3 cup/396 ml apple cider
2 2/3 cup/624 g sour cream
1/4 cup/60 ml agave syrup
2/3 cup/156 g pate fermentee
Apple Cider Paste
3/4 tsp/4 g black bean flour (.96 g)
2 1/4 tsp/11 g sorghum (.77 g)
3/4 tsp/4 g cocoa powder (.76 g)
1/2 tsp/2 g chia seed meal
1/2 tsp/2 g agar agar powder
3/4 tsp/4 g instant dry yeast
1/4 tsp/1 g sea salt
3 Tb/44 ml apple cider
1 tsp/5 ml agave syrup
1. Mix the dry ingredients together in a large mixing bowl and stir together very well. In a medium bowl pour in the apple cider, sour cream, agave syrup and pate fermentee. Stir together making sure there aren't any lumps. Add to the dry ingredients and blend. The dough should be a little firmer, so if you need to add a little sweet rice, arrowroot starch or brown rice flour to the dough to make it firmer.
2. On a sheet of parchment paper sprinkled with sweet rice flour place 1/3 of the bread dough. Gently pat into a triangular shape.
3. In a small bowl, mix together the dry ingredients of the apple cider paste. Then add the apple cider and agave syrup. Stir together.
4. Spread the apple cider paste over the top of the bread. Allow to rise for 1 hour.
5. Place a baking stone into the oven and an oven proof bowl filled with water into a 450 degree F/232 degree C oven. Slip the parchment paper with the loaf of bread on it onto the baking stone. Spray water onto the walls of the oven and gently spray the top of the bread. Bake for 20 minutes. Then prop the oven door open with a wooden spoon and allow the bread to vent for 5 to 10 minutes. Cool before serving.
Notes:
1. Bean Flour – You can purchase Black bean flour from Barry Farm or you can grind your own using a coffee grinder.
2. Chia Seed Meal – You can purchase chia seeds from Barry Farm and use a coffee grinder to turn them into meal.
3. Agar Agar Powder - Is available from Barry Farm as well.
Other Baking & Pastry Project Posts
Baking & Pastry Project #11 - Beer & Cheese Bread
Baking & Pastry Project Week 6 - Beer, Cheese & Cider
Baking & Pastry Project #10 - Sunflower Honey Bran Bread
Baking & Pastry Project #9 - Black Bean Millet Pullman Loaf (mock rye)
Baking & Pastry Project Week 5 - Mock Rye & Sunflower Seeds
Baking & Pastry Project #8 - Cocoa Chia Whole Grain Pullman Loaf
Baking & Pastry Project #7 - Adzuki & Job's Tears Pain de Mie
Baking & Pastry Project Week 4 - Sandwich Breads
Want More?
You can follow me on Twitter, where I'm glutenagogo.
May 5, 2009
Baking & Pastry Project Week 5 - Mock Rye & Sunflower Seeds

April 30, 2009
Cocoa Chia Whole Grain Pullman Bread (B&P-8)

The last loaf for this week is the Whole Grain Pullman Loaf (page 134) from the Baking & Pastry Project. I received the Culinary Institute of America's Baking & Pastry book and all their learning DVDs for my birthday. This began my quest to bake my way through the Baking & Pastry book one recipe at a time and all gluten free. This dough is baked in a pullman loaf pan or a regular loaf pan with using a baking sheet for a top and something to weigh down the top like a foil wrapped brick or even a cast iron pan.
When I was getting prepared for the project, I worked up a list of the protein contents of all the flours. One of the flours that made me curious was cocoa. It has a fairly high protein content (19.70 g per 100 g flour) and quite a bit of fiber (33.7 g per 100 g). In addition, each cup has 11 percent calcium and 66 percent iron. This amount of protein is comparable to the bean flours. By comparison carob, a substitute for cocoa, only has 4.85 g protein per 100 g of flour. However, it has 39.8 g fiber (per 100 g) and each cup has 36 percent calcium and 17 percent iron. As a flour it worked out nicely in the dough, although it did I did need to add agave syrup to the dough to help take the bitter edge off the unsweetened cocoa and the Job's tears flour.
This dough turned out a lovely pullman loaf that sliced easily into sandwich slices. Each bite had a dense cocoa flavor that tasted heavely when served warm and slathered with butter. My husband and I thoroughly enjoyed this loaf, although our kids wanted it to be sweeter more like a sweet bread.
hour and then cover with a sheet of parchment paper and a baking sheet. Weigh down the top baking sheet with either foil covered bricks or rocks, even a cast iron.
Adzuki & Job's Tears Pain de Mie (B&P-7)

Baking & Pastry Project #7 - Adzuki & Job's Tears Pain de Mie
This week I'm starting off the Baking & Pastry project with the recipe for Pain de Mie (page 134) from the Culinary Institute of America's Baking & Pastry book. This dough can be used to make oblong loaves (pg 184 & 222) or into cylinder loaves using a pain de mie pan.
Until starting the Baking & Pastry project, I hadn't used metric quantities very often. Most of those recipes were for the monthly baking challenges for the international baking online group, The Daring Bakers. After baking some of these recipes, I realized how easy it was to use my kitchen scale and the metric beakers that are in my kitchen. It also helps, that my son's Geometry work is always done in both imperial and metric measurements, so I get in a fair bit of practice.
If you are interested in adding the ability to use metric quantities in your baking, one of the best investments I made for baking is a kitchen scale. You want one that has ounces, pounds, kilograms and grams, like the one from Escali.
Next you'll need to get a measuring cup or beaker that measures in milliliters, like the Emsa beaker which measures six different ways. A mini measuring cup that does smaller amounts is helpful, such as the one from Oxo, but isn't necessary is you have metric equivalents on your measuring spoons. Take a look at measuring spoons like the ones from Roscan, or another option is a progressive international measuring set that starts at 1/32 tsp and goes through 2 cups, made by Progressive.
If you aren't ready to add a scale or metric cups and spoons to your kitchen, one of the best baking or cooking resources is the Gourmet Sleuth website. They have a variety of measurement converters to help you change anything from drops all the way through gills.
This recipe is made with a bread flour that in the original version has 31.59 grams of protein per 100 grams of flour. The gluten free version has 31.51 grams of protein for 100 grams of flour. The protein contents of each flour used follow in the parenthesis.
This loaf turned out to be rich tasting loaf that was reminiscent of a whole grain bread. I served it with a breakfast meal of fruit salad and egg and ham cups. My family thoroughly enjoyed this loaf of bread.
Recipe
Yield: 1 loaf
3.3 Tb/47 g brown rice flour (4.23 g)
2.8 Tb/40 g sweet rice flour (2.4 g)
2.8 Tb/40 g arrowroot starch (.12 g)
4.2 Tb/60 g job's tears flour (6 g)
3.5 Tb/50 g adzuki bean flour (17.5 g)
1.3 tsp/6 g chia seed meal (1.26 g)
0.4 tsp/2 g agar agar powder
1.5 tsp/7 g instant dry yeast
1.5 tsp/ 7 g cane sugar
1 tsp/5 g sea salt
0.7 cup/176 ml whole milk, room temperature
0.9 Tb/13 g butter, softened
1 tsp/5 ml agave syrup
Egg Wash
1 egg, beaten
1. In a large bowl combine all the dry ingredients and blend. Add the wet ingredients and stir into a cohesive dough.
2. On a sheet of parchment paper sprinkle some sweet rice flour and then set the ball of dough on it. Shape into an oblong loaf and place in a warm location to rise for 1 1/2 hours.
3. Place the baking stone into the oven and preheat the oven to 375 degrees F/190 degrees C. Brush the egg wash over the loaf and once the oven is preheated, slide the parchment paper with the loaf on it into the oven. Bake for 35 to 45 minutes and the crust is a golden brown.
Notes:
Flours & Binding Agents: Authentic Foods, Barry Farm, Bob's Red Mill
Adzuki Beans: Amazon.com, Eden Foods, Barry Farm
Job's Tears (Yimi or Hato Mugi): Amazon.com, Gold Mine Natural Foods
Instant Dry Yeast: Barry Farm
Other Baking & Pastry Project Posts
Baking & Pastry Project Week 4
Baking & Pastry Project #6 - Grissini
Baking & Pastry Project #5 - Soft Rolls
Baking & Pastry Project Week 3
Baking & Pastry Project #4 - Rosemary Bread
Baking & Pastry Project #3 - Whole Grain Bread
Baking & Pastry Project Week 2
Baking & Pastry Project #2 - Bagels
Baking & Pastry Project #1 - Lean White Bread
Baking & Pastry Project - Week 1
April 21, 2009
Tepary Almond Sweet Potato Soft Rolls (B&P-5)

I started the week with the recipe for Soft Rolls (page 132) for the Baking & Pastry Project using the Culinary Institute of America's Baking & Pastry book. This dough can be used to make shapes such as Parker House and Knots (page 218 & 219).
These soft and tender rolls are made with bread flour. For a long time I experimented with various gluten free flours trying to pump up the protein content without using a bean flour. However, I'd have needed to use a larger amount of nut or seed meal, then the rolls would no longer have a soft and tender texture. I opted for using some tepary bean flour, which is very high in protein so I could use less of it in the mixture. Then I used almond meal for it's mild flavor and to pump up the protein content. I switched to sweet potato flour since it contains more protein than arrowroot starch. The resulting dough had a nice taste although it was a bit robust. To mellow the flavor I added agave syrup to the recipe.
The protein amounts of each flour follow in parenthesis. The total amount of protein for the original soft roll dough has 36.4 grams (per 100 g flour) as compared to 36.88 grams of gluten free flour (per 100 g flour).
My husband and I thought the rolls had a fabulous texture and flavor. After he got home late from work the other night, we enjoyed them with slices of Comte cheese and a glass of red wine...delicious. My son opted to eat his plain, but my daughter wasn't thrilled with the rolls. She just couldn't get past the aroma the rolls had when they came out of the oven - as they smelled a bit beany. We told her that once they cooled slightly they didn't smell or taste of beans, however she remained unconvinced. There was no way she was going to try these out.
Recipe
Yield: 6 rolls
Imperial measurements follow the protein amounts
75 g brown rice flour (6.75 g protein) [.47 cup/2.65 oz]
50 g sweet rice flour (3 g protein) [.32 cup/1.76 oz]
50 g sweet potato flour (1.05 g protein) [.32 cup/1.76 oz]
53 g almond meal (10.6 g protein) [.231 cup/1.87 oz]
50 g tepary bean flour (15 g protein) [.32 cup/1.76]
5 g chia seed meal (.48 g protein) [1 tsp/.176 oz]
2 g agar agar powder [.421 tsp/.07 oz]
28 g sugar [2 Tb/.983 oz]
5 g sea salt [1.26 tsp/.21 oz]
8 g instant dry yeast [1.686 tsp/.28 oz]
150 ml whole milk, room temperature [.63 cup/5.07 fl oz]
28 g butter, softened [2 tb/.983 oz]
28 - 35 g eggs, 55 degrees F/13 degrees C (1 medium egg)
20 ml agave syrup [1.353 Tb/.676 fl oz]
1. In a large bowl combine all the dry ingredients and stir making sure the ingredients are thoroughly blended. Pour in the agave syrup, butter, milk and egg mixing until combined.
2. On a sheet of parchment paper sprinkle some sweet rice flour and turn out the bread dough. Roll into a log shape and divide into 6 equal pieces. Then roll them gently between your palms to around them and place on the parchment paper. Set out another sheet of parchment paper and sprinkle with sweet rice flour for the rolls that are shaped.
3. For Parker House Rolls - Press each piece of dough into an oval about 4 in/10 cm long and 3/8"/1 cm thick. Then fold the dough in half with the top edge stopping about 1/4 in/7 mm from the edge. Lay on the second sheet of parchment paper.
4. For Single Knot Rolls - Roll each piece of dough until it is a long cylinder about 6 in/15 cm in length. Gently ease the dough into a single knot and fold the ends to the back so they touch. Then press the ends together. Lay on the second piece of parchment paper.
5. When all the rolls are shaped, cover the rolls and allow to rise until doubled, approximately 1 hour.
6. Preheat the oven to 375 degrees F/191 degrees C convection oven. If you have a baking stone, place it in the oven at the same time on a shelf in the top third of the oven. Brush the Parker House rolls with clarified butter and the knots with egg wash. Place the parchment paper with the rolls on it onto the baking stone. Bake for 18 to 20 minutes.
7. Remove the stone or brick from the oven and slide the parchment paper with the rolls onto the baking stone. Remove the bread from the oven, then let the bread cool before serving.
Notes
All ingredients can be purchased from Barry Farm.
Other Baking & Pastry Project Posts
Baking & Pastry Project Week 3
Baking & Pastry Project #4 - Rosemary Bread
Baking & Pastry Project #3 - Whole Grain Bread
Baking & Pastry Project Week 2
Baking & Pastry Project #2 - Bagels
Baking & Pastry Project #1 - Lean White Bread
Baking & Pastry Project - Week 1
April 20, 2009
Baking & Pastry Project Week 3 - Sticks & Rolls

This week I'm making Soft Rolls and Grissini. What are grissini you ask? They are thin breadsticks. You can roll them out with a pasta machine or you can fix them by hand. Over at Delicious Days, you can find some she made with squid ink making them a dense black color. Or over at the LA Times there are some made with whole wheat flour.
You can follow my adventure daily on Twitter, where I'm glutenagogo.
Schedule for the Week of April 19th:
Thursday – Grissini Dough & Grissini (page 133)
Brown Rice Flour (Fine or Superfine grind)
Sweet Rice Flour (also called glutinous rice flour)
Arrowroot Starch
High Protein Flours such as: Soybean, White Bean, Quinoa, Millet, Sorghum
Whole Grain Flour such as: Buckwheat, Millet, Sorghum, Quinoa, Amaranth, Teff
Instant Dry Yeast
Sea Salt
Binding Agents such as: Xanthan gum, Guar Gum, Chia Seed Meal, Agar Agar Powder
Toppings: Sesame Seeds, Poppy Seeds, Coarse Salt
Resources
Equipment
Other Messages in the Baking & Pastry Project
Baking & Pastry Project #4 - Rosemary Bread
Baking & Pastry Project #2 - Bagels
Baking & Pastry Project #1 - Lean White Bread
Baking & Pastry Project - Week 1
April 19, 2009
Rosemary Quinoa Black Bean Rolls (B&P-4)

My second challenge this week is the recipe for Durum Rosemary Dough (page 132) for the Baking & Pastry Project using the Culinary Institute of America's Baking & Pastry book.
The beauty of baking gluten free is the infinite variety of options when it comes to selecting flours. Each one is unique in nutrition, flavor and texture. When I figure out which flours will work for the recipe, I make up little bowls the chosen mixture and start taste testing. For example, when I selected quinoa and black bean flour the flavor was strong and a little too much for the rosemary. I experimented with adding more rosemary or a touch of agave syrup and found that the sweetener was the perfect choice to mellow the mixture.
It is a high protein bread that calls for durum wheat flour that has 13 percent protein for 100 grams of flour, as compared to 12 percent protein for bread flour. This recipe contains both types of flour, the first series of gluten free flours are to replace the durum flour and the second set (after the line) are to replace the bread flour.
The protein amounts of each flour follow in parenthesis. The total amount of protein for the original durum rosemary bread was 33.02 grams (per 100 g flour) as compared to 33.41 grams of gluten free flour (per 100 g flour).
This bread has a great crust and holds together very well when you bite into it. The flavors blended together beautifully. It's great warm from the oven with a pat of butter, but it's also nice with a chunk of aged gouda. My daughter wouldn't give it a try, but her brother thought it was quite tasty. He decided to have it along with some left overs...pizza and chinese. This from the guy who believes there is really only one flavor of ice cream worth eating - vanilla. Go figure.
Recipe
Yield: 6 rolls
50 g brown rice flour (5.3 g)
40 g sweet rice flour (8.24 g)
48 g arrowroot starch (7.2 g)
50 g black bean flour (4 g)
-----
54 g quinoa flour (8.64 g)
12 g arrowroot starch (.03 g)
5 g instant dry yeast
5 g sea salt
2 g agar agar powder
5 g chia seed meal
1 g fresh rosemary, minced
5 ml agave syrup
180 - 200 ml water
1. In a large bowl combine all the dry ingredients and stir making sure the ingredients are thoroughly blended. Pour in the agave syrup and the water mixing until combined.
2. On a sheet of parchment paper sprinkle some sweet rice flour and turn out the bread dough. Roll into a log shape and divide into 6 equal pieces. Then roll them gently between your palms to around them and place on the parchment paper. When all the rolls are shaped, take a sharp knife and score the center of each roll with a straight line. Cover the rolls and allow to rise until doubled, approximately 1 hour.
3. Preheat the oven to 460 degrees Fahrenheit. If you have a baking stone, place it in the oven at the same time on a shelf in the top third of the oven. Gather an oven proof bowl that can hold water, a stone or brick, and a squirt bottle filled with water for steaming your bread. Allow the stone or brick to warm in the oven.
4. Remove the stone or brick from the oven and slide the parchment paper with the rolls onto the baking stone. Place the water bowl on a shelf in the bottom third of the oven. Then place the brick or stone into the pan of water. Squirt the sides of the oven with water and the top of the bread. Bake for 3 minutes then squirt the sides of the oven and top of bread with water. Then continue to bake for another 17 minutes. Prop open the door of the oven and allow the bread to cook for 10 minutes. Remove the bread from the oven, then let the bread cool about 1 ½ hours before cutting.
Notes:
1. All ingredients can be purchased from Barry Farm.
2. Kitchen tools or pans can be purchased from Amazon.com, Fantes, Sur La Table, and Williams Sonoma.
Other Baking & Pastry Project Posts:
Baking & Pastry Project #3 - Whole Grain Bread
Baking & Pastry Project - Week 2
Baking & Pastry Project #2 - Bagels
Baking & Pastry Project #1 - Lean White Bread
Baking & Pastry Project - Week 1
April 14, 2009
Baking & Pastry Project Week 2 - Batards & Rolls

April 13, 2009
Mung Bean Pumpkin Seed Bagels (B&P2)

Baking & Pastry Project #2 - Mung Bean & Pumpkin Seed Bagels
Bagels call for high protein flour that has 14 percent protein, compared to 12 percent protein found in bread flour. To convert this recipe, I started horsing around with my Excel spreadsheet to get the flour mixture right. I wanted to try making the bagels using a different combination of flours than I had used with the Lean White Bread. Plus, I wanted to minimize any of the potential down sides to using bean flours (i.e. bitterness).
Taking a long review of my listing of protein contents, I noticed that mung beans have a protein content of 20 g per 100g of flour and the flour was a beautiful minty green. It was the color that made me think of pistachios and pumpkin seeds. That led me to thinking about salmonella outbreaks. No surprise that I ended up selecting pumpkin seeds to help offset any potential bitterness from the bean flour and to provide the extra protein the mixture needed. Besides, I figured that might not be too many people out there harboring year old pistachios in their freezer...mumble...mumble...unlike me.
Next to consider was the choice of binder, in other words what is going to hold this gluten free bagel together when I go to boil or cut it. The problem is that if you use too much of any one binder, you tend to get gummy bread that makes you think of a bad jelly candy. Many commercial foods that use binders (i.e. gums) tend to use more than one since they work better together. For example, the pint of Green & Black's Vanilla Ice Cream I have in my freezer uses two gums, locust bean gum and guar gum. I chose chia seed meal and agar agar powder since each works a little differently. The bagels just need a little extra binding, so I chose not to cook the agar agar and used the powder.
"Sorghum malt syrup," you say, "What in the heck is that?" Well, it's the syrup that's made from boiling down the juice from the unmalted grain (rather than from squeezed sorghum canes) until it reaches a lovely amber color. Sorghum malt syrup is made from white sorghum and contains the proteins and amino acids needed to feed the yeast. It's the perfect thing to perk up bread, but also for making gluten free beer...maybe I should try a little side project in home brewing.
Glorious green dough is what came from the mung bean flour and pumpkin seed meal. Minty green like new leaf shoots and perfect for a St. Patrick's Day celebration, although I'm a little late for this year. Better yet, they retained their lovely green color through boiling and baking. Yep, they survived the boiling and maintained their shape. An added bonus was the glaze added to the bagels by the sorghum syrup water and it keeps the toppings on the bagel.
Hands down my family loved the bagels. No bean flavors to mar their enjoyment and my son (a no topping, no filling kind of guy) worked his way through several of these quite happily. He's almost 13 and while he eats like there is no tomorrow, he's no push over. He's not about to inhale anything that doesn't taste good. Yeah, the inhaling food thing makes me wonder too. Can he really taste his food? Hmmm...maybe it's the nose and taste buds combo that does it. Anyway, you've got his word on it - these taste good.
Recipe
Yield: 6 bagels
Note: You will need to grind your own pumpkin seed, chia seed meal and mung bean flour. You can use a coffee grinder, just make sure to sift your pumpkin seed meal and mung bean flour prior to using so as to remove any larger bits. You can purchase sorghum malt syrup from Midwest Home Brewing Supplies in a smaller 3.3lb container. All the flours, pumpkin seeds, mung beans, chia seeds, agar agar powder, salt and instant dry yeast from Barry Farm.
72 g brown rice flour(7.26 g protein)
60 g sweet rice flour (6 g protein)
60 g arrowroot starch (2.79 g protein)
50 g pumpkin seed meal, sifted (12 g protein)
40 g mung bean flour, sifted (12 g protein)
6 g chia seed meal
2 g agar agar powder
4 g instant dry yeast
5 g sea salt
2 g sorghum malt syrup
1 ml agave syrup
200 - 220 ml water
Water Bath
113 g sorghum malt syrup, for 2.5 gal water (227 g for 5 gal water)
Toppings
sesame seeds
pumpkin seeds
1. In a large bowl, pour in all the dry ingredients and stir together. Add the sorghum malt syrup and water into the bowl and mix together. Lay out a sheet of parchment paper and sprinkle with sweet rice flour. Dump the dough in the middle of the sheet and then shape into a rectangle. Divide the rectangle into 6 equal strips. Then roll each strip out and join the ends. Roll the ends together to attach them. Lay out another sheet of parchment paper on a baking sheet. Sprinkle with sweet rice flour and lay the finished bagels on the parchment paper. Once you are finished shaping the bagels, place the baking sheet into the refrigerator and retard over night.
2. Fill a stock pot with water and pour in the malt syrup. Place on a burner and set it to boil. If you have a baking stone, place it in the oven and then preheat it to 500 degrees Fahrenheit. Set out a sheet of parchment paper in your work area and near it set a bowl of ice water and your bagel toppings.
3. Once the water is boiling, place the bagels in the water and allow them to cook for 1 minute, but don't allow them to touch. Lift each bagel out of the water, place into the ice water for about 3 seconds. Allow the water to drain off before placing on the parchment paper. Sprinkle with toppings and allow to air dry for a couple of minutes. Then slide the parchment paper with the bagels on it onto the baking stone. Cook for 10 to 13 minutes. Remove from the oven and allow the bagels to cool before slicing and serving.
Related Posts
Baking & Pastry Project #1 - Lean White Bread
Baking & Pastry Project Introduction - Week #1
Other Bagels from Gluten Free Bloggers
Bagels from Ginger Lemon Girl
Bagels & Lox from Gluten Free Girl
Bagels & Foccacia from I Am Gluten Free