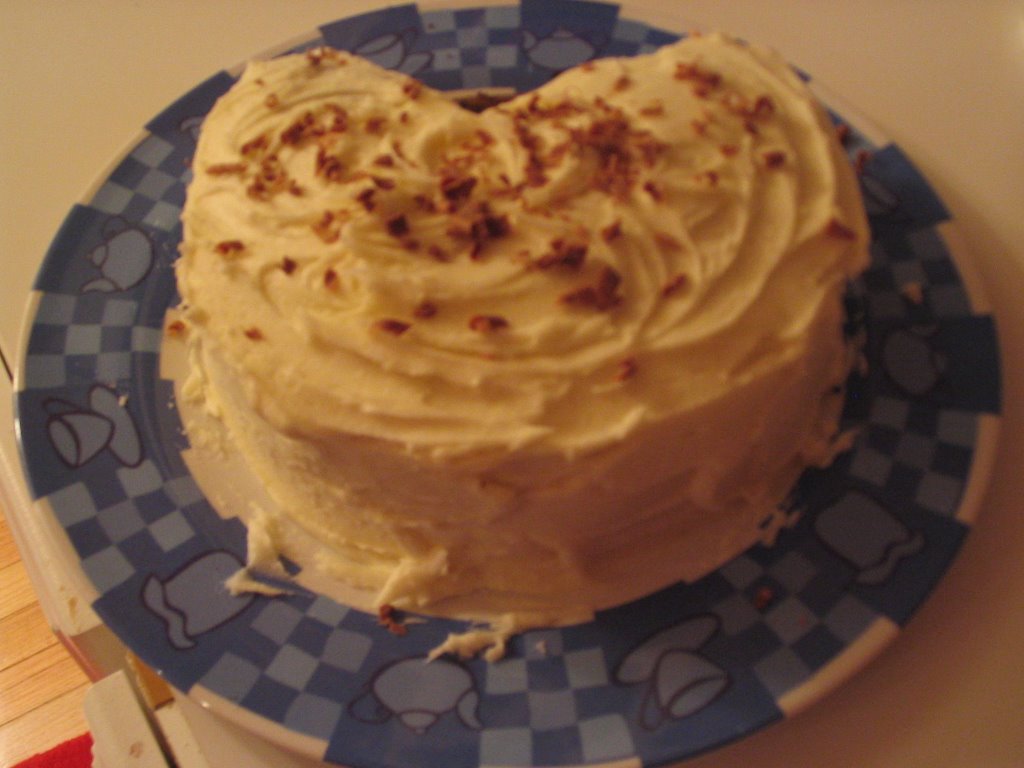
Showing posts with label chestnut. Show all posts

May 26, 2009

Cherry Blueberry Vodka Strudel


Daring Baker's May Challenge

I was delighted to discover that our challenge this month was from the mouth watering book, "Kaffeehaus." This is one of my favorite cook books as it's filled with so many fabulous foods that I loved when we visited Vienna. I have to admit that I have spent quite a few hours just oogling the beautiful images.

The strudel was a delight to make. My husband and I thoroughly enjoyed the cherry blueberry vodka filling. I made a maple whipped cream to go with the warmed strudel. It was an excellent way to start Mother's Day.

The May Daring Bakers' challenge was hosted by Linda of make life sweeter! and Courtney of Coco Cooks. They chose Apple Strudel from the recipe book "Kaffeehaus: Exquisite Desserts from the Classic Cafes of Vienna, Budapest and Prague," by Rick Rodgers.


Recipe

Filling
1 Tb/15 ml vodka
4 oz/114 g pkg frozen cherries, pitted
4 oz/114 g pkg frozen blueberries
1/2 cup/115 g cane sugar
2 Tb/28 g cornstarch
1/2 cup/118 ml fresh gluten free bread crumbs
3 Tb/43 g butter, melted

Dough

3 1/2 Tb/50 g chestnut flour
3 1/2 Tb/50 g brown rice flour
3 1/2 Tb/50 g arrowroot starch
3 1/2 Tb/50 g sweet rice flour
1 1/4 tsp/6 g chia seed meal
3/8 tsp/2 g agar agar powder
1/4 tsp/1 g sea salt
5 tsp/24 g butter, grated & frozen
1/4 cup/52 ml water
3 tsp/15 ml vegetable oil
3/8 tsp/2 ml cider vinegar

Filling Instructions

Place the cherries (and liquid), blueberries (and liquid), sugar, and cornstarch into a sauce pan. Bring to a boil, then reduce the heat to a simmer and cook for 2 minutes, stirring occasionally. Allow to cool completely before using.

Dough Instructions

1. Combine the flours, chia seed meal, agar agar powder and salt into a bowl and blend together. Mix the water, oil and vinegar in a measuring cup, then add to the bowl. It should make a soft dough, if it doesn't add just enough water to fix it.

2. Lay out 2 sheets of parchment paper. On one sprinkle sweet rice flour over the sheet and place the dough in the center. Sprinkle the dough with sweet rice flour and cover with the 2nd sheet of parchment paper. Roll out the dough until it is around 15" x 12". Gently ease the parment paper off the top of the dough and sprinkle the dough with sweet rice flour. Replace the top sheet and flip the dough over and repeat.

Making the Strudel

1. Put an oven rack in the upper third of the oven and preheat the oven to 400 degrees Fahrenheit (200 degrees C). Cover a cookie sheet with parchment paper.

2. Using a silicone brush, spread the melted butter over the dough. Sprinkle the dough with the bread crumbs. Sprinkle the frozen grated butter over the dough. Spread the filling about 3" (8 cm) from the short edge of the dough in a 6" (15 cm) wide strip. Using the parchment paper to help you, raise the paper so that the edge of the dough folds over the filling. Continue easing the dough over so that the strudel rolls onto itself. Leave the strudel on the parchment paper that it was rolled on, transfer the strudel onto the cookie sheet. Trim off the excess parchment paper that the dough had been rolled on. Tuck the ends of the dough under the strudel. Brush the top with melted butter and sprinkle with turbinado sugar.

3. Bake for 30 minutes or until the dough is a golden brown. Cool for about 30 minutes before slicing. Best the day it is made, but will keep nicely in the refrigerator.


Want More?

You can find me on Twitter @ glutenagogo.

January 24, 2009

Vanilla Cognac Aebleskiver


Dorothy's sentiment, "There's no place like home!" is so very appropriate for us. We've been traveling quite a bit off and on for the last year. It always takes a little bit to get adjusted to being back home and not living out of a suitcase.

For the last two months, we've been in Florida helping my Dad care for my Mom who had a stroke in late October. I took over from my brother who went down when she was released from the hospital. He spent a month helping them with all aspects of their life and the logistics of physical and speech therapy and traveling to her various doctor's. When we arrived, I took over the running of the house and let my dad focus on her care, while together we negotiated the changes in her diet directed by her doctor (diabetes and GERD).

Her prognosis is wonderful. The doctor's were able to get to her within 20 minutes of the onset of the stroke and give her the stroke drug. Her neurologist believes that she will be back to her normal self at around six months from her stroke.

Our family and friends were absolutely fabulous and banded together to help us out. So many stopped by to sit and visit, drop off Christmas goodies or part of their citrus harvest (Meyer lemons, kumquats, naval oranges and grapefruit) and to give us a sholder to lean on.

Leaving them and coming back home was bittersweet, as we were torn between wanting stay and help and the need to get back to our home, however the shock of returning to a New York winter has us shivering in our shoes.

While getting settled back into the house we had an interesting discovery, every severe cold snap a mouse takes up residence and this one had a taste for fine chocolate. This mouse managed to find it's way upstairs into the kitchen pantry and was working it's way through a 1/2 pound block of bittersweet Callebaut chocolate. Obviously a mouse of discerning taste, it left all the other items in the pantry alone.

As you can guess that started me on a frantic cleaning frenzy and a purging of the pantry (just in case). While my husband donned his hunter persona and started stalking his wily rodent prey. A hunt that while successful, seems to be never ending as the temperatures drop at night making the little furry fellows seek out the warmth of our home.

With freshly washed and scalded cookware, I have started cooking and baking again. After reseasoning my aebleskiver pan, I thought it was the perfect opportunity to bake up several batches of these delightful and poppable breakfast delights.

This version is a bit sweeter than my version filled with spiced apples, and has the added richness of flavor from a Madagascar vanilla bean flavored French cognac. Needless to say, these didn't last long as my son tended to grab them by the handful and eat them like candy.

Recipe

1/2 cup brown rice flour
1/4 cup millet flour
1/4 cup chestnut flour
3 Tb sweet rice flour
2 tsp chia seed meal *
3/4 tsp baking soda
1 tsp baking powder
1/2 tsp sea salt
1 Tb agave syrup
3 egg yolks
1 1/3 cup almond milk, soured with 1 Tb + 1/4 tsp vinegar
1 Tb vanilla cognac
5 egg whites

Batter

1. In a medium bowl, dump in the flours, chia seed meal, soda, baking powder, salt and stir together.

2. In another medium bowl, pour in the agave syrup, egg yolks, cognac and soured almond milk. Then stir the ingredients together.

3. Pour the liquid ingredients in to the dry ingredients and stir together. Set aside while you beat the egg whites.

4. Plop the egg whites in to the bowl of an electric mixer. Beat the egg whites on high speed until it forms firm peaks. Fold the egg whites in to the aebleskiver batter until blended.

5. Preheat the aebleskiver pan and then grease the cups with oil. Pour 3 Tb of batter into the bottom of each cup and cook for 4 minutes.

6. Use bamboo skewers to flip each pancake upside down and cook another 2 minutes. Remove the aebleskivers from the pan and set on a plate to cool. Makes 18 aebleskiver. Dust with powdered sugar and serve with warm syrup and jams, jellies or curds.

* Substitutions: You can substitute 2 tsp flax seed meal or 1 tsp xanthan or guar gum for the chia seed meal.

June 29, 2008

Chestnut Pumpkin Danish


A June Daring Baker's Challenge

This month's challenge was hosted by the lovely Kelly of Sass & Veracity and the fabulous Ben from What's Cookin'?. They selected the "Danish Braid" from Sherry Yard's "Secret of Baking". Kelly and Ben chose for us to make danishes for a variety of reasons, one of them would allow us as Daring Bakers to get creative with our fillings and the shapes of our braids.

Pumpkin is a favorite flavor in my house, attaining a level of popularity that out shines any fruit including apple. When I started contemplating what flavors to use, my kids wanted to know what was wrong with using pumpkin. Absolutely nothing, I assured them, so pumpkin it is.

The dough was easy to make and worked very well with all the changes I made to make it gluten and dairy free. The finished dough turned out flaky and flavorful as well. I made a braid and several smaller pinwheel danishes with the dough, but the pinwheels were devoured by my eager family when they first came out of the oven.

This was a wonderful challenge for a gluten free baker with learning to make laminated dough and then make different shapes with the dough. My family loved the danish, everything from the crisp flaky dough to the pumpkin custard filling. I served it on Father's Day for breakfast and we almost ate the entire danish at one sitting. Simply delicious.

Thanks Kelly and Ben for a great challenge!

Recipe

Dough

½ cup brown rice flour
½ cup chestnut flour
¼ cup + 1 Tb arrowroot starch
¼ cup + 2 Tb sweet rice flour
½ tsp sea salt
½ tsp chia seed meal
½ tsp pectin powder
1 pkg dry active yeast
¼ cup + 2 Tb almond milk
Pinch monocalcium phosphate powder *
3 Tb cane sugar
1 Tb chestnut spread **
½ tsp vanilla extract
1 egg, chilled & beaten

Shortening Block

1/3 cup vegetable shortening
2 Tb coconut oil
2 Tb sweet rice flour


Dough

1. In a medium mixing bowl, combine the flours, salt, chia seed meal and pectin. Stir and make sure the chia seed meal and pectin are thoroughly incorporated through out the flours.

2. In a mixing bowl, combine the yeast, almond milk and calcium powder. Start mixing on low speed. Slowly add the sugar, vanilla extract, chestnut spread and egg. Continue mixing and slowly add the dry ingredients into the bowl. If the dough is sticky add a tablespoon of flour.

3. Transfer the dough to a sheet of parchment paper and wrap it. Then place it in the freezer for 30 minutes.

Shortening Block

1. In a mixing bowl, dump in the vegetable shortening, coconut oil and flour. Beat on medium speed for 1 minute. Scrape the sides down and beat for 1 more minute.

2. Transfer the shortening mixture to a small bowl. Leave at room temperature.


Layering the Dough & Shortening Block

1. Once the dough has chilled for 30 minutes, turn it out on a parchment paper covered surface. Sprinkle with flour and then cover with parchment paper. Roll out the dough into a rectangle that is ¼ inch thick. If the dough is sticky, keep sprinkling it with flour. After it is rolled out, slightly score the dough into thirds. Spread some of the shortening block on the middle and right thirds of the dough. Fold the left side into the center and then the right side on top of the left side. Wrap in the parchment paper and place in the freezer for 30 minutes. This is the end of the first turn.

2. Remove from the freezer and rotate the dough. Repeat the above steps and place back in the freezer to chill for 30 minutes. This is the end of the second turn. Repeat the same for the third and fourth turns.

3. Once the fourth turn has been completed, leave the dough in the freezer for at least 5 hours or overnight. The dough is now ready to be used. If you aren’t going to use it within 24 hours, roll out the dough until it is about 1 inch in thickness. Then wrap it in plastic wrap and place back in the freezer. Danish dough will keep in the freezer for up to 1 month.


Making the Braid

1. Cover a baking sheet with parchment paper. On another sheet of parchment paper, sprinkle it with some flour and then lay down the Danish dough. Sprinkle the top with flour and cover with parchment paper. Roll out into a rectangle that is ¼ inch thick. If the dough seems elastic and shrinks back when rolled, let it rest for a few minutes and then roll again. Place the dough on the baking sheet.

2. Along one long side of the pastry make parallel, 3 - 4 inch long cuts with a knife or rolling pastry wheel, each about 1 inch apart. Repeat on the other side, making sure to line up the cuts with those you’ve already made.

3. Spoon the filling in the center of the rectangle. Starting with the top and bottom flaps, fold down the top flap over the filling to cover it. Then, fold the bottom flap up to cover the filling. This helps to keep the braid net and to hold in the filling. Begin folding the cut side strips of dough over the filling, alternating first left, then right, left, right, until finished. Trim any excess dough and tuck in the ends.


Chestnut Pumpkin Danish Filling

2/3 cup canned pumpkin
1 egg
½ cup brown sugar
1 tsp chia seed meal
¼ cup arrowroot starch
½ tsp vanilla extract

1. Combine all the ingredients in a medium sized saucepan. Cook over medium heat until the mixture has thickened.

2. Spoon the mixture down the center of the danish dough.

3. Store in the refrigerator in a sealed container if you are not planning to use the filling right away.


Chestnut Glaze

1 Tb chestnut spread

1/2 cup powdered sugar

1 Tb almond milk

1. Place the ingredients in a small bowl and stir together. Work the mixture with the back of a spoon to work out any lumps that might remain.

2. Pour over the top of the warm danish.

Proofing and Baking

1. Set the baking sheet with the Danish on it in a warm location. Cover the Danish and allow it to rise for 2 hours or until it has doubled in volume.

2. Near the end of the time the bread needs to rise, preheat the oven to 400 degrees Fahrenheit. Position a rack in the center of the oven.

3. Bake the Danish for 10 minutes then rotate the pan so that the side of the braid previously in the back of the oven is now in the front. Lower the oven temperature to 350 degrees Fahrenheit and bake about 15 – 20 minutes more or until it is golden brown.

4. Cool and serve the braid either warm from the oven or at room temperature. The cooled braid can be wrapped and stored in the refrigerator for up to 2 days or freeze for 1 month.


* The monocalcium phosphate powder is part of the Pomona’s Universal Pectin package.

** Chestnut Spread is by Clement Faugier (crème de marrons de l’ardeche).

February 22, 2008

Finish Fingers


When I told our children that I was going to make Finnish Fingers, they weren't overjoyed. They thought I was going to make Halloween party food that was shaped like real fingers. Not fans of spooky food, they started working on their best pleading skills to keep me from making the cookies. As soon as I could get a few words into a very one sided conversation, I began to make my case for trying out a new cookie recipe, one that didn't have anything to do with food masquerading as body parts. Once I described the cookies as a sweet confection decorated with chocolate toppings, they were far happier.

Finnish Fingers (Finska pinnar) are a traditional favorite not only in Finland, but throughout Scandinavia. Full of character and flavor, Finnish Fingers are an enjoyable to make and fun to eat. The recipe that I used came from "Things Swedish," by Mari Hemming (Albert Bonniers Forlag, 2001). I substituted vegetable shortening and coconut oil for the butter, used gluten free flours in place of the wheat and used chia seed meal as the binder. The glaze recipes came from the Fanny Farmer cookbook and are found on my post for Chocolate Chestnut Doughnuts.


Once they were ready to eat, my family moved in and by Friday there was one lone Turbinado sugar cookie left. Most of us thought they were delicious. My son preferred the ones with the crunchy sugar outside and my husband and I liked those with the chocolate glaze and almonds. My daughter decided she would rather eat the gluten free chocolate chip cookies that I made. This recipe made two dozen cookies, a nice size for having around or for saving out a few and freezing the rest. This recipe is a keeper as it's perfect for when you are in the mood for something very enjoyable and a little different.

This post was submitted to the monthly event, Does My Blog Look Good In This, hosted this month by Bake or Break.

Recipe

Cookie

7 Tb vegetable shortening
7 Tb coconut oil
1/2 cup cane sugar
1/2 cup brown rice flour
1/2 cup chestnut flour *
1/2 cup sweet rice flour
1/4 cup + 1 Tb arrowroot starch
1/2 cup almond meal
2 tsp chia seed meal **
1/2 tsp almond extract

Toppings

Turbinado sugar
Sprinkelz
Chopped almonds
Chocolate Glaze
Vanilla Glaze

1. In the bowl to your mixer, cream the shortening and coconut oil. Then slowly add the cane sugar.

2. In a medium bowl, dump in the flours and meals. Then stir together.

3. Slowly add the flour mixture to the sugar mixture in the bowl of the mixer. Once blended. Plop in the almond extract and continue to blend.

4. Remove the bowl from the mixer and place in the refrigerator to chill for at least 30 minutes.

5. Line several cookie pans with parchment paper. Then place a sheet of parchment paper on the counter for a surface to roll the cookies.


6. Remove a scoop of dough and make a ball in your hands. Then slowly roll the ball on the counter until it forms a log that is the thickness of a finger and about 2 inches long. Then place the cookie on the cookie sheet. Repeat until all the cookies are formed.

7. For cookies covered in Turbinado sugar: Roll the uncooked cookie in the sugar and replace on the cookie sheet.

8. Then chill the cookies in the refrigerator for about 20 minutes. While the cookies are chilling, preheat the oven to 350 degrees Fahrenheit.

9. Remove the cookies from the refrigerator and place in the oven. Bake for 15-17 minutes. Remove from the oven and allow the cookies to completely cool before decorating them. Makes 2 dozen cookies.

1o. For the Chocolate and Almond Cookies: Gently pick up a cookie and sprinkle chopped almonds on the parchment paper were the ends of the cookie had been resting. Then dip each end of the cookie in the chocolate glaze and allow the excess to drip off. Replace the cookie on the cookie sheet so that the chocolate ends are resting on top of the chopped almonds. Then sprinkle chopped almonds over the chocolate glazed tops of the cookies. Allow the chocolate to set before serving.

11. For Vanilla Glaze and Sprinkelz Cookies: Gently dip one end of the cookie into the vanilla glaze and allow the excess to drip off. Then roll the glazed end of the cookie into a bowl containing the Sprinkelz. Repeat this on the other end of the cookie. Once decorated, replace the cookie on the parchment paper. Allow the glaze to set before serving.

* Chestnut flour: You can purchase chestnut flour at your local Whole Foods, Glutenfree.com and the Glutenfreemall.com

** Chia Seed: You can purchase chia seed from Native Seeds/SEARCH. Then I grind them in my coffee grinder to make a meal that works as a binder in place of xanthan or guar gum.

December 23, 2007

Chestnut Yule Log - Gluten Free

A December Daring Baker's Challenge

This month's Daring Baker's Challenge for a Yule Log is brought to us by Lis of La Mia Cucina and Ivonne of Cream Puffs In Venice. Yule Log's have a long tradition going back to Scandinavia when a decorated pine log was burned in the family fireplace at Christmas. Then during the late 18th to early 19th century the yule log or "Buche de Noel" was translated into a dessert served during the Christmas season in France.

The Daring Baker's hail from around the world and not all of us celebrate the holidays or Christmas. So Lis and Ivonne wanted our December baking challenge to be about the "sharing of warmth and light...something that we all need in our lives, regardless of race, creed or religion."

I was very excited about this month's baking challenge, since this is one of those holiday desserts that I have missed since being gluten free. While at Whole Foods last week, my daughter and I checked out the pastry counter to see if they would have any gluten free cakes or yule logs for the holidays. My daughter was so saddened to learn that the yule logs and other pastries they had were all made from wheat and we couldn't bring any home. I told her not to worry as I was going to make one of those lovely cakes for us for Christmas. The smile on her face was so delightful...I had made her day.

My version of the Daring Baker's Yule log is based on the classic chestnut flavor that is typically found in the butter cream filling. My cake has chestnut flour, the butter cream filling has chestnut spread in it and the outer log covering is chocolate chestnut butter cream. I used chia seed meal as the binder for the cake. Then I made marzipan mushrooms to decorate the log.

Recipe

This recipe is in 3 parts. First is the recipe for the plain genoise, second the chestnut & chocolate chestnut butter cream and then the marzipan.

Plain Genoise

2 large eggs
2 egg yolks
dash of sea salt
6 Tb cane sugar
1 Tb brown rice flour
1 Tb sweet rice flour
1 Tb arrowroot starch
1 Tb chestnut flour*
2 Tb corn starch
1 Tb chia seed meal

1. Preheat the oven to 400 degrees Fahrenheit and set an oven rack in the middle of the oven. Then line a 11 1/2 in x 7 1/2 in x 1 in pan with parchment paper.

2. Fill a medium sauce pan half full with water and bring it to a simmer.

3. Whisk the eggs, egg yolks, salt and sugar together in the bowl of a heavy-duty mixer. Place over the pan of simmering water and whisk gently until the mixture is lukewarm (100 degrees Fahrenheit). Remove from the pan and return the mixing bowl back to the mixer.

4. Using the whisk attachment, whip on medium-high speed until the egg mixture is cooled and tripled in volume. The egg foam will be thick and will form a slowly dissolving ribbon falling back into the bowl of whipped eggs when the whisk is lifted.

5. While the eggs are whipped, stir together the flours and cornstarch.

6. Sift one-third of the flour mixture over the beaten eggs. Use a rubber spatula to fold in the flour mixture, making sure to scrape all the way to the bottom of the bowl on every pass through the batter to prevent the flour mixture from accumulating there and making lumps. Repeat with another third of the flour mixture and finally with the remainder.

7. Scrape the batter into the prepared pan and smooth the top.

8. Bake the genoise for 10 minutes. Make sure that the cake doesn't overbake and become too dry or it will not roll properly.

9. While the cake is baking, being making the butter cream.

10. Once the cake is done (a tooth pick will come out clean and if you press the cake lightly it will spring back), remove it from the oven and let it cool on a rack.


Chestnut Butter Cream & Chocolate Chestnut Butter Cream:

2 large egg whites
1/2 cup cane sugar
2 sticks butter, softened
1 Tb + 1 tsp chestnut spread**
1 Tb vanilla extract
1 Tb cocoa powder (saved for the second half of the butter cream)

1. Turn the heat back on the pan of water on the cook top. Make sure the water comes to a simmer.

2. Whisk the egg whites and sugar together in the bowl of an electric mixer. Set the bowl over simmering water and whisk gently until the sugar is dissolved and the egg whites are hot.

3. Attach the bowl to the mixer and whip with the whisk on medium speed until cooled. Switch to the paddle attachment and beat the softened butter and continue beating until the butter cream is smooth. Then dump in the chestnut spread and vanilla extract and beat together.

Note: If the butter cream curdles or separated once the vanilla extract and chestnut spread goes in, then remove a quarter of the butter cream and place in a measuring cup or other heat proof bowl. Place into the simmering water and warm until the butter begins to melt a little bit. Return to the mixing bowl and rewhip. It should come back together.

4. After spreading some of the chestnut filling over the genoise, return the mixing bowl to the mixer. Then dump in the cocoa powder and whip into the butter cream. This butter cream will be used for the outside of the yule log.

Filling and Frosting the Log:

1. Lift the genoise out of the pan by the sides of the parchment paper.

2. Cover a cookie sheet with parchment paper and then turn the genoise over (unmolding it from the jelly roll pan onto the parchment paper) and peel away the paper.

3. Spread about half the chestnut butter cream over the genoise.

4. Use the parchment paper to help you roll the cake into a tight cylinder.

5. Transfer the parchment covered cake back to the baking sheet and refrigerate for several hours.

6. Unwrap the cake. With a sharp knife cut off one end on the diagonal.

7. Place the smaller piece of the log on top of the larger log.

8. Cover the log with the chocolate chestnut butter cream, make sure to curve around the piece placed on top as a protruding stump.

9. Streak the butter cream with a fork or a decorating comb to resemble bark.

10. Transfer the log to a platter and decorate with your mushroom or other decorations you've chosen.


Marzipan Mushrooms:

4 oz. almond paste***
1 cup + 1/4 cup powdered sugar
3 Tb agave syrup

1. Combine the almond paste and the powdered sugar in the mixing bowl of an electric mixer. Beat with a paddle attachment on low speed until the sugar is almost absorbed.

2. Add the agave syrup and continue mixing until the marzipan holds together when squeezed.

3. Transfer the marzipan to a work surface and knead until smooth.

4. Roll out small balls of the marzipan for the bases of the mushrooms. Roll the balls into logs.

5. Roll out medium sized balls of the marzipan and for the mushroom tops. Shape each ball over a finger tip to allow for a bowl type shape for the tops.

6. Trim a toothpick into a smaller piece, then push the toothpick into the base of the mushroom. Some of the toothpick should be sticking out above the mushroom base. Place the mushroom top on this piece of the toothpick.

7. Dust the mushroom with cocoa powder.

8. Dust the entire yule log with powdered sugar to simulate snow.

What did my family think of the yule log? They thought it was wonderful and had a nice flavor. My daughter decided that the Yule Log should be a new family tradition for us at Christmas.

* My chestnut flour is from Dowd & Rogers and I have bought it from both Whole Foods and Glutenfree.com.

** My chestnut spread is by Clement Faugier. Privas. I purchased it from Whole Foods.

*** I used Almond Paste from Love'n Bake as it is wheat free. I purchased it from Whole Foods.

December 12, 2007

Chestnut Coffee Cake with Chocolate Filling - Gluten Free


One of the wonderful things about the holidays is that we always have an abundance of good food to share together. From candy to stuffing, vibrant greens to winter fruits, I try to cook ahead so we have a variety of foods to eat without spending a lot of our family time in the kitchen.

My husband and I used to enjoy having coffee cakes for breakfast on weekends. On Saturday's after sleeping late, we get up and share a cup of coffee and some coffee cake while we read the paper. Then we decide what we were going to do for the day. After our son was born, we had to start taking turns on who got to sleep in on Saturday. When our daughter was born, neither one got to sleep in late, instead there was the late morning nap. Now that the kids are older, they have joined my husband in the Saturday morning sleep in, while the Sheltie and I share the early morning together. She to protect her house and yard from any sleepy eyed jogger going by and I to have a cup of hot spiced Rooibos tea and a slice to warm coffee cake.

This recipe is a gluten free adaptation of the French Chocolate Coffee Cake from Better Homes and Garden's Homemade Bread Cook Book. I used to make this recipe in my gluten eating days and I wanted to have a chance to enjoy it again for the holidays. This recipe is also part of the Holiday Blogging Event for Christmas, Hanukkah and Kwanzaa that is being hosted by the lovely Sally at Aprovechar.

Recipe

Coffee Cake

1/2 cup brown rice flour
1/2 cup chestnut flour*
1/2 cup sweet rice flour
1/2 cup arrowroot starch
2 Tb chia seed meal**
2 pkg. dry active yeast
6 Tb cane sugar
5 Tb water
4 Tb vegetable shortening
2 Tb + 1 1/2 tsp gf oat milk***
1/4 tsp sea salt
2 eggs, beaten

Chocolate Filling

6 Tb semi sweet chocolate chips
2 Tb + 1 1/2 tsp gf oat milk**
1 Tb cane sugar
1/4 tsp ground cinnamon

Topping

1 Tb brown rice flour
1 Tb chestnut flour
2 Tb butter, softened
2 Tb chopped pecans
1/2 tsp ground cinnamon

Equipment Needed: 7" Angel Food Pan (mine is made by Wilton)

Coffee Cake

1. In a large mixing bowl, dump in the flours and the yeast. Stir together.

2. In a small sauce pan warm the sugar, water, butter oat milk and salt until the temperature is between 110 degrees Fahrenheit and 115 degrees Fahrenheit. Stir constantly to melt the butter. If the temperature rises above 115 degrees allow it to cool to 115 degrees at the highest before adding it to the bowl with the flour and yeast.

3. Pour the liquid mixture into the bowl with the flour and yeast, then dump in the beaten eggs. Stir until it makes a soft dough. Cover and allow to rise for 1 1/2 to 2 hours or until doubled. While the dough is rising make the topping and the chocolate filling.

Chocolate Filling

4. In a small saucepan, dump in the chocolate chips, oat milk, sugar and cinnamon. Stirring constantly, warm the mixture until the chocolate chips melt and then allow to cool. While the chocolate filling is cooling and the bread dough is rising, make the topping.

Topping

5. In a small bowl, dump in the flours, sugar, butter, and cinnamon. Using a spoon or fork cut or press in the butter until it is mixed well with the flour, sugar and cinnamon. Pour in the chopped nuts and stir together. Set aside.

Putting It Together
6. Line a 7 inch angel food pan with parchment paper. Pour half of the bread dough into the angel food pan. Using a spatula or spoon, spread the dough around until it covers the bottom of the pan.

7. Spoon the chocolate filling over the bread dough in the pan. Then pour the rest of the bread dough on top of the chocolate filling. Use a spatula or spoon to spread the bread dough evenly over the top of the pan.

8. Sprinkle the topping over the top of the bread dough. Set in a warm place to rise for 1 1/2 hours or until doubled.

9. Bake at 350 degrees Fahrenheit for 30 to 40 minutes or until a pick comes out clean. Allow to cool before removing from the pan.

What did my family think of the chestnut coffee cake with chocolate filling? My children preferred the chocolate filling, but not the bread. My husband and I though it was delightful, and tasted the best when it was served warm. It reminded us both of the Chocolate Babka's that we used to get from Whole Foods.

* Chestnut Flour: I purchased my chestnut flour from Whole Foods, but you can also find it at Glutenfree.com. It's made by Dowd & Rogers.

** Chia Seed Meal: I purchased my chia seeds from Native Seeds/SEARCH. I ground them in my Braun coffee grinder that I use only to grind spices. Chia seed meal will act as a gluten free binder just like chia seed gel (made with chia seed and water).

*** Oat Milk: I used 1/2 cup of cooked certified gluten free oats, 1 Tb agave syrup and 2 cups of water. Dump the oats into your food processor and pulse until finely chopped. Then add the agave syrup and pulse. Pour in the water and pulse to blend. Be careful not to pulse too long as the water might/will leak out from under the lid of your food processor and onto the counter. Store oat milk in the refrigerator.

October 13, 2007

Yeasted Banana Nut Waffles & Agave Coconut Cream - Gluten Free

Since the times of the ancient Greeks, people have been eating cakes flattened between two cooking plates. By the thirteenth century we began eating waffles after a craftsman had the idea to create honeycombed plate.

The Belgian waffle is thicker than the traditional American waffle, because it uses yeast rather than baking powder and soda. Brussels waffles became popular at the 1960 World's Fair in Brussels, when they were served by restauranteur Maurice Vermersch. His Brussels waffles were made from one of his wife's recipes. Maurice was so successful at the fair that he decided to go to the 1964 World's Fair in New York. Once in Queen's he renamed his pastry the Belgian waffle.

I was inspired by an article in The Daily Gullet, by Matthew Amster-Burton, titled "Desperate Measures: Waffles, Breakfast With the King." Like Matthew, I always forget that I would like to have waffles in the morning, actually make that my entire family. Light, crisp and filled with syrup, they are a soul satisfying way to start the say. So I took Matthew's advice and started up a batch of gluten free banana nut yeast waffles.

I couldn't wait to start cooking when I woke up. Armed with a hot cup of tea, I warmed up the waffle iron and gathered my kitchen tools. The aroma was so enticing, I quickly had company in the kitchen. Our Shetland sheepdog, came in and laid on my feet while I was cooking. This batch of waffles turned out beautifully. I served them with either warm maple syrup or Agave Coconut Cream. Either way, the waffles were delicious.
Recipes

Banana Nut Waffles

1 cup brown rice flour
1/2 cup chestnut flour
1/2 cup arrowroot starch
1/2 cup sweet rice flour
1 tsp Plantago seeds (psyllium seeds)*
1/4 tsp salt
1 package dry active yeast
1 cup water (110 to 115 deg Fahrenheit)
1 cup lite coconut milk
4 Tb butter, melted
4 Tb coconut oil, melted
2 eggs, lightly beaten
3 Tb agave syrup
2 mashed bananas
1/2 cup chopped pecans

Agave Coconut Cream

1/4 cup coconut milk
1 Tb agave syrup

Waffle Instructions

1. Pour the yeast into the warm water and set aside to proof for ten minutes.

2. In a large bowl, dump in the flours, plantago seeds and salt then stir. Then pour in the coconut milk, yeast and water, butter, coconut oil, eggs and agave syrup. Stir the mixture together.

3. Cover the batter and set aside in a warm location for about one hour, if you want to use the batter right away. If you want to use the batter the next day, cover the batter and place in the refrigerator. The next morning allow the batter to come to room temperature before using.

4. Preheat your waffle maker and cook according to the manufacturer's instructions. Makes 6 waffles.

Agave Coconut Cream Instructions

1. Pour the coconut cream into a small bowl. Whisk until the cream is slightly fluffy.

2. Dump in the agave syrup and whisk. Serve with Banana Nut Waffles.


What did my family think of the waffles? They were a hit. Everyone of us thought they were great. My children didn't care for the agave coconut cream on their waffle, they preferred the maple syrup. My husband and I enjoyed the coconut cream on the waffles. This recipe is a keeper.

* Note: I purchased my Plantago Seeds (Psyllium seeds) from Native Seeds/SEARCH.

October 12, 2007

Chestnut and Celeriac Soup

Rich and hearty soups are staple fare at my home when fall weather arrives. Warming you from the inside out, these types of soups can chase the chill from your body just like a toasty radiator. I'm always looking for ways to stay warm when chilly weather hits and new soups for us to try.

While I was at the vegetable stand, I picked up a celeriac, some parsley roots and sweet potatoes that I thought would be wonderful together in a soup. After looking through my collection of cookbooks, I was inspired by a recipe for sweet potato and celeriac soup in Vegetables: from Amaranth to Zucchini by Elizabeth Schneider. I used celeriac, parsley root, sweet potatoes, shallots, celery and chestnuts to create a delightful fall soup.

Recipe

2 cups chopped celeriac
1/2 cup chopped parsley root
1 cup chopped celery
2 cups chopped sweet potato
1/2 cup chopped shallot
3/4 cup chopped roasted chestnuts
1 quart vegetable broth
2 1/4 cups water
2 tsp sea salt
dash black pepper
1/2 tsp ground nutmeg

1. In a stock pot, pour in the first ten ingredients. Cook until the vegetables are tender.

2. Puree the soup in a food processor and then return it to the stock pot to keep warm.

3. Add the nutmeg then stir. Garnish with celery leaves and chopped roasted chestnuts.

What did my family think about the soup? My husband and I thought it was delicious. My children didn't really enjoy it, but they said it wasn't too bad. My husband and I enjoyed it for lunch the next day with toasted ham and cheese open faced sandwiches.

March 21, 2007

Chocolate Chestnut Cake - Gluten Free

My daughter is turning eight and I've been gearing up for the big event. The birthday party with party favors and the all important birthday cake. For my children, their cake is thought about and planned months ahead of time.

What shape shall my daughter challenge me with this year? I've done the space shuttle, G.I. Joe strategically placed behind a tree, Spirit and Rain (from the movie, Spirit), a fairy garden, a knight's castle and many others. When I asked my daughter what she wanted her cake to be like, she said a dolphin. Okay, I can do it...however I need a recipe for the cake first.

Pen in hand and my lovely sheltie note paper in front of me, I got to work on a draft recipe. I consulted a couple of recipe books for more information on leavening agents (The Cake Bible by Rose Levy Beranbaum and the Fanny Farmer Cookbook). The Cake Bible has a "Special Section" that discusses the various leavening agents, liquids, and cocoa versus chocolate in cakes. Then I double checked my choices and made recipe #1. After the taste test, I went back to Rose's book to read more. Recipe #2 was crafted, baked and was promptly deemed in need of work by my trusty crew of taste testers.

I tweaked the recipe again and while it baked, we watched a movie. All of us patiently waiting for the all important taste test. When the timer went off, I pulled the cake out of the oven and the aroma was simply lovely.

Recipe

2/3 cup brown rice flour
1/3 cup chestnut flour
1/4 cup arrowroot starch
1/4 cup sweet rice flour
1/2 cup + 1 Tb buttermilk or sour milk*
1/4 cup +1 Tb cocoa powder
2/3 cup cane sugar
1 tsp vanilla
1/2 tsp salt
1/2 tsp baking powder
2 tsp kudzu/kuzu powder, dissolved in 1 Tb of buttermilk
2 eggs, beaten
1 stick butter, softened

*To make sour milk - add 1 1/2 tsp of white vinegar to a 1/2 cup of milk or cream

Preheat oven to 350 degrees. Line a 6" spring form pan with parchment paper.

Place the softened butter into the bowl of your mixer and beat until fluffy. Add the sugar and vanilla and blend. Slowly add the eggs, buttermilk and the dissolved kudzu and blend. In a separate bowl, place all of the dry ingredients and mix. Then slowly add the dry ingredients to the mixing bowl. Scrape down the sides and blend again. Pour the cake batter into the parchment paper lined spring form pan. Bake for 1 hour 20 minutes or until a bamboo skewer comes out clean.

The cake came out beautifully. I topped it off with a sprinkling of powdered sugar. How did it taste? My son and I thought it was wonderful. My daughter wasn't so thrilled with the powdered sugar, but she thought the cake tasted pretty good.

Now, to plan out that dolphin....

If you'd like to learn more about Rose Levy Beranbaum, visit her websites, www.realbakingwithrose.com and www.thecakebible.com.

February 26, 2007

Chocolate Chestnut Biscotti - Gluten-Free

The challenge I set for myself was to create a decadent gluten-free chocolate chestnut biscotti that was reminiscent of the ones I used to eat. Plus, I needed a recipe that didn't contain xanthan gum...which I have had to eliminate from my gluten free diet.

Back during the days when I could eat gluten, one of the things I really enjoyed was dipping crispy biscotti into a hot cup of coffee with cream. The flavors would melt in your mouth and the indulgence was divine. My husband and I would to go to a local coffee shop and indulge in coffee and biscotti while we sat outside and watch people go by.

Some of my local favorites came from Whole Foods. They sold a wonderful intense chocolate variety and an almond biscotti with the most heavenly aroma. The biscotti were divine. When I went shopping, I'd buy a small bag and let the kid's nibble on pieces while we went around the store.
Since becoming gluten free I've missed my little indulgences. There aren't many local places that sell baked goods that aren't made of wheat much less gluten free.

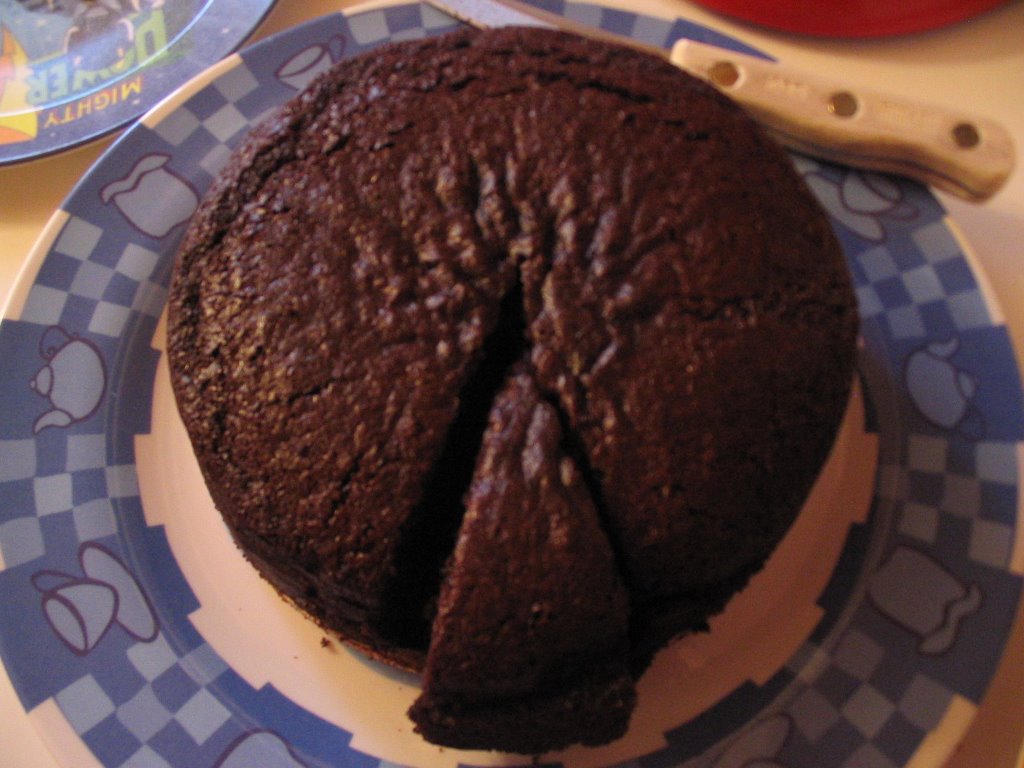
I've been working on a biscotti recipe that was crunchy and deliciously chocolate. They are softer when finished, however they will crisp up as the chocolate on the bottom dries.

Recipe

3 Tb Cocoa
6 Tb Butter, softened
1/2 cup Cane Sugar
1/2 cup Turbinado sugar
2 eggs
1/2 cup Chestnut Flour
1/2 cup Brown Rice Flour
1/2 cup Sweet Rice Flour
1/2 cup Almond Meal
1/2 tsp Sea Salt
1 tsp Baking Soda
1 1/2 tsp Kuzu/Kudzu Powder
2.5 oz dark chocolate
Optional: 1/2 cup chopped almonds or 1/2 cup chocolate chips

Preheat oven to 350 degrees and cover a cookie sheet with parchment paper.

In your machine mixing bowl, beat two eggs and add kudzu powder. Allow the mixture to sit and the kudzu dissolve. In another bowl, place the cocoa, sugar, flours, almond meal and salt and blend. Add the butter to the mixing bowl and blend. Then slowly add the dry ingredients to the mixing bowl while blending. Add your choice of optional ingredients and blend.

Divide the dough in two and make two oblong loaves on the parchment paper. Take a small sheet of aluminum foil and cut into 3 inch wide strips. Connect the strips until they will go around the loaves of biscotti dough and fold the end onto the side of the ring so it will stay in place. The foil bands keep the dough from spreading during baking.

Bake for 30 minutes or until a toothpick comes out clean. Allow the dough to cool for 5 minutes. Transfer the loaf to a cutting surface and using a sharp knife cut diagonal slices off the loaf. Each slice should be about 1 inch wide. Arrange the cut slices on the cookie tray and return them to the oven for 10 minutes.

Place the dark chocolate in the top bowl of a double boiler that has simmering water in it. Once the chocolate is melted, dip the bottom of the biscotti into the chocolate. Lay the cookie back on the cookie sheet so the chocolate can dry. If you like a thicker layer of chocolate on your biscotti, simply repeat this step.

The biscotti were beautiful and smelled like dark chocolate brownies. It's the kind of smell that has everyone in the house hovering around the oven wondering what you are making and when can they eat it. We ate our first cookies before the chocolate had finished drying and they were a warm blast of dark chocolate. Everyone agreed that they had a wonderful flavor.

The biscotti were so good that the next morning my husband and I decided to start the day with dessert and have breakfast second. The chocolate had completely dried and the cookies were nice and crisp. They were scrumptious with a fresh cup of coffee. Outside it was a frigid 16 degrees so we passed on watching the world go by and watched each other instead. A wonderful way to start the day.

May 22, 2006

Dowd & Roger's Chocolate Chestnut Cake Mix - Gluten Free

I really needed a successful gluten free baking experience! At my kids insistence, I reached for the Dowd & Rogers chocolate cake mix. Made with rice flour, chestnut flour and tapioca flour, this mix is one even those who have an allergy to nightshade plants can handle. My daughter has an evolving/developing allergy problem with the nightshade plant family. Yep, there goes the potato flour.... The "evil shadow vegetables," as my daughter calls them, will no longer have a place in our evolving gluten-free cooking.

I found my Dowd & Rogers cake mix at our local Whole Foods market in the baking section. It comes in chocolate, dark vanilla and lemon. We have tried the chocolate and dark vanilla cake mixes -- both are delicious. If you can't find it at your local market, Dowd & Rogers does sell mixes over their website.

The box holds enough cake mix for a single layer cake. I bake mine in a 6 inch springform pan which yields a nice double layer height cake. I have sliced the cake in the middle to add frosting, but most often just frost the outside. I line the springform pan with parchment paper (sides & bottom) to make sure the cake comes out of the pan.

Our cake baked up beautifully and didn't make it to the frosting stage before the kids were asking to have some. The Dowd & Rogers cake mix is always moist and chocolately. It doesn't leave a grainy texture in your mouth when you eat it. I used butter cream frosting to top it off. Now I'm thinking that I should have decorated it like Pac-Man.....

The verdict on the taste test? Four thumbs up from the family. This is a keeper.